Table of Contents
What is Mandrill
Mandrill, now known as Mailchimp Transactional, is a transactional email service designed for sending one-to-one emails from websites and applications. It is commonly used for emails such as password resets, order confirmations, welcome emails, and other automated notifications. Mandrill supports SMTP sending, offers scalable delivery infrastructure, and is built to help businesses send fast and reliable transactional emails. It is available as a Mailchimp add-on for transactional email sending.
Creating and Setting Up a Mandrill Account
Mandrill is part of Mailchimp Transactional, so you need a Mailchimp account first.
Log in to your Mailchimp account here:
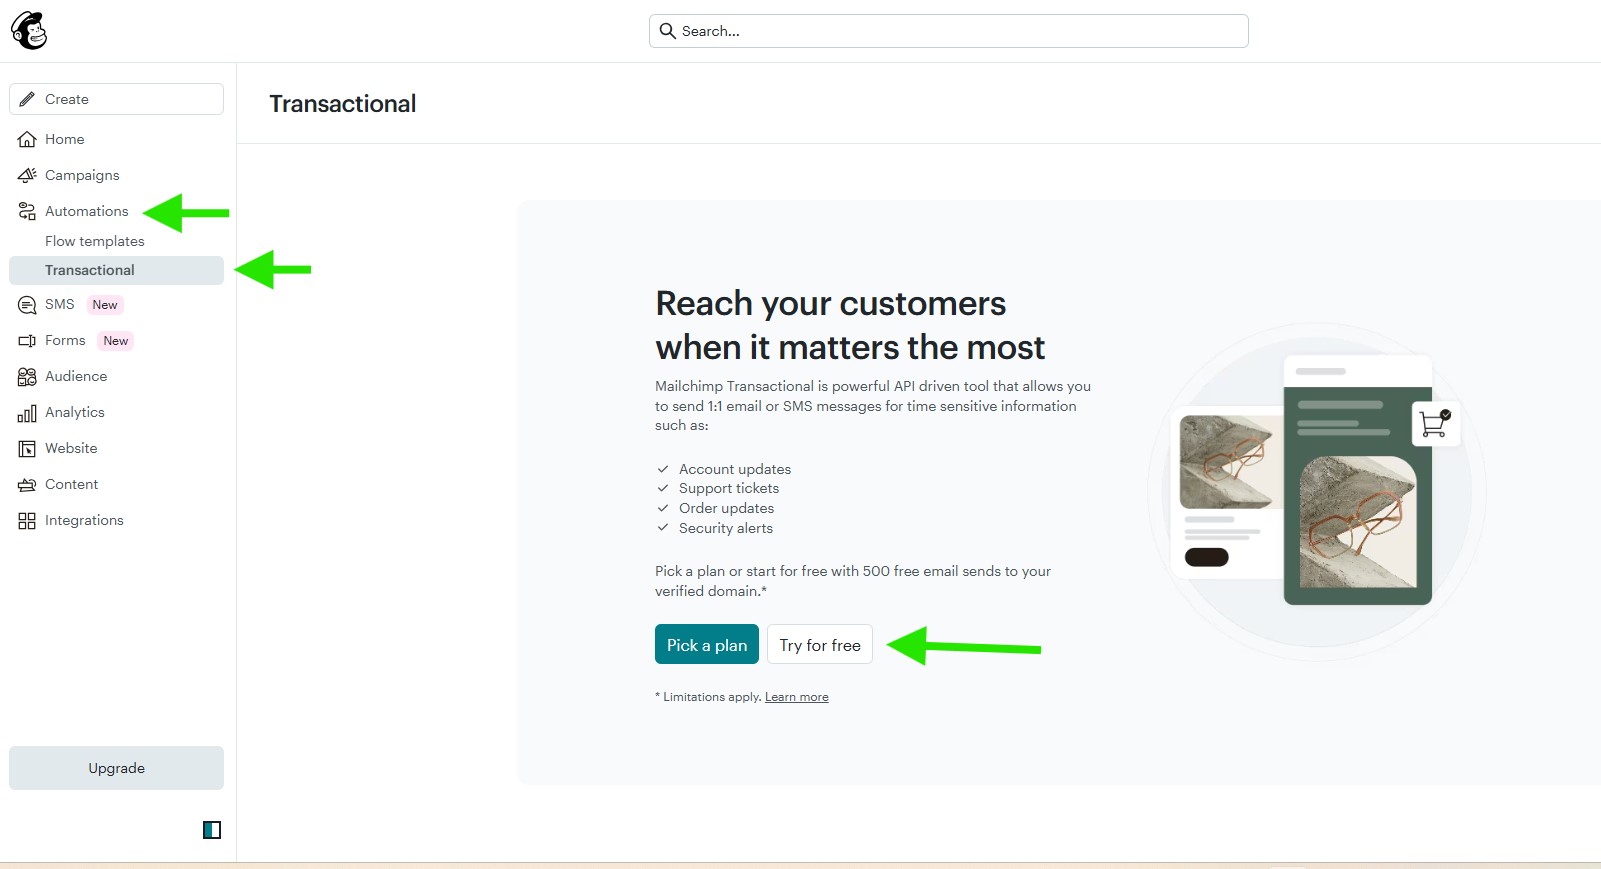
In your dashboard, go to Automations > Transactional, then click Try for Free.
In this example, we use the free plan.
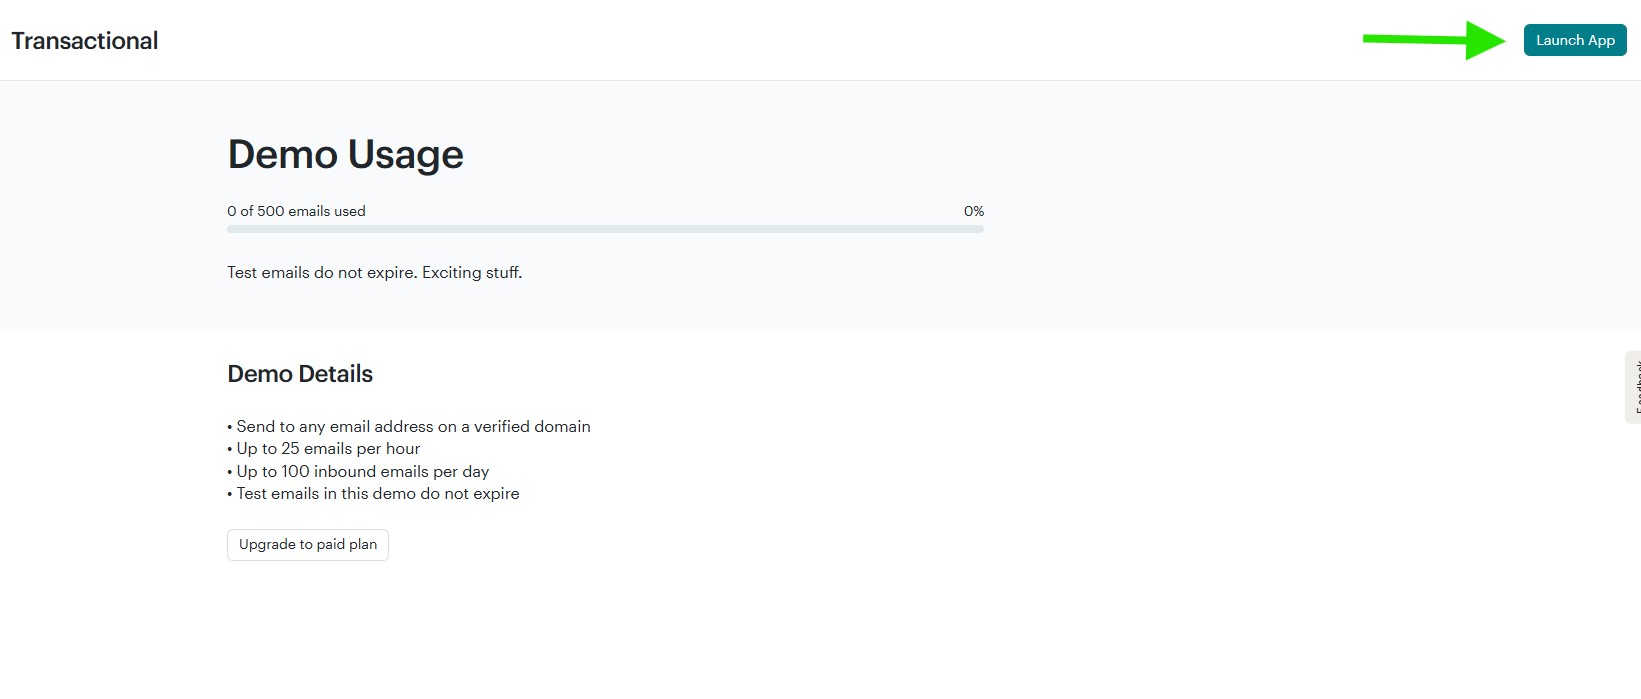
After activating the free transactional plan, click Launch App to open the Mandrill dashboard.
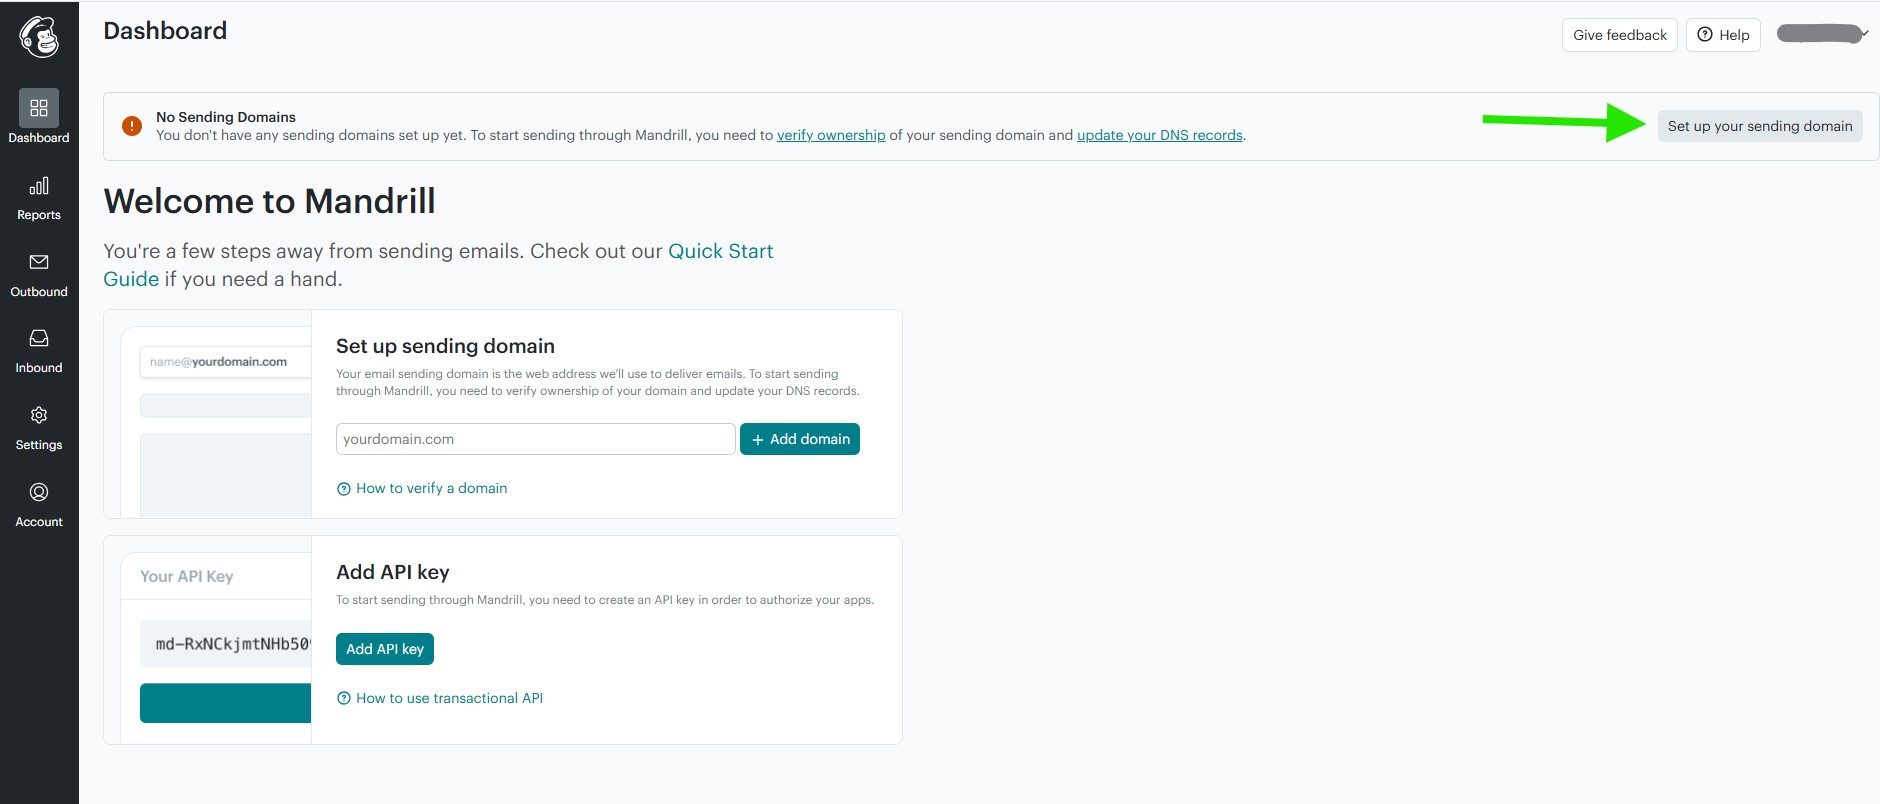
In the Mandrill dashboard, you will see a No Sending Domains notice. Click Set up your sending domain to start adding and verifying your domain.
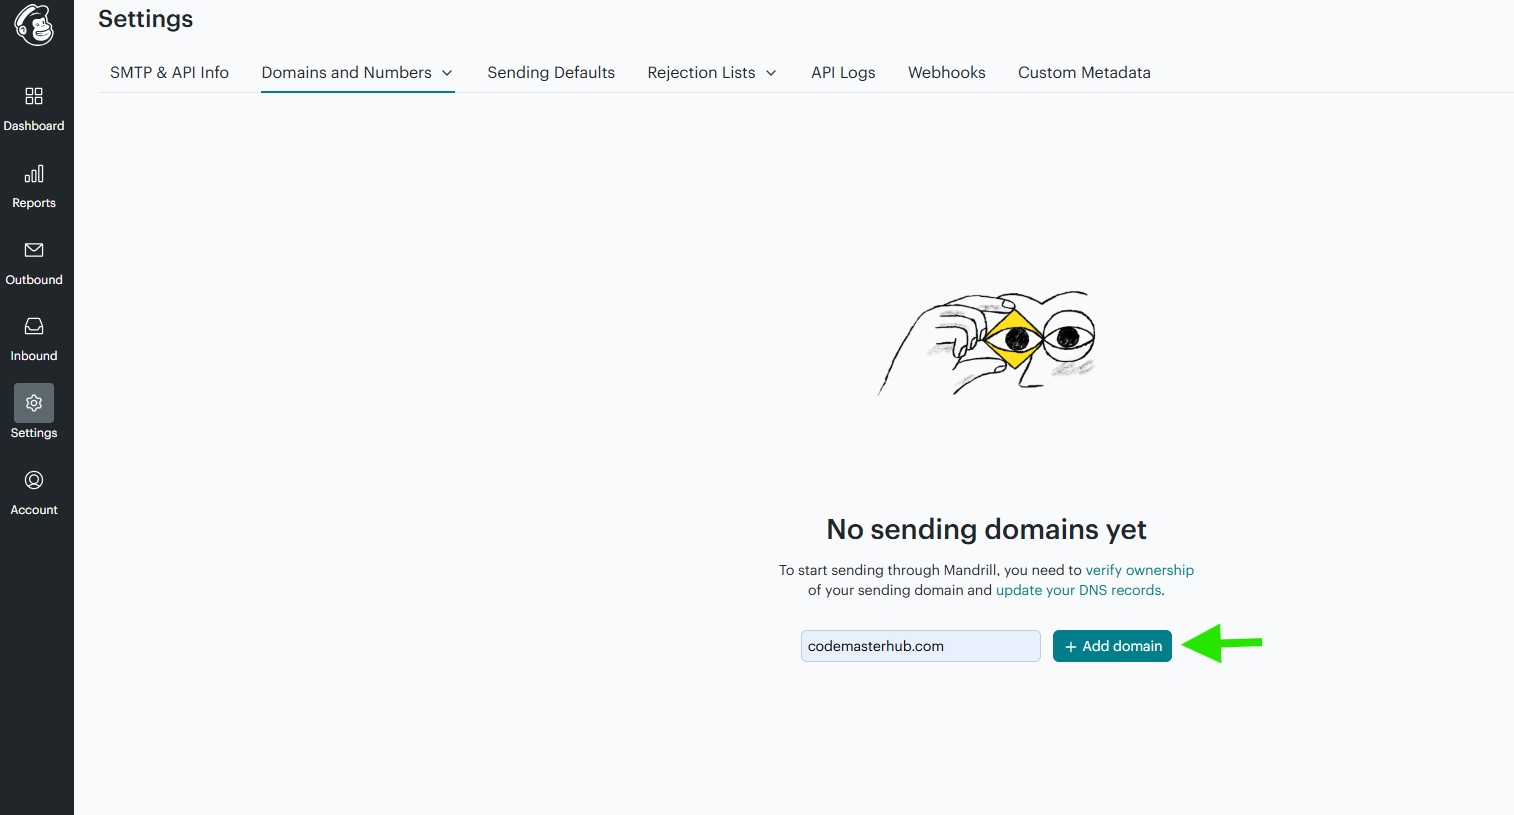
Enter your sending domain name, then click Add domain.
Verify Your Domain and Add DNS Records
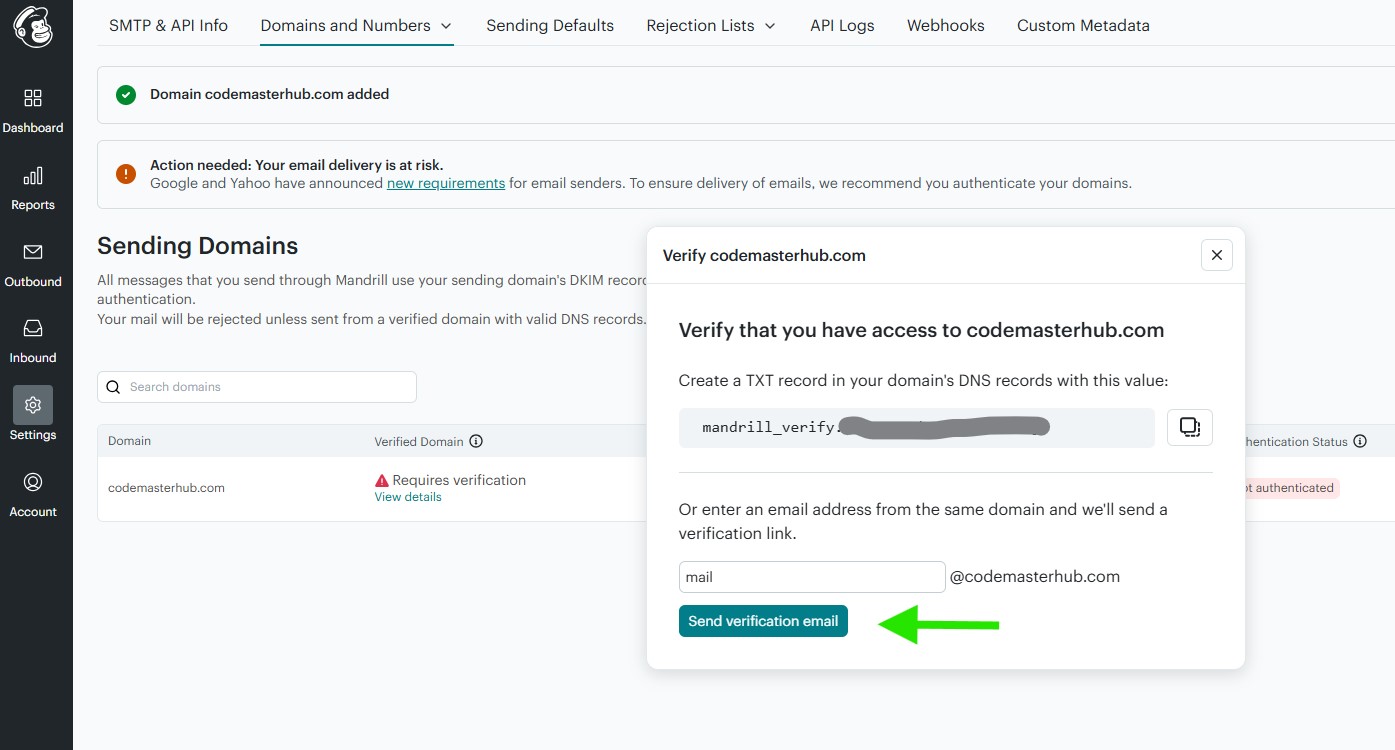
In the records table, under Verified Domain?, click View details to open the verification popup.
Mandrill provides two ways to verify your domain:
- Add the verification TXT record to your domain DNS records.
- Or enter an email address on the same domain, then click Send verification email to receive a verification link.
In this example, we use the email verification method.
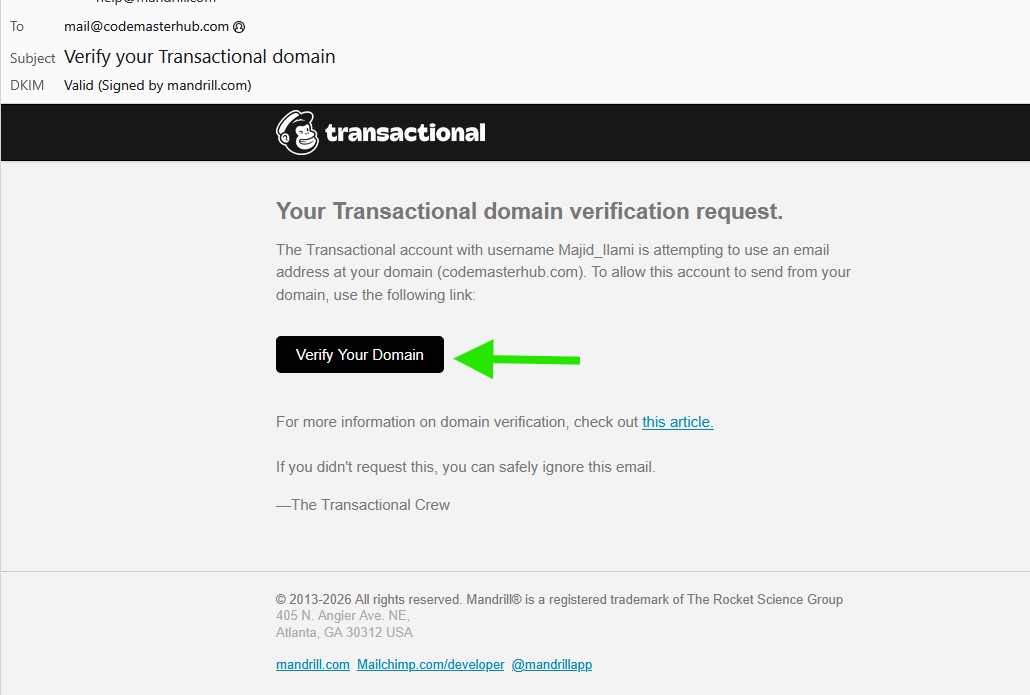
If you use the email verification method, check your inbox for the verification message, then click Verify Your Domain.
DKIM Settings
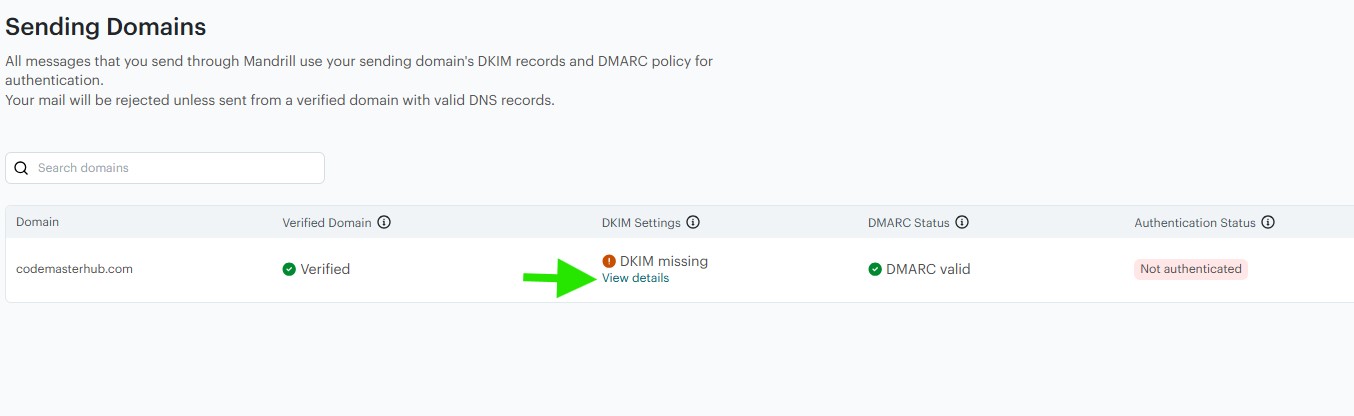
After your domain is verified, check the DKIM Settings column. If it shows DKIM missing, click View details to see the DNS records you need to add.
Create the two required CNAME records in your domain DNS settings exactly as shown by Mandrill.
After adding the records, allow some time for DNS propagation, then return to Mandrill and test the DNS settings again.

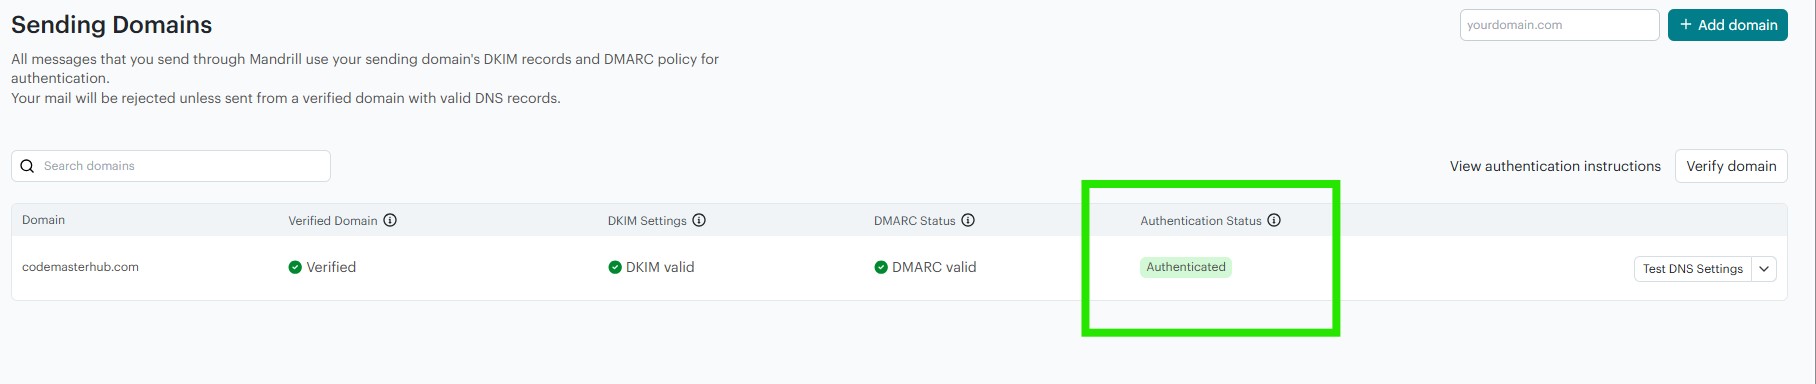
Do the same for DMARC if it is not configured correctly. Add the required DNS record to your domain settings, wait for DNS propagation, then click Test DNS Settings.
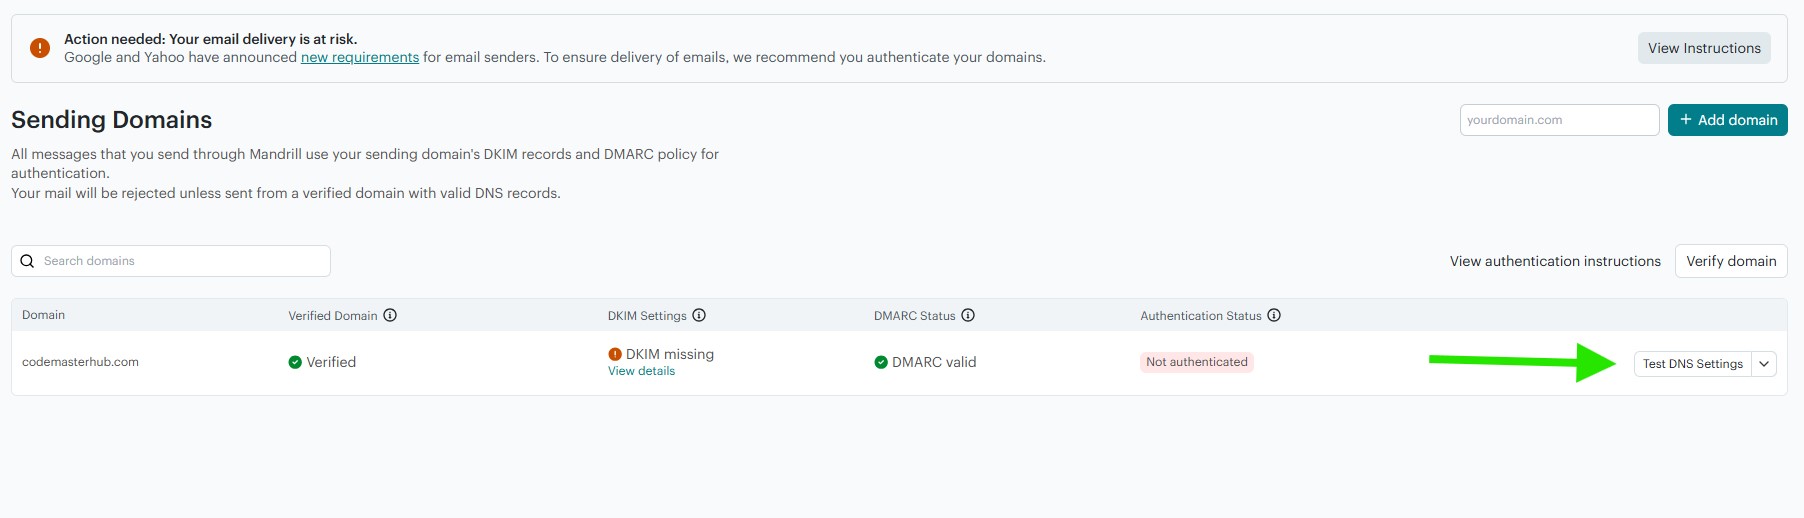
Once the DNS records are verified successfully, you should see Authenticated in the Authentication Status column.
Creating Your API Key
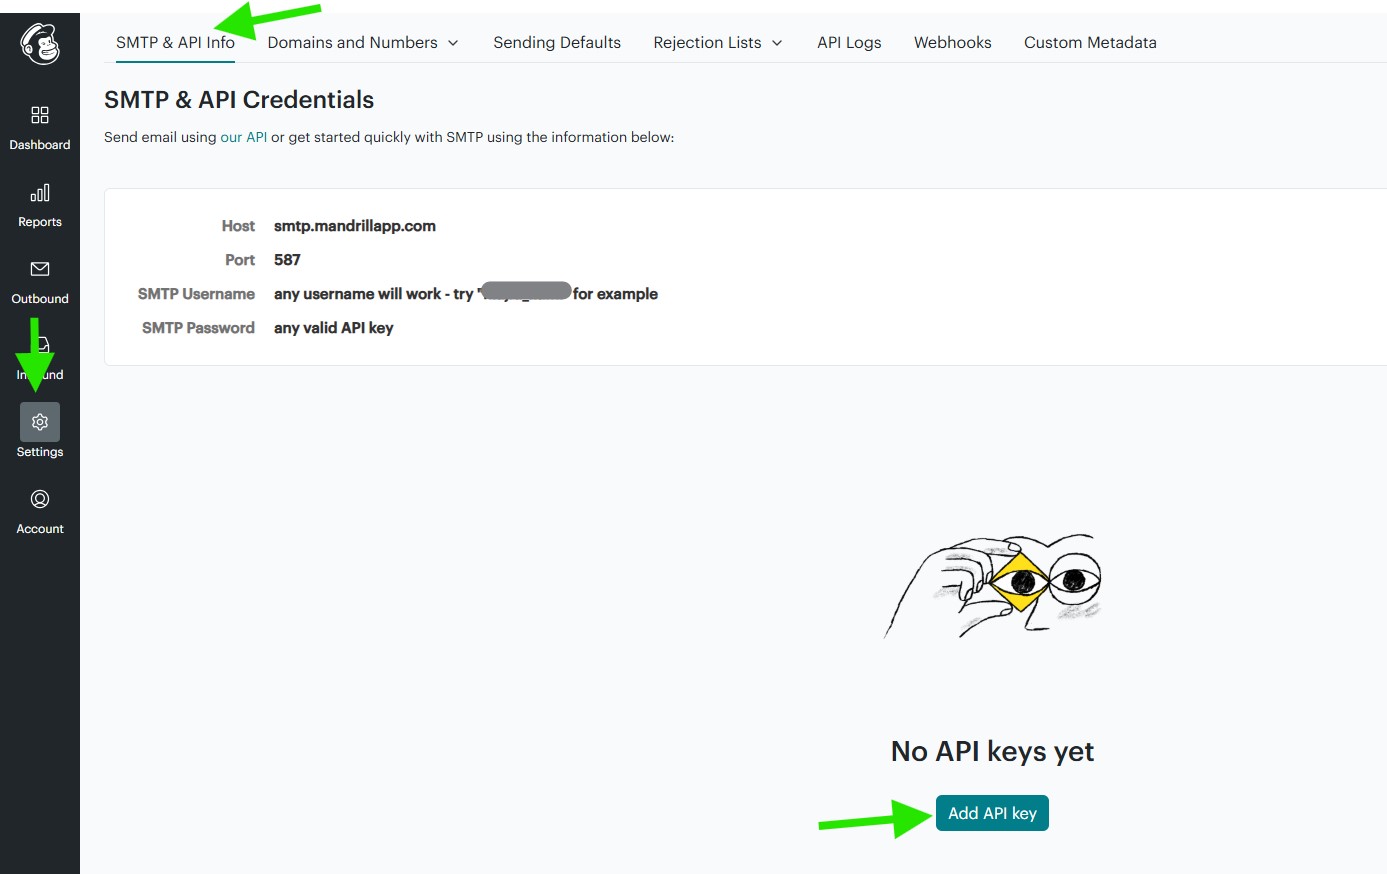
In the Mandrill dashboard, go to Settings > SMTP & API Info, then click Add API key.
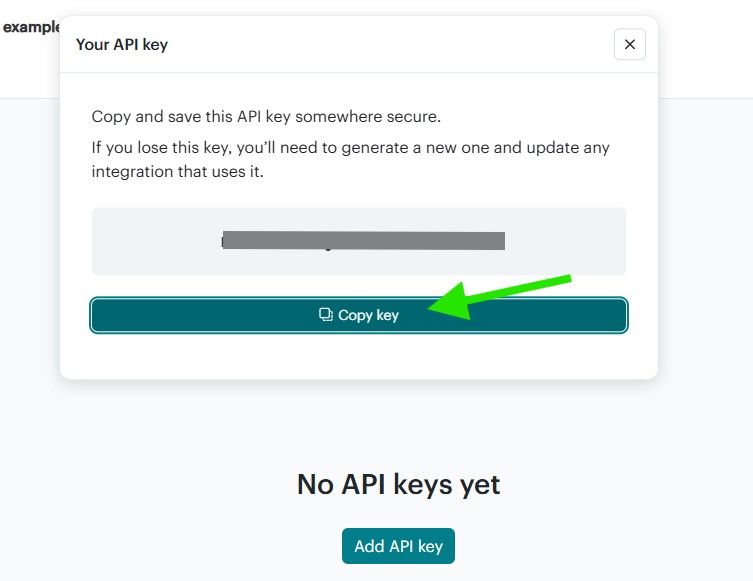
Copy the API key and save it somewhere secure. You will need it in the next step when configuring Mandrill in the DeliveryKit SMTP plugin.
Mandrill Setup in DeliveryKit SMTP Plugin
In your WordPress dashboard, go to DeliveryKit SMTP > Connections, then click Create New Connection.

Configure Connection
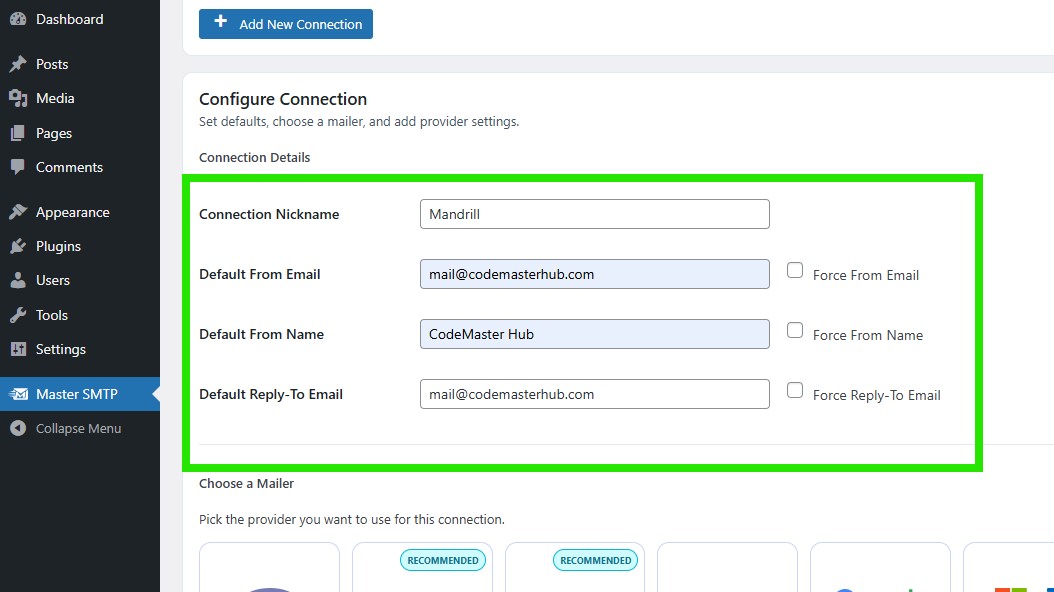
In the Configure Connection section, fill out the Connection Details fields:
Connection Details: Enter a name for this connection. This is only for you, recipients will not see it.
Default From Email: The email address used when an outgoing email does not define a From Email.
Force From Email: If enabled, this From Email will be used for all emails, even if the email has a different From Email.
Default From Name: The name used when an outgoing email does not define a From Name.
Force From Name: If enabled, this From Name will be used for all emails, even if the email has a different From Name.
Default Reply-To Email: The Reply-To address used when an outgoing email does not define a Reply-To Email.
Force Reply-To Email: If enabled, this Reply-To Email will be used for all emails, even if the email has a different Reply-To Email.
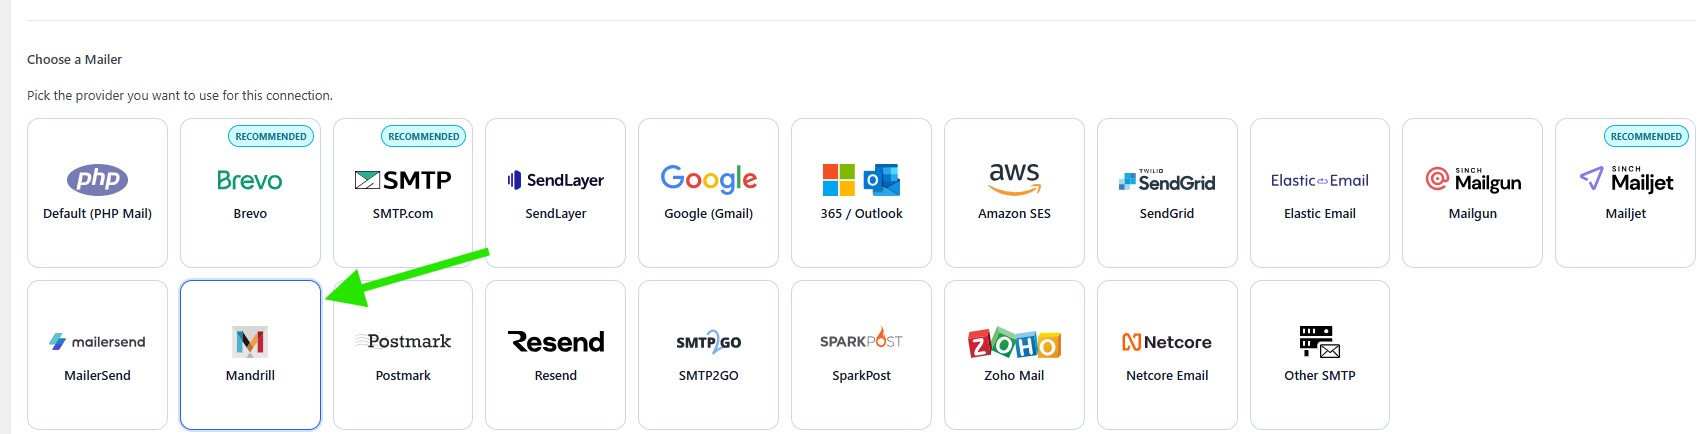
In the Choose a Mailer section, select Mandrill from the grid mailer list.
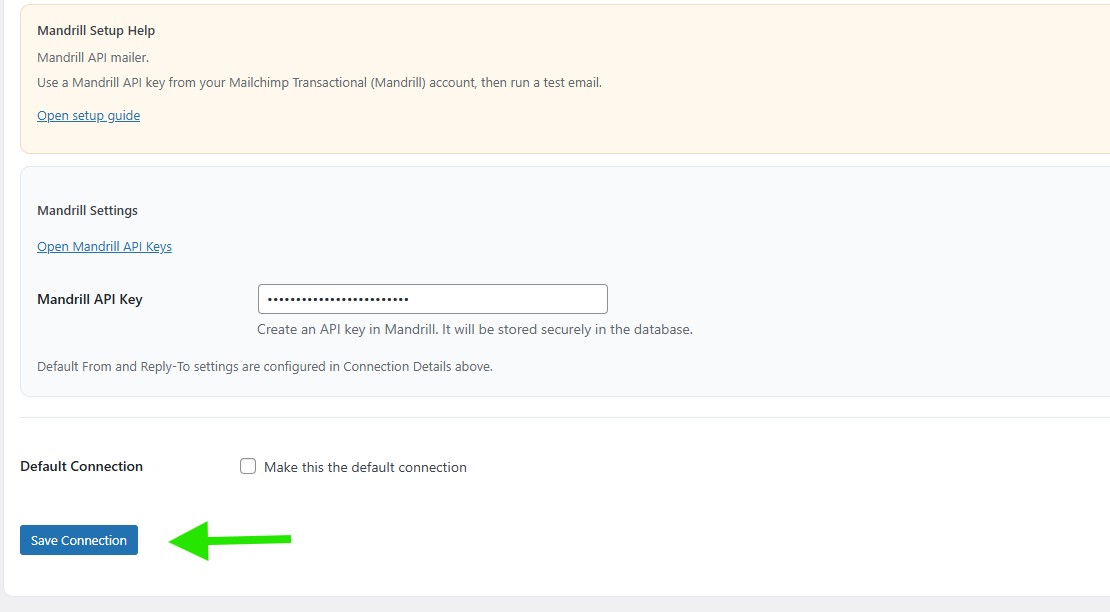
Mandrill Settings
In the Mandrill Settings section, paste your Mandrill API Key into the API key field.
Under Default Connection, check the option if you want this connection to be your default sender.
Then click Save Connection.
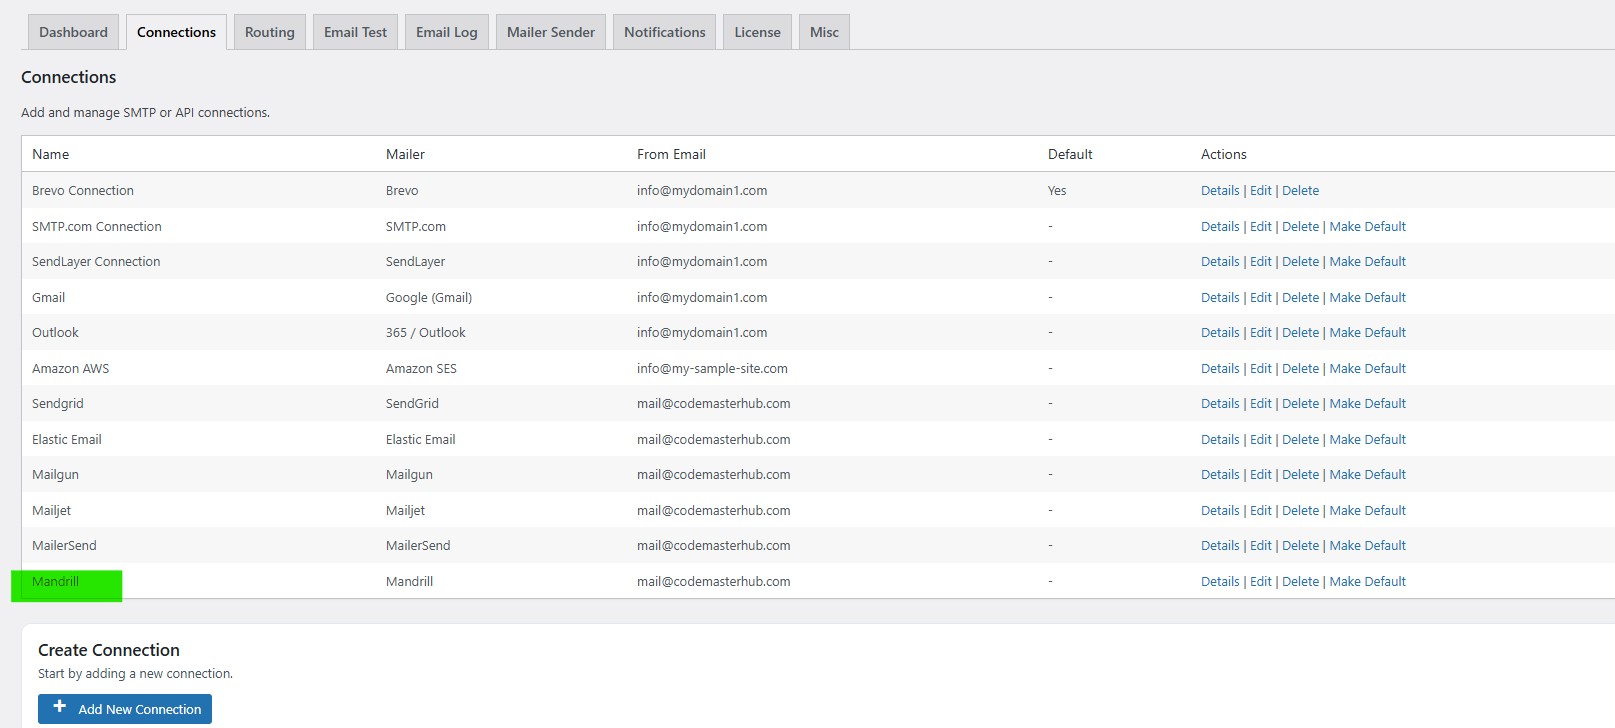
The connection will be added to the Connections list, and you should see Connection saved. at the top of the window.
Note: The free version allows you to add only one connection. If you need multiple connections, Conditional Routing, and many other features, you should purchase the DeliveryKit SMTP Pro.
Test Mandrill Connection
After saving your Mandrill connection, it is recommended to send a test email to make sure everything is working correctly. This helps confirm that your API Key, and connection settings have been entered properly and that your site can send emails successfully through Mandrill SMTP.
For step-by-step instructions, see the test connection guide here: