Table of Contents
What is SendGrid SMTP
SendGrid is an email delivery service that lets your website or application send messages through SendGrid’s SMTP relay instead of relying on your web server’s default mail system. It is commonly used to improve delivery reliability, support authenticated sending, and manage transactional emails such as contact form messages, account emails, and order notifications.
Create a SendGrid Account
Start by creating your SendGrid account from the official pricing page.
- Open
SendGrid Pricing
and choose the plan you want. You can start with the free trial if it fits your needs. - Continue to the account creation form and enter your basic details:
your name, email address, and password. - Check your inbox for the SendGrid verification message, then enter the confirmation code to verify your email address.
- Complete phone verification for account security and 2FA setup. Select your country code, enter your phone number, choose SMS or voice call, then enter the verification code you receive.
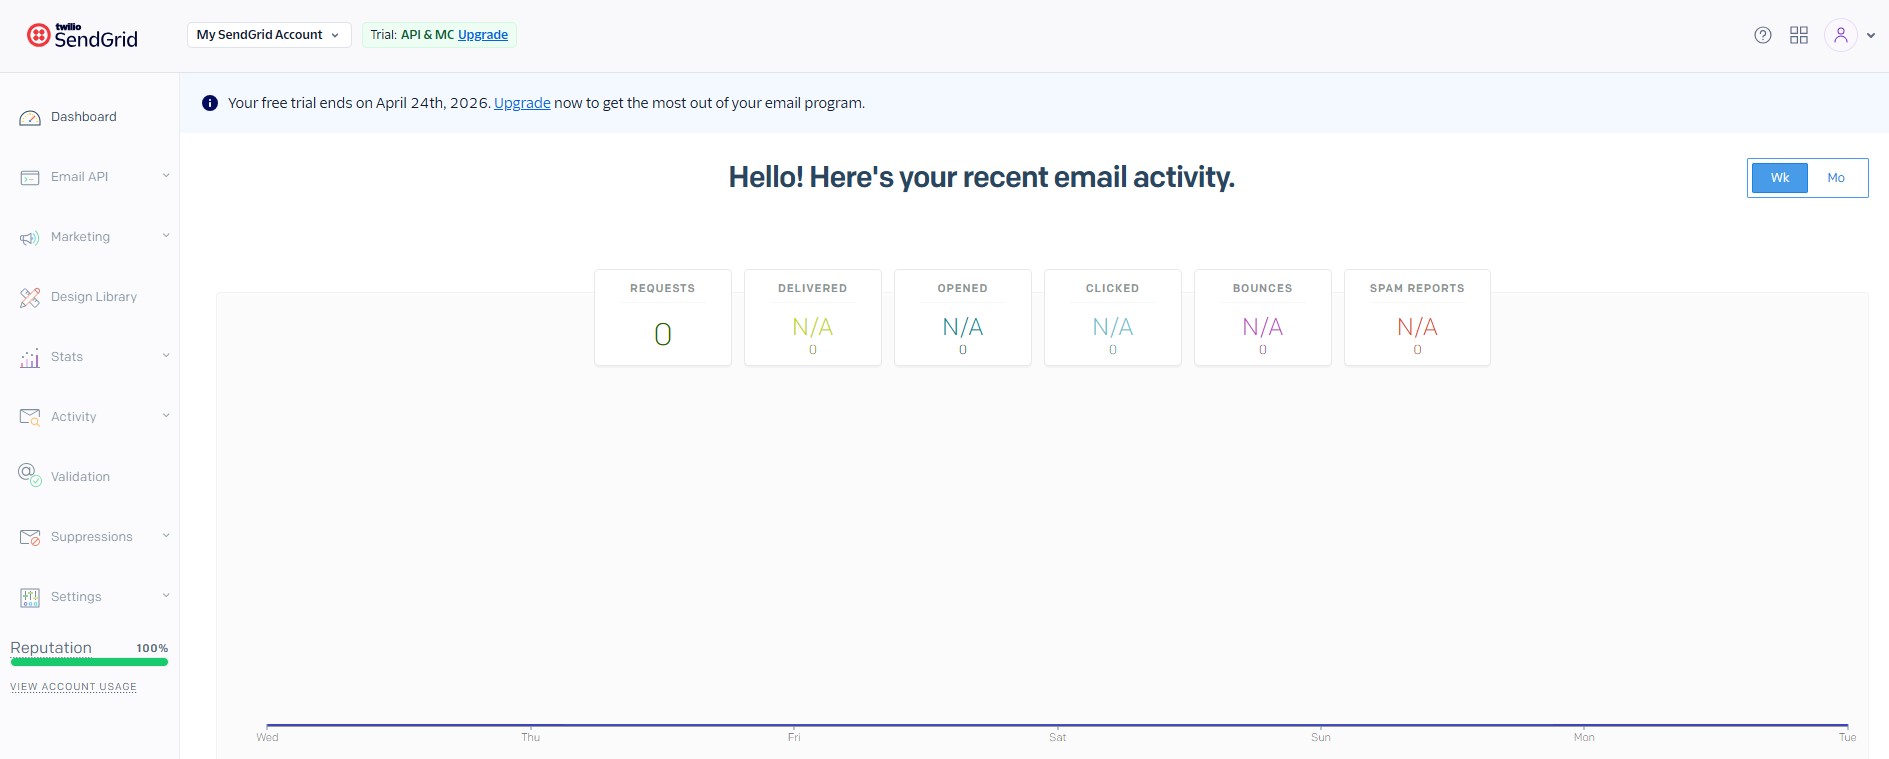
- After verification is complete, sign in to your SendGrid account dashboard and continue with the next setup steps.
Single Sender Verification
Add a Single Sender to Your SendGrid Account
If you want to verify one approved sending address in SendGrid, you can use the Single Sender option.
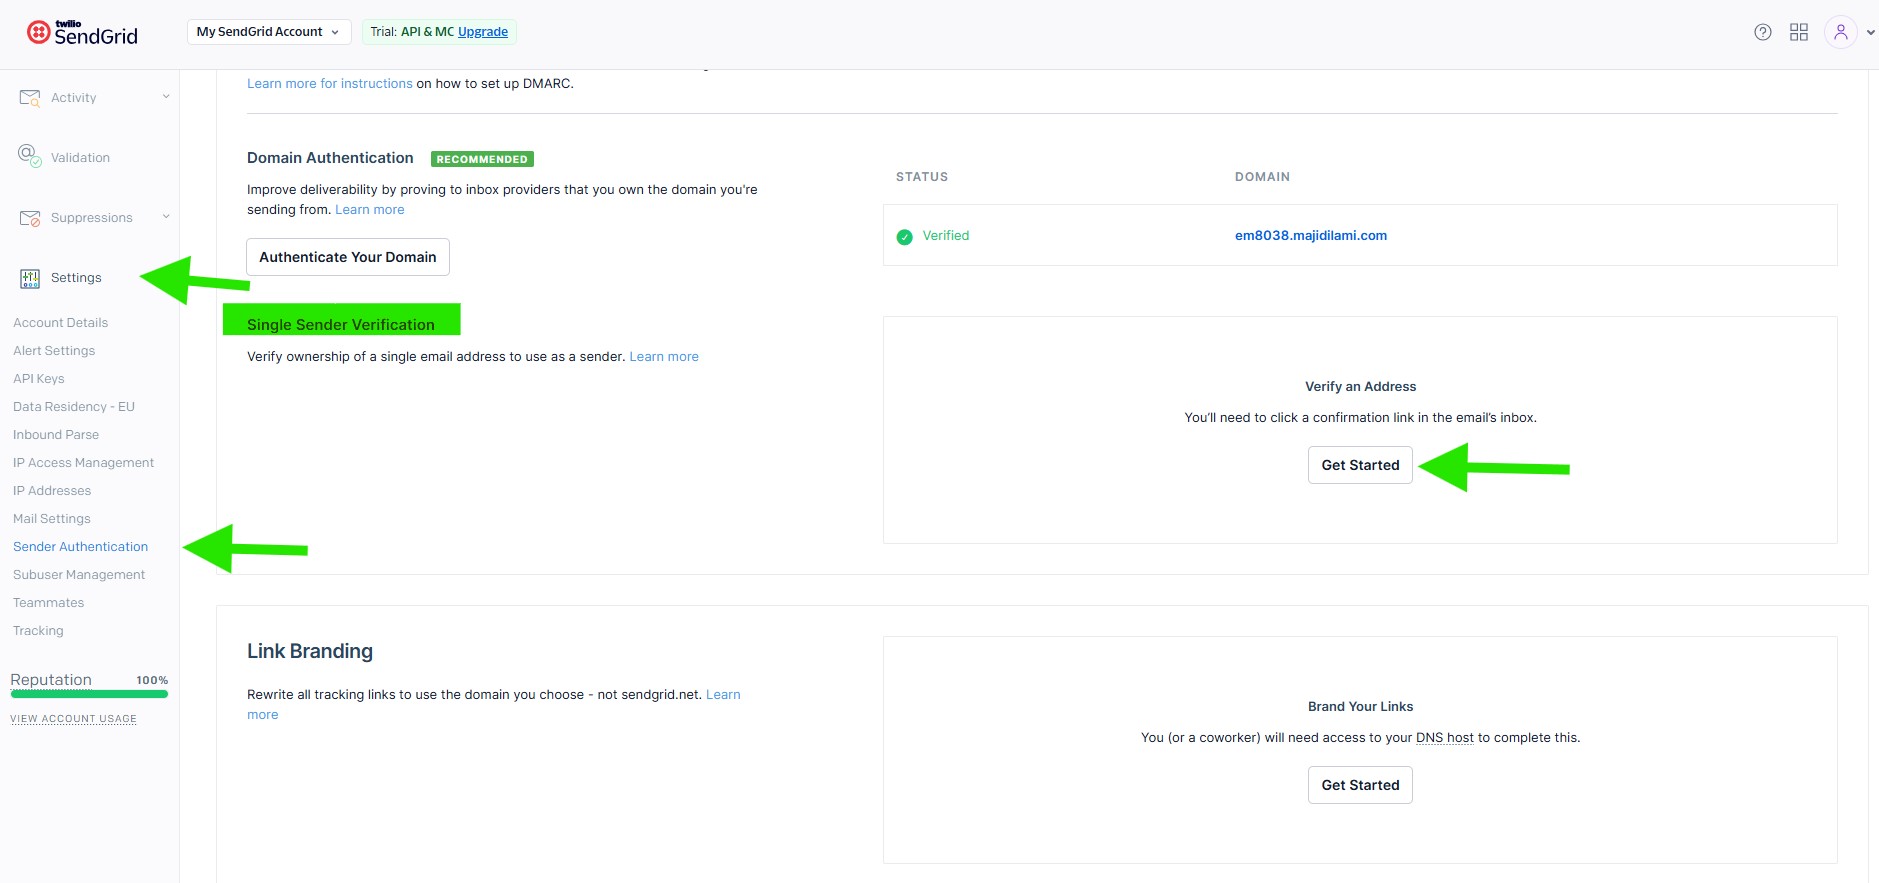
To begin, log in to your SendGrid dashboard and go to Settings > Sender Authentication. In the Single Sender Verification section, click Get Started.
Create a Sender
After clicking the Create New Sender button, SendGrid will open the Create a Sender form. Here, you need to enter the sender details that will be used for verification.
- From Name: Enter the name you want recipients to see.
- From Email Address: Enter the email address you want to verify.
- Reply To: Enter the email address where replies should be sent.
- Company Address: Enter your physical mailing address.
- Company Address Line 2: Add extra address details if needed, this field is optional.
- City: Enter your city.
- State: Select your state or region.
- Zip Code: Enter your postal code.
- Country: Select your country.
- Nickname: Add an internal name to help you identify this sender later in your SendGrid account.
Once all required fields are completed, click Create to save your sender profile.

Verify Your Single Sender Email
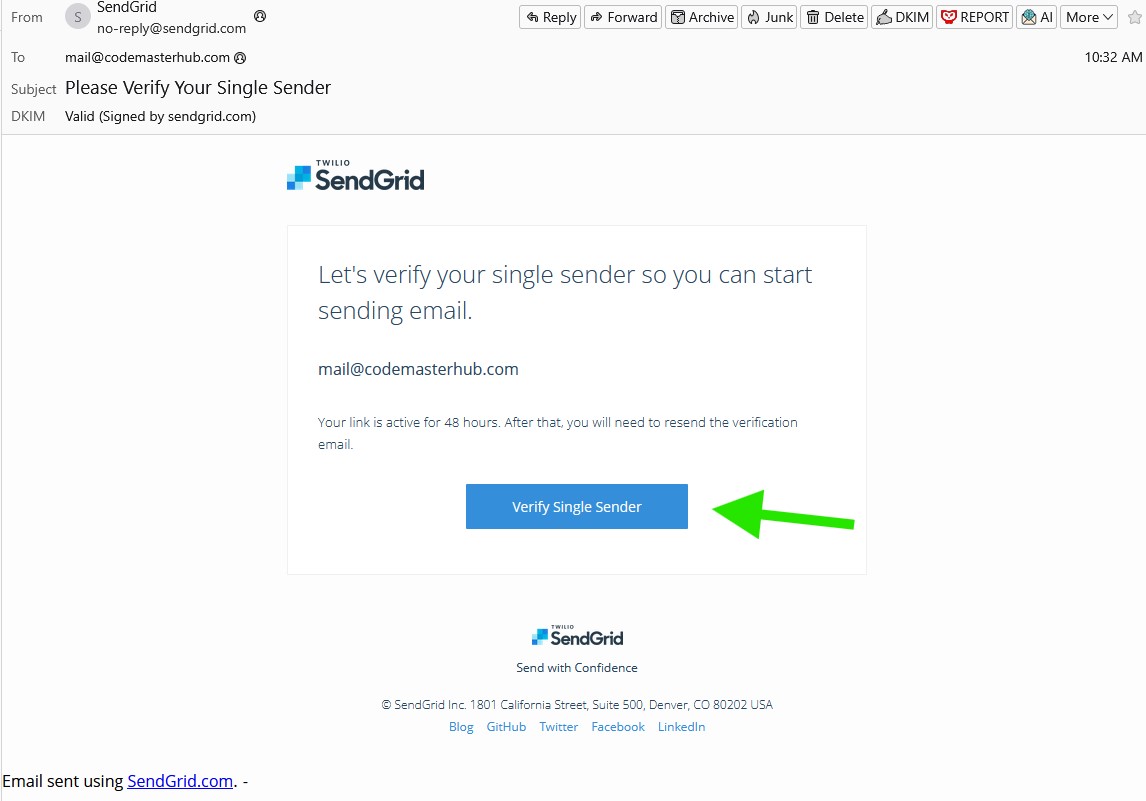
After you create the sender, SendGrid will show a confirmation message and send a verification email to the address you entered.
Open your inbox, find the verification email from SendGrid, and click the verification link inside it. This step is required before the sender can be used for sending emails.
If you do not receive the email right away, check your spam or junk folder. You can also click the Resend email button in SendGrid to send the verification email again.
Once the email address is verified, your Single Sender Identity will be ready to use in SendGrid.
After completing the verification, you will see a confirmation message showing that your sender identity has been verified successfully.
Authenticating Your Domain in SendGrid
Domain authentication confirms that your emails are sent from a domain you own and control. This helps build your domain’s reputation as a trusted sending source and can improve email deliverability. It also removes the “via sendgrid.net” notice that may otherwise appear in your outgoing emails.
Sender Authentication
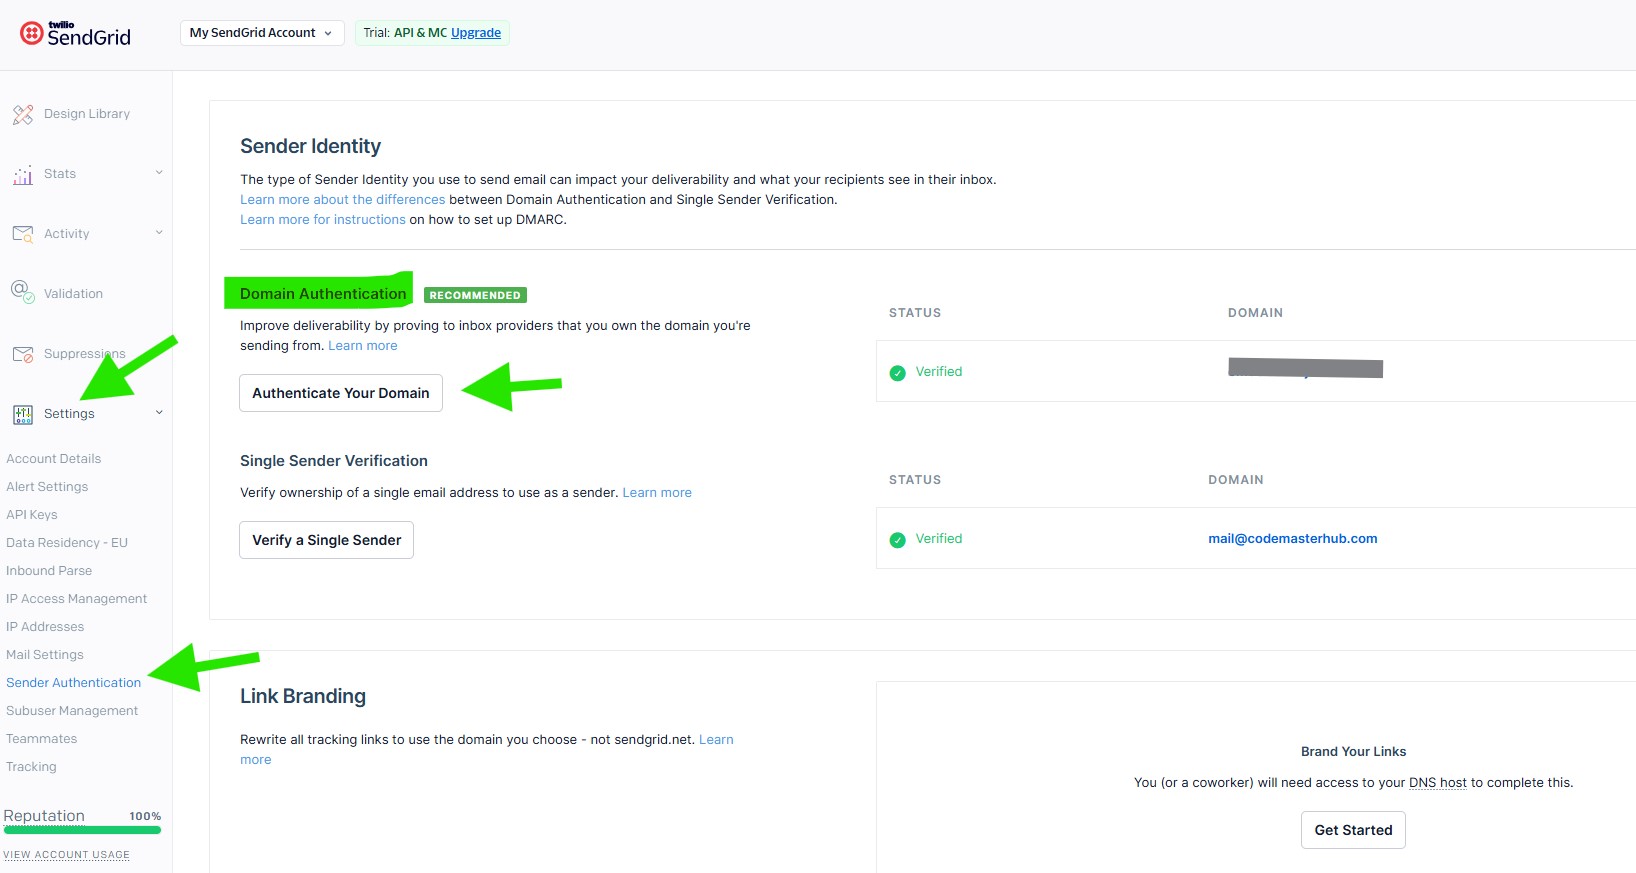
To get started, log in to your SendGrid dashboard and go to Settings > Sender Authentication. In the Domain Authentication section, click Authenticate Your Domain.
Authenticate Your Domain
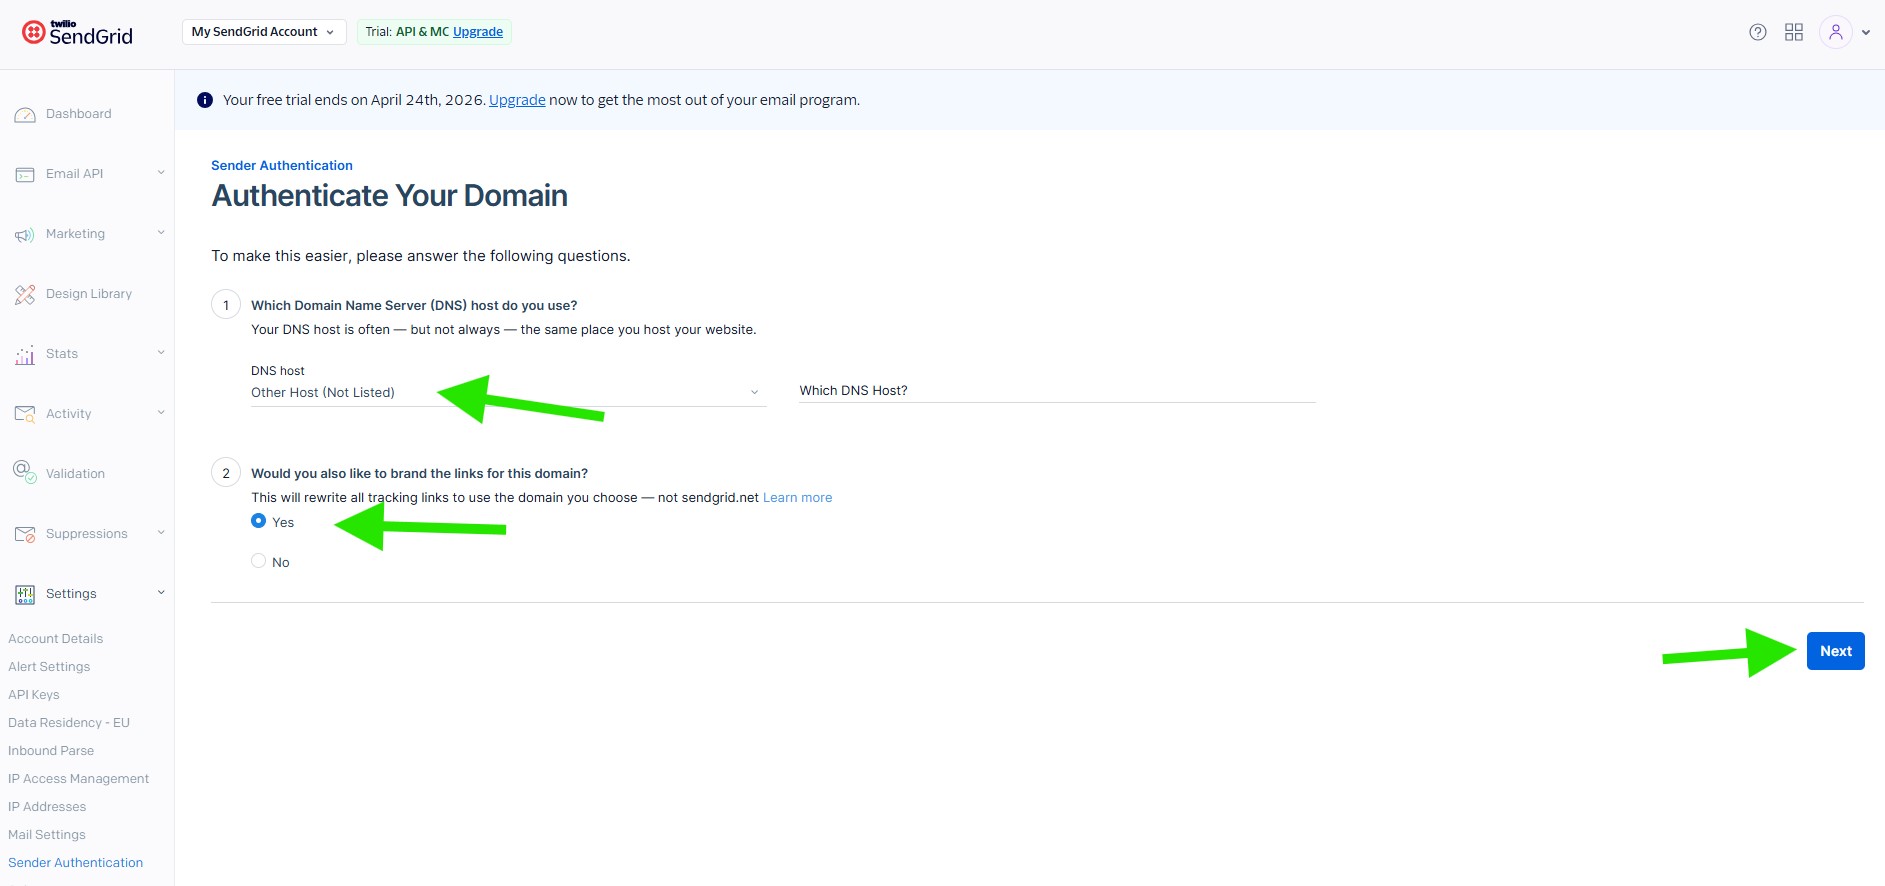
On the Authenticate Your Domain screen, select your DNS provider from the DNS host dropdown. If your provider is not listed, choose Other Host (Not Listed) and enter your DNS host name if requested.
Next, choose whether you want to brand the links for this domain. For most setups, you can leave Yes selected. Then click Next to continue.
Enter Your Domain Details
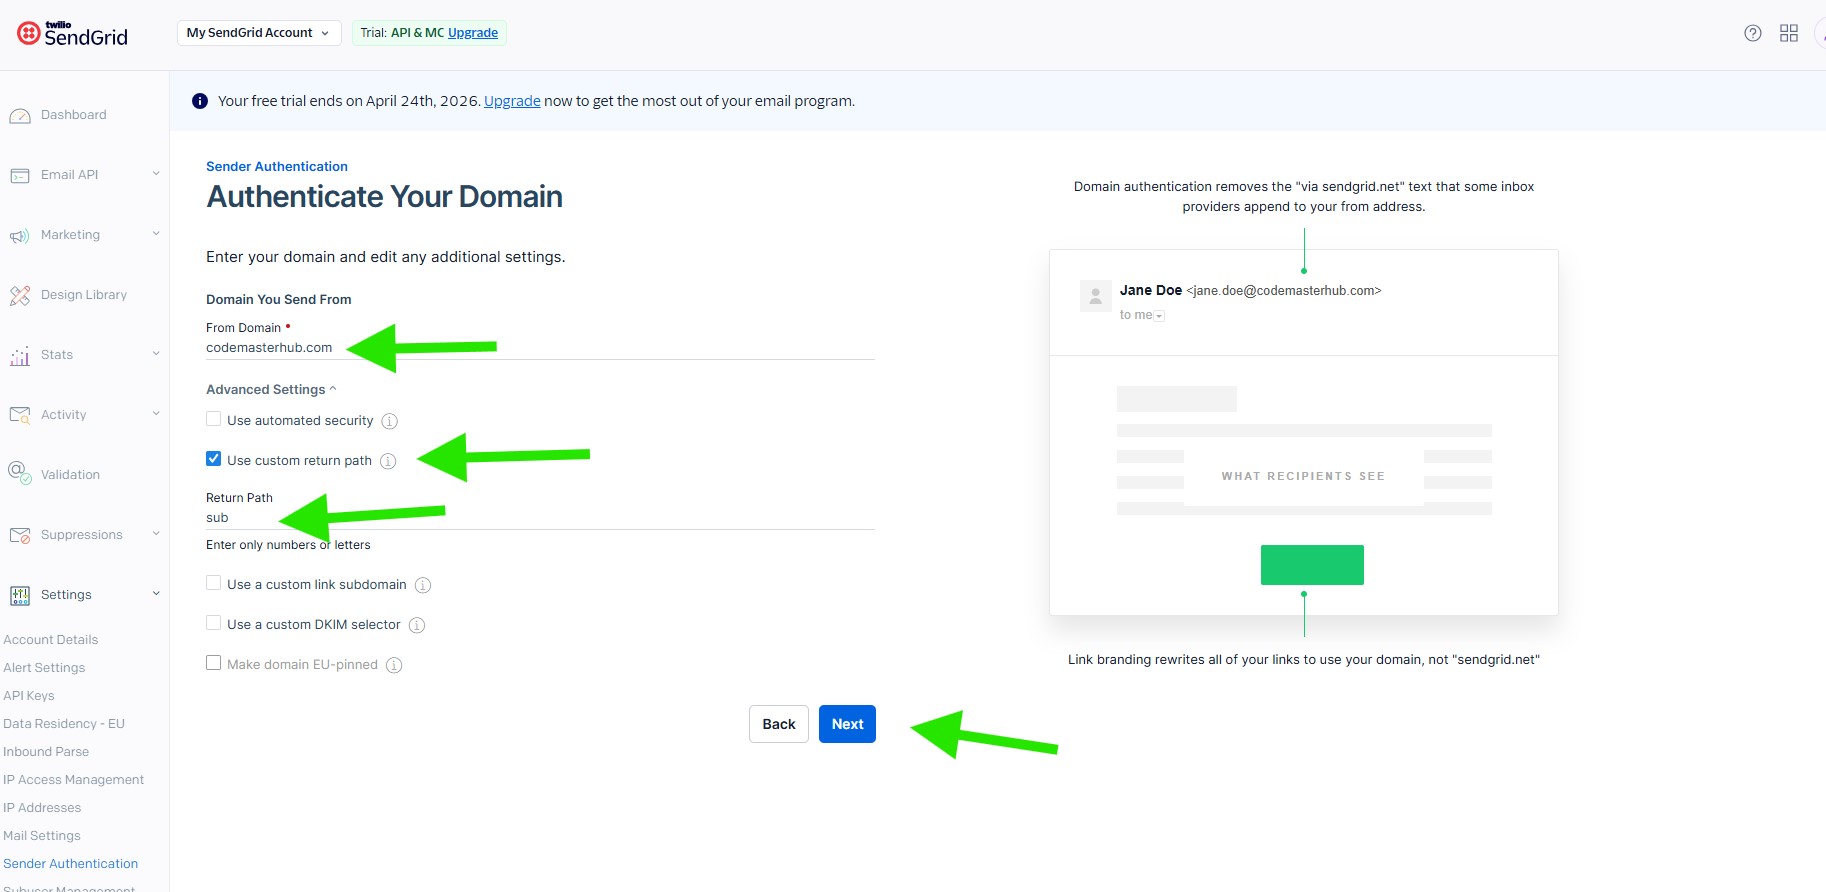
On the next screen, enter the domain you want to send emails from in the From Domain field. This should be your own domain name, such as example.com.
Under Advanced Settings, enable Use custom return path. In the Return Path field, enter a simple subdomain value such as sub. SendGrid will use this to generate the DNS records needed for domain authentication.
After entering your domain details, click Next to continue.
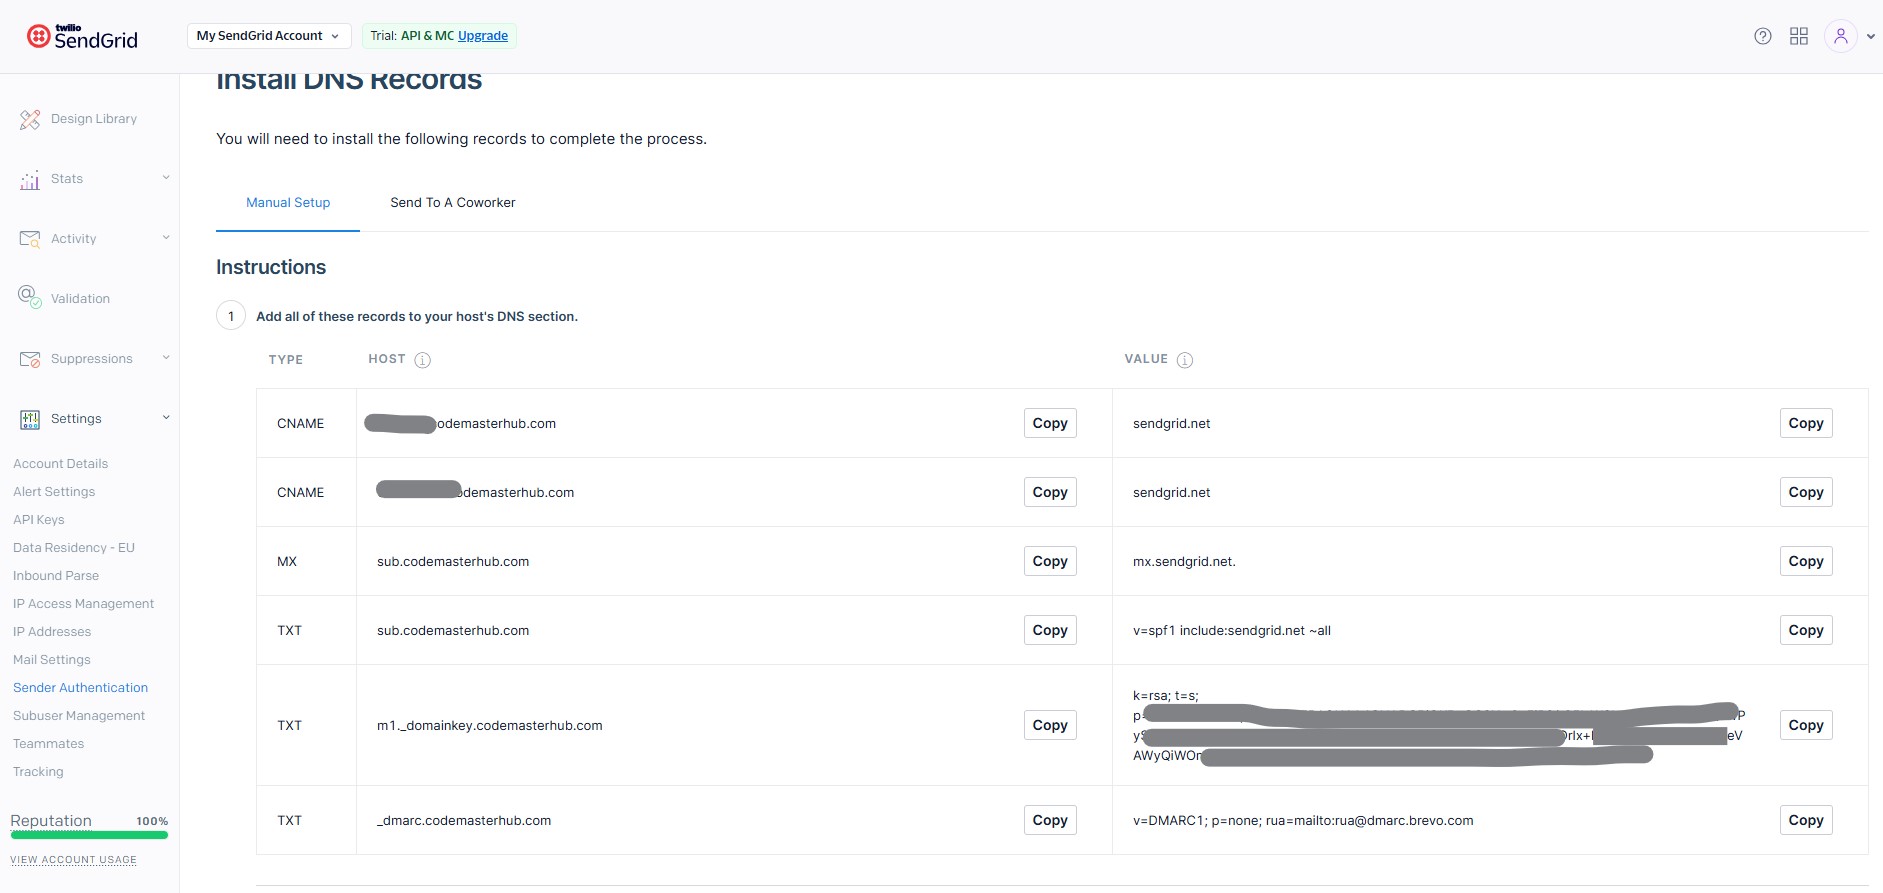
Install DNS Records
SendGrid will now display the DNS records required for domain authentication. Open your DNS manager, usually in your domain registrar, hosting panel, or DNS provider, and add each record exactly as shown in SendGrid.
- Copy the Type, Host, and Value for each record.
- Add every required record to your domain’s DNS zone.
- Do not change the record names or values unless your DNS provider requires a different host format.
- If your DNS provider automatically appends your domain name, enter only the host prefix instead of the full domain.
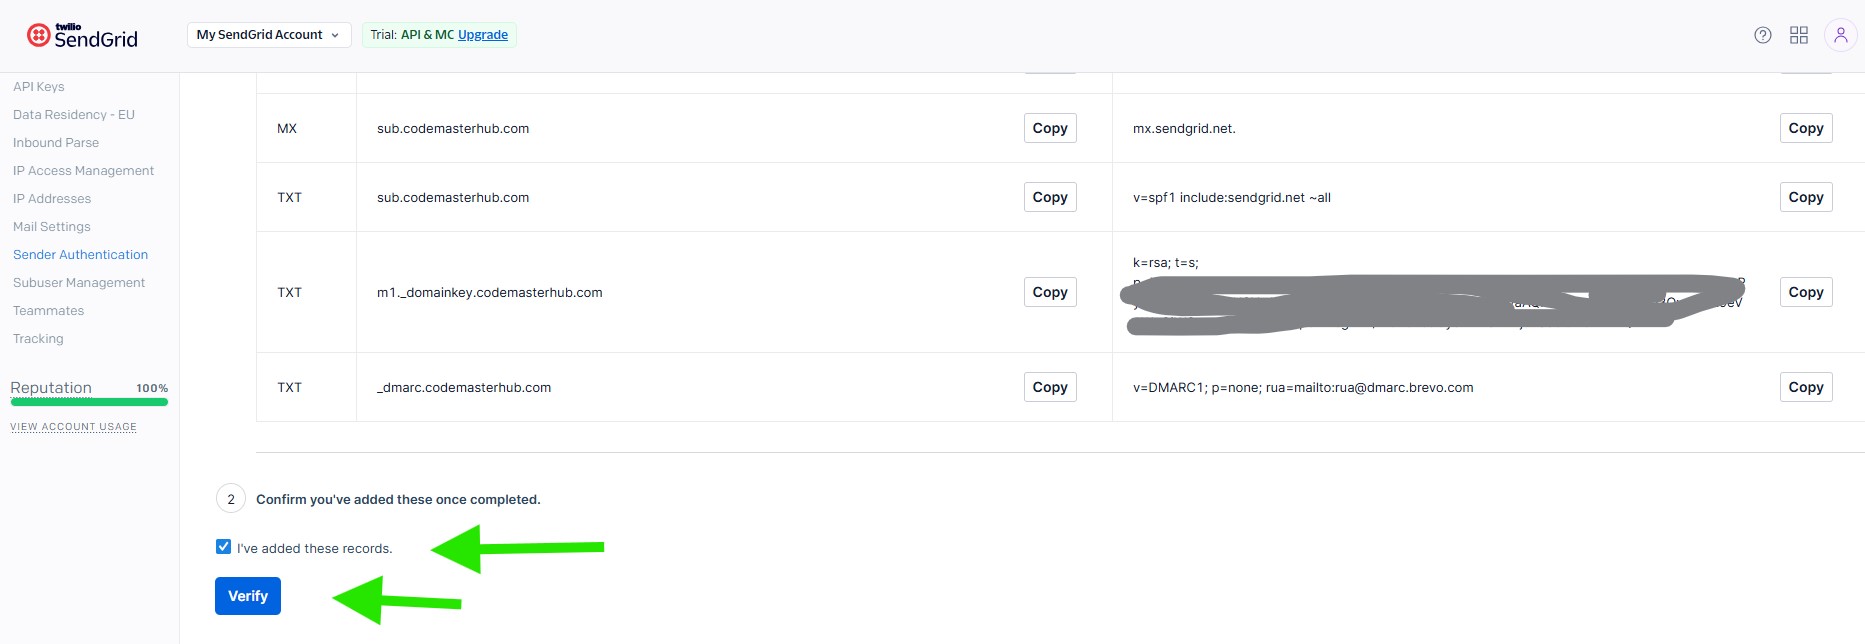
When all records have been added, return to SendGrid and continue to the verification step.
After adding all the required DNS records to your domain, return to your SendGrid dashboard and check the box labeled I have added these records. Then click the Verify button.
DNS changes can take up to 48 hours to fully propagate, so if verification does not work right away, wait a while and try again later. Once the records are detected successfully, you will see a confirmation message showing that your domain has been authenticated.
Generating an API Key
After creating your SendGrid account and setting up your sender identity, the next step is to generate an API key so DeliveryKit SMTP can connect to SendGrid and send emails from your website.
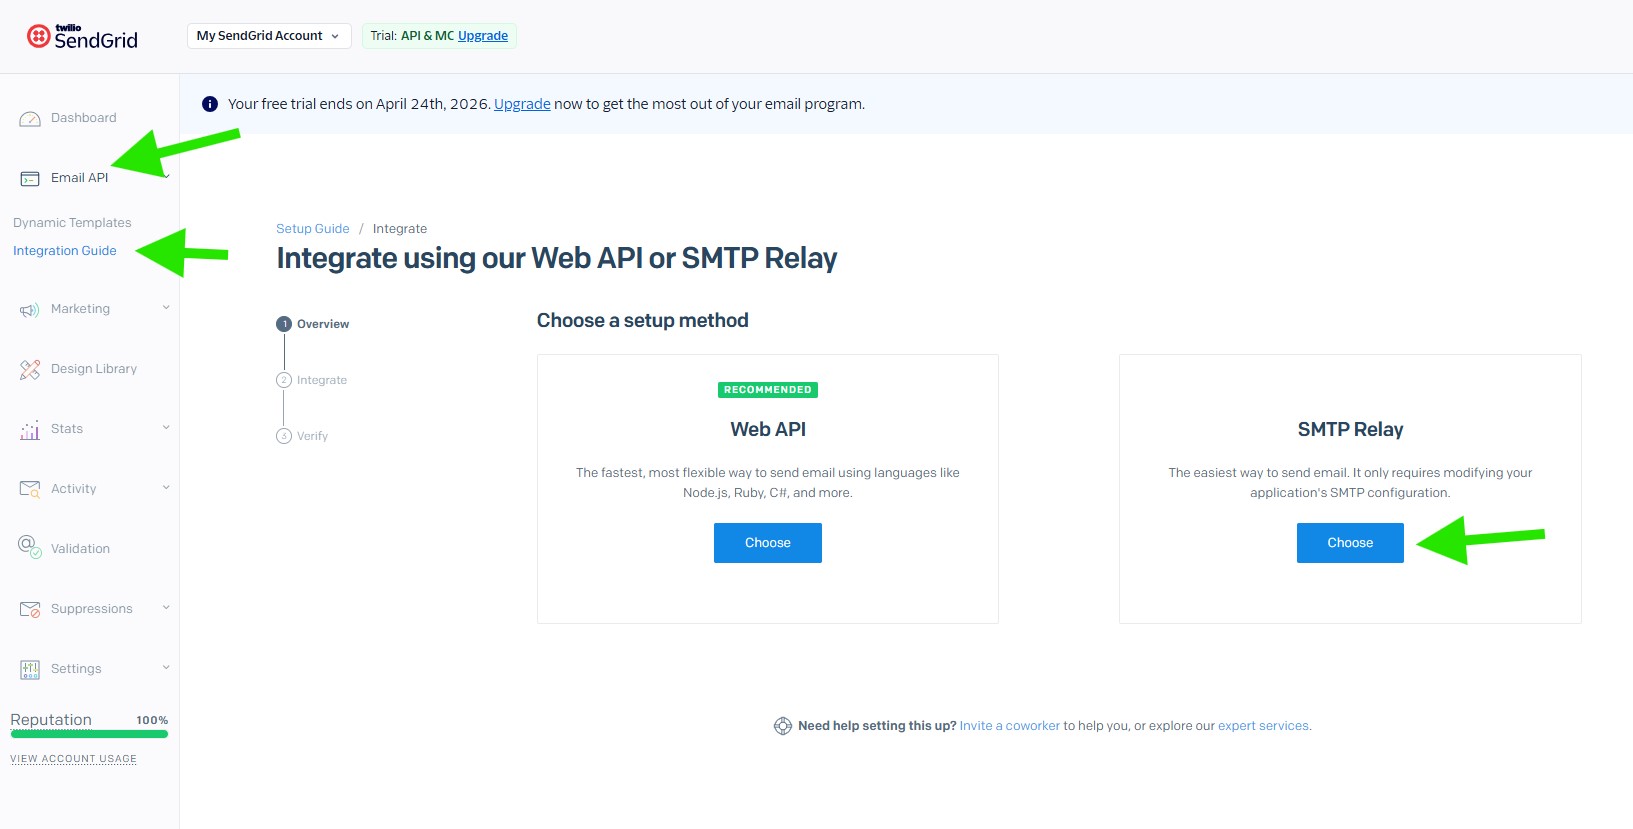
In your SendGrid dashboard, go to Email API > Integration Guide from the left menu. On the setup method screen, locate the SMTP Relay option and click Choose to continue.
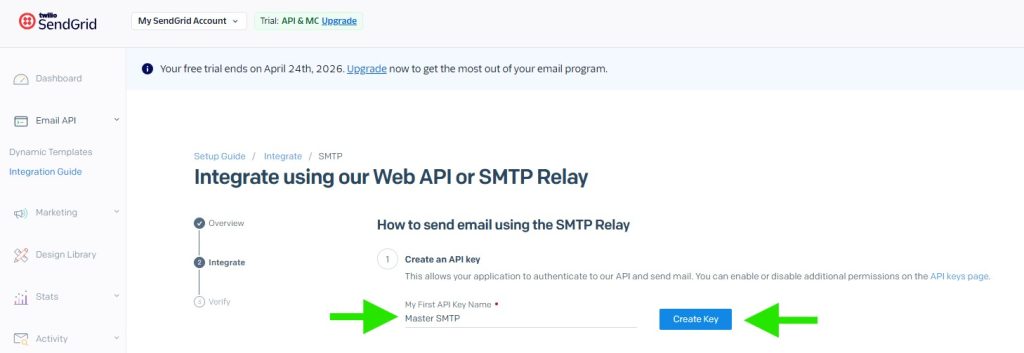
On the SMTP Relay setup screen, enter a name for your new API key in the My First API Key Name field. This name is only for your own reference, so you can use something clear such as DeliveryKit SMTP. Then click the Create Key button to generate your SendGrid API key.
SendGrid will now generate your API key. Keep this page open, as you will need to copy and use this API key in a later step.
Sendgrid Setup in DeliveryKit SMTP Plugin
In your WordPress dashboard, go to DeliveryKit SMTP > Connections, then click Create New Connection.

Configure Connection
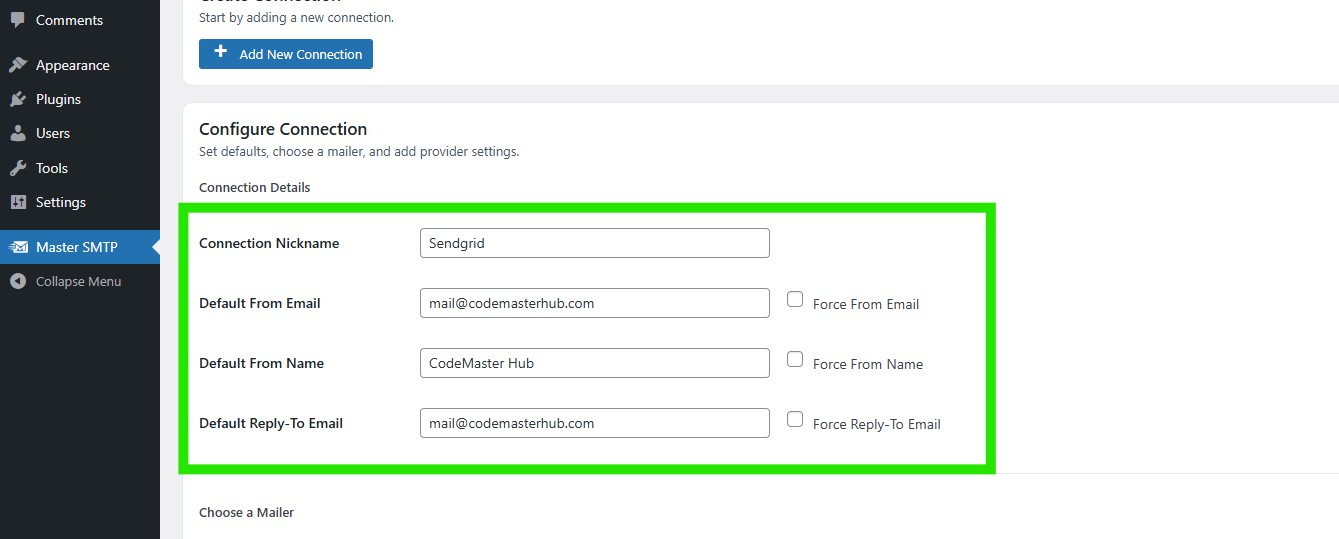
In the Configure Connection section, fill out the Connection Details fields:
Connection Details: Enter a name for this connection. This is only for you, recipients will not see it.
Default From Email: The email address used when an outgoing email does not define a From Email.
Force From Email: If enabled, this From Email will be used for all emails, even if the email has a different From Email.
Default From Name: The name used when an outgoing email does not define a From Name.
Force From Name: If enabled, this From Name will be used for all emails, even if the email has a different From Name.
Default Reply-To Email: The Reply-To address used when an outgoing email does not define a Reply-To Email.
Force Reply-To Email: If enabled, this Reply-To Email will be used for all emails, even if the email has a different Reply-To Email.
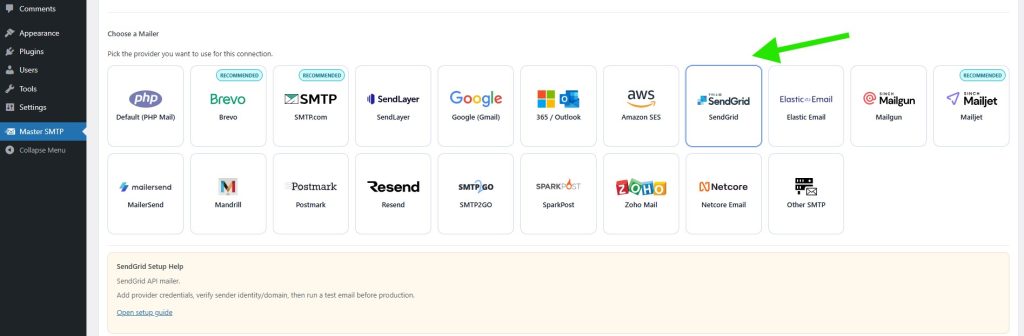
In the Choose a Mailer section, select Sendgrid from the grid mailer list.
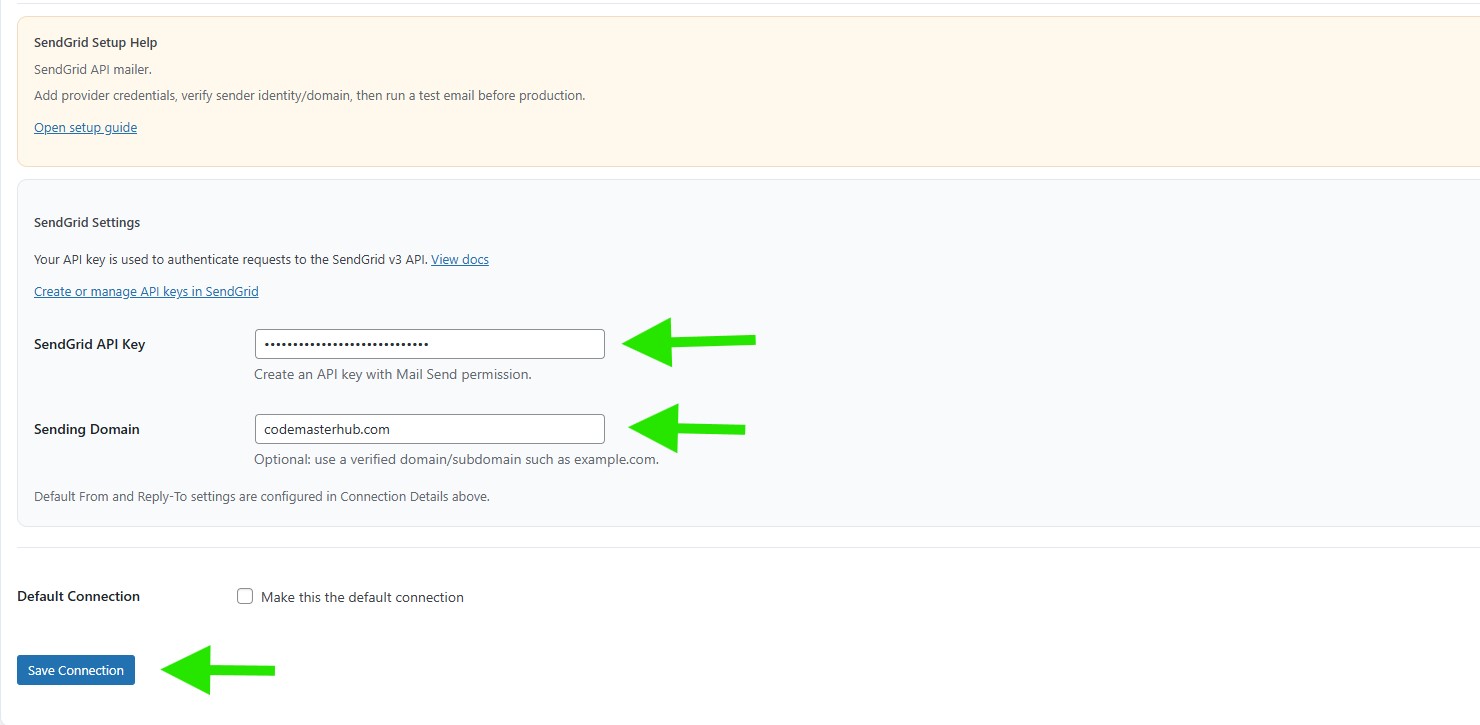
SendGrid Settings
In the SendGrid Settings section, paste your SendGrid API key into the SendGrid API Key field.
Next, enter your verified domain or subdomain in the Sending Domain field. This field is optional, but it is recommended to use a verified sending domain for better deliverability and alignment with your SendGrid setup.
Default Connection: Enable this option if you want this connection to be the default sender for your WordPress website.
When you are done, click Save Connection.
The connection will be added to the Connections list, and you should see Connection saved. at the top of the window.
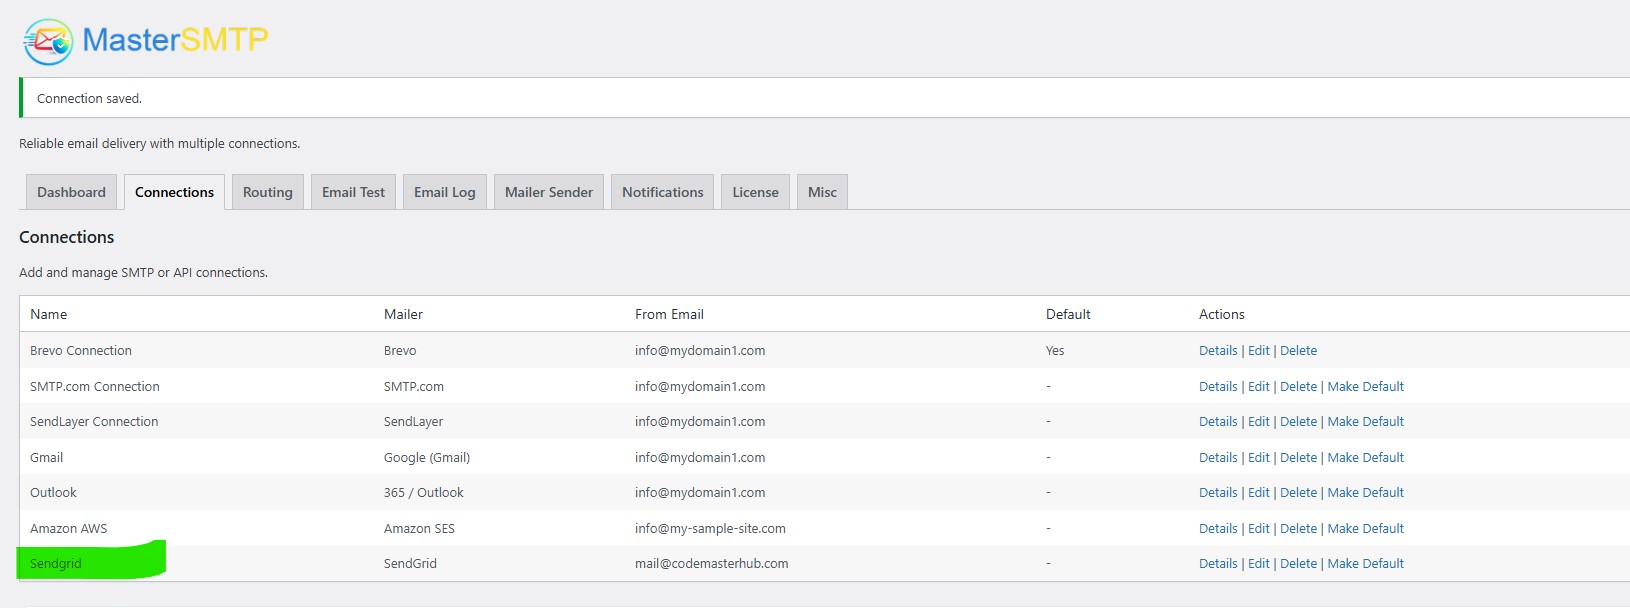
Note: The free version allows you to add only one connection. If you need multiple connections, Conditional Routing, and many other features, you should purchase the DeliveryKit SMTP Pro.
Test Sendgrid Connection
After saving your Sendgrid connection, it is recommended to send a test email to make sure everything is working correctly. This helps confirm that your API Key , and connection settings have been entered properly and that your site can send emails successfully through Sendgrid SMTP.
For step-by-step instructions, see the test connection guide here: