Table of Contents
What Is SendLayer?
SendLayer is a transactional email delivery service designed to help websites and apps send important emails reliably, including password resets, order confirmations, account notifications, and other automated messages. It supports sending through both SMTP and API, with a strong focus on deliverability, reliability, and scalability. SendLayer also helps authenticate your domain with the DNS records needed to improve trust with mailbox providers such as Gmail, Yahoo, and Outlook. Learn more on the official website: https://sendlayer.com/
Create a SendLayer Account
Before you can connect DeliveryKit SMTP to SendLayer, you need to create a SendLayer account. If you do not have one yet, follow SendLayer’s official step by step account creation guide. SendLayer’s documentation explains that you can start from its signup or pricing flow, create your account, complete the required details, and then continue to the dashboard.
Official guide:
https://sendlayer.com/docs/creating-your-account/
Once your account has been created, log in to your SendLayer dashboard here:
https://app.sendlayer.com/login
After signing in, you can continue with the SendLayer mailer setup in the next steps.
Authorizing Your Domain in SendLayer
Before you can send emails with SendLayer, you need to authorize your domain. This helps email servers verify that you are the legitimate owner of the sending domain and that your messages are coming from a trusted source.
Authorizing your domain is an important step for improving email deliverability and reducing the chance of your messages being marked as spam.
For full step by step instructions, see SendLayer’s official guide to authorizing your domain:
Setting Up SendLayer on DeliveryKit SMTP
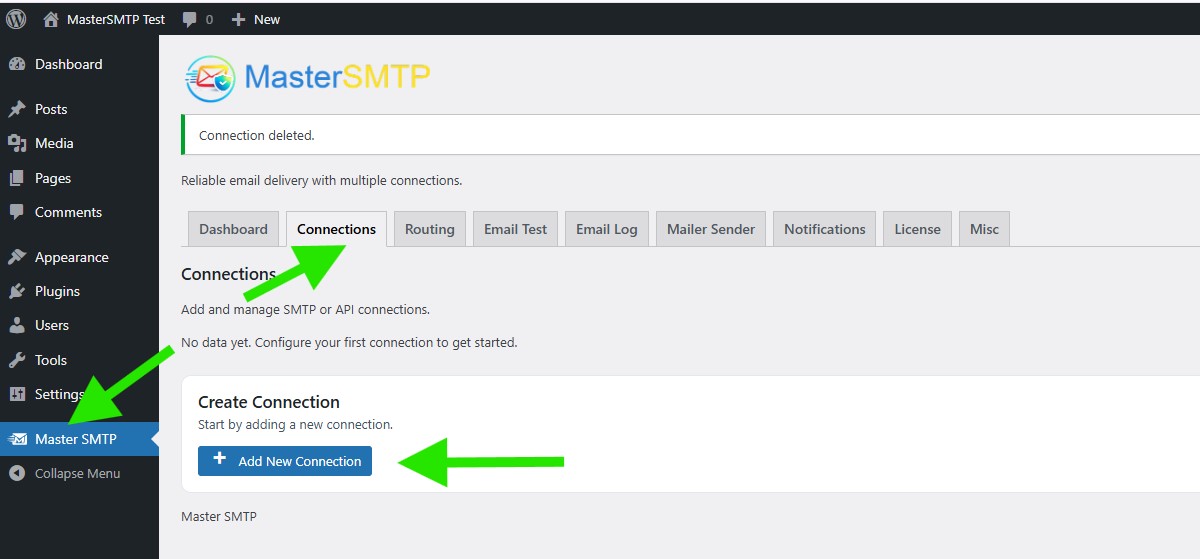
In your WordPress dashboard, go to:
DeliveryKit SMTP > Connections
In the Create Connection section, click Add New Connection.
Configure Connection
In the Configure Connection section, fill out the Connection Details fields:
Connection Details: Enter a name for this connection. This is only for you, recipients will not see it.
Default From Email: The email address used when an outgoing email does not define a From Email.
Force From Email: If enabled, this From Email will be used for all emails, even if the email has a different From Email.
Default From Name: The name used when an outgoing email does not define a From Name.
Force From Name: If enabled, this From Name will be used for all emails, even if the email has a different From Name.
Default Reply-To Email: The Reply-To address used when an outgoing email does not define a Reply-To Email.
Force Reply-To Email: If enabled, this Reply-To Email will be used for all emails, even if the email has a different Reply-To Email.

Create an API Key in SendLayer
Create an API Key in SendLayer
To create or manage your SendLayer API key, follow SendLayer’s official guide:
https://sendlayer.com/docs/managing-api-keys/
After you create the API key, click the copy icon next to it to copy the key.
Go back to the SendLayer connection settings in your WordPress dashboard, then paste the API key you copied into the appropriate field.
Default Connection: Enable this option if you want this connection to be used as the default sender for outgoing emails.
Then click Save Connection.

The connection will be added to the Connections list, and you should see Connection saved. at the top of the window.
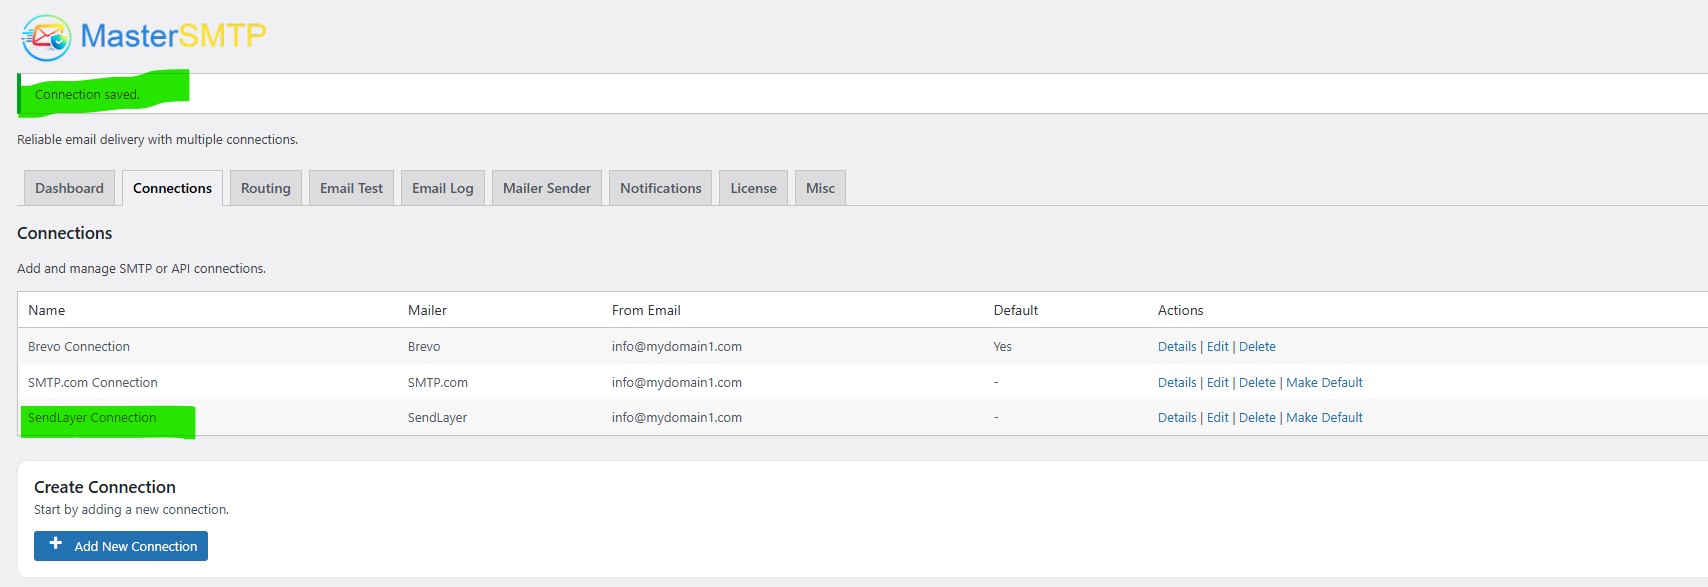
Note: The free version allows you to add only one connection. If you need multiple connections, Conditional Routing, and many other features, you should purchase the DeliveryKit SMTP Pro.
Test SendLayer Connection
After saving your SendLayer connection, it is recommended to send a test email to make sure everything is working correctly. This helps confirm that your API Key, Sender Name, and connection settings have been entered properly and that your site can send emails successfully through SendLayer SMTP.
For step-by-step instructions, see the test connection guide here: