Table of Contents
What Is SMTP.com?
SMTP.com is a professional email delivery service designed for sending transactional and marketing emails with better speed, reliability, and inbox placement. It provides businesses and website owners with the tools needed to send emails securely through SMTP or API, making it a popular choice for websites that need dependable email delivery for user notifications, password resets, purchase confirmations, and similar messages.
Setting Up SMTP.com Account
Before you begin the SMTP.com connection setup in Master SMTP, you need an active SMTP.com account. This account will be used to connect your website to SMTP.com so your emails can be sent more reliably. If you already have an account, log in and keep it open in another browser tab. If you do not have one yet, create a new SMTP.com account first.
During registration, SMTP.com may require a few additional verification steps. These checks help protect the platform from abuse and support better email deliverability for all users. After signing up, check your inbox for the activation email and open the verification link to activate your account. You may also be asked to agree to SMTP.com’s terms or usage policy.
After activation, SMTP.com may review your account before it is fully approved. In some cases, this process can take up to 24 hours and may require you to provide extra details about your website or how you plan to send emails. Keep an eye on your inbox in case their team contacts you for more information.
Once your SMTP.com account has been activated and approved, you can continue with the setup in Master SMTP. It is recommended to keep your SMTP.com dashboard open, because you will need information from your account in the next steps.
Create Account in SMTP.com
To get started, open the SMTP.com trial signup page at trial.smtp.com. On the Start Free Trial form, enter the required account details to begin creating your SMTP.com account. Continue through the registration steps and complete the payment information section as requested on the signup form, even if you are starting with a trial account.
After submitting the form, follow any verification or onboarding steps shown by SMTP.com. Once your account has been created, keep your SMTP.com dashboard open in a separate browser tab, because you will need it during the next stages of the Master SMTP setup.
Setting Up Your Site’s DNS Settings
Domain authentication is an essential part of email delivery because it helps email providers recognize that your messages are coming from a legitimate and authorized source. Without proper authentication, your emails are more likely to be filtered, flagged, or sent to spam.
To send emails with SMTP.com, you need to add the required DNS records for your domain. SMTP.com uses SPF to help authorize your sending service, and you will also need to configure DKIM so your outgoing messages can be cryptographically signed. These records work together to improve trust, support deliverability, and help protect your domain from spoofing.
SMTP.com provides an onboarding process that makes it easier to find the DNS records needed for your domain. Log in to your SMTP.com account and follow the onboarding steps to access your domain authentication settings and copy the exact SPF and DKIM values provided for your account.
You must then add these DNS records in your domain’s DNS manager, which is usually available through your hosting provider, domain registrar, or DNS service such as Cloudflare. If you are not sure how to add the records, SMTP.com provides setup tutorials for different hosting providers and DNS platforms here: DNS setup guides for different providers.
After adding the records, allow time for DNS changes to propagate. Once the records have been detected and verified in your SMTP.com account, you can continue with the connection setup in Master SMTP.
Sending Domain
Enter your website’s domain in the What is your sending domain? field. This should be the domain you want to use for sending emails from your site. After entering the domain, click Next to continue and start the verification process.
Email Authentication (SPF, DKIM, DMARC)
Email authentication is a key part of successful email delivery. It helps mailbox providers verify that your messages are genuinely being sent from an authorized source and not from someone pretending to use your domain.
SMTP.com uses standard email authentication methods, including SPF, DKIM, and DMARC. SPF helps define which servers are allowed to send emails for your domain. DKIM adds a digital signature to your outgoing messages so receiving servers can verify that the message was sent legitimately and was not altered in transit. DMARC works with SPF and DKIM to help protect your domain from spoofing and tells receiving servers how to handle messages that fail authentication.
To complete your SMTP.com setup, you should add the required SPF and DKIM records provided in your SMTP.com account to your domain’s DNS settings. You may also configure a DMARC record on your domain to improve protection and reporting. These records help improve deliverability, support domain trust, and reduce the risk of your emails being rejected or sent to spam.
For more information, see SMTP.com’s guide to email authentication.
Setting Up SMTP.com in Master SMTP
In your WordPress dashboard, go to:
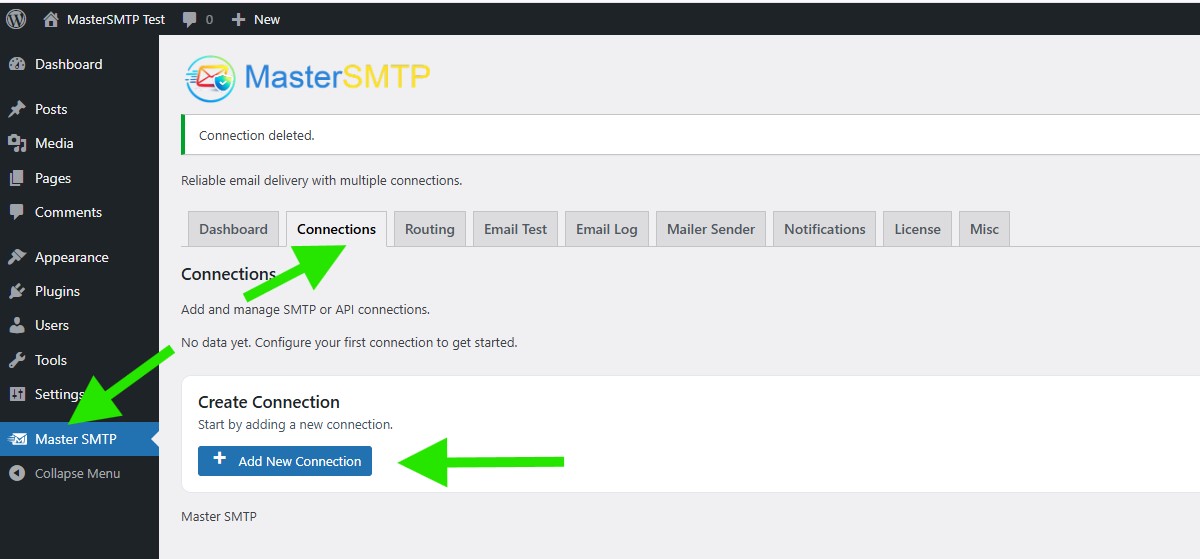
Master SMTP > Connections
In the Create Connection section, click Add New Connection.
Configure Connection
In the Configure Connection section, fill out the Connection Details fields:
Connection Details: Enter a name for this connection. This is only for you, recipients will not see it.
Default From Email: The email address used when an outgoing email does not define a From Email.
Force From Email: If enabled, this From Email will be used for all emails, even if the email has a different From Email.
Default From Name: The name used when an outgoing email does not define a From Name.
Force From Name: If enabled, this From Name will be used for all emails, even if the email has a different From Name.
Default Reply-To Email: The Reply-To address used when an outgoing email does not define a Reply-To Email.
Force Reply-To Email: If enabled, this Reply-To Email will be used for all emails, even if the email has a different Reply-To Email
Choose a Mailer
In the Choose a Mailer section, select SMTP.com from the mailers grid list. This will load the SMTP.com connection settings so you can enter the required account details and complete the setup.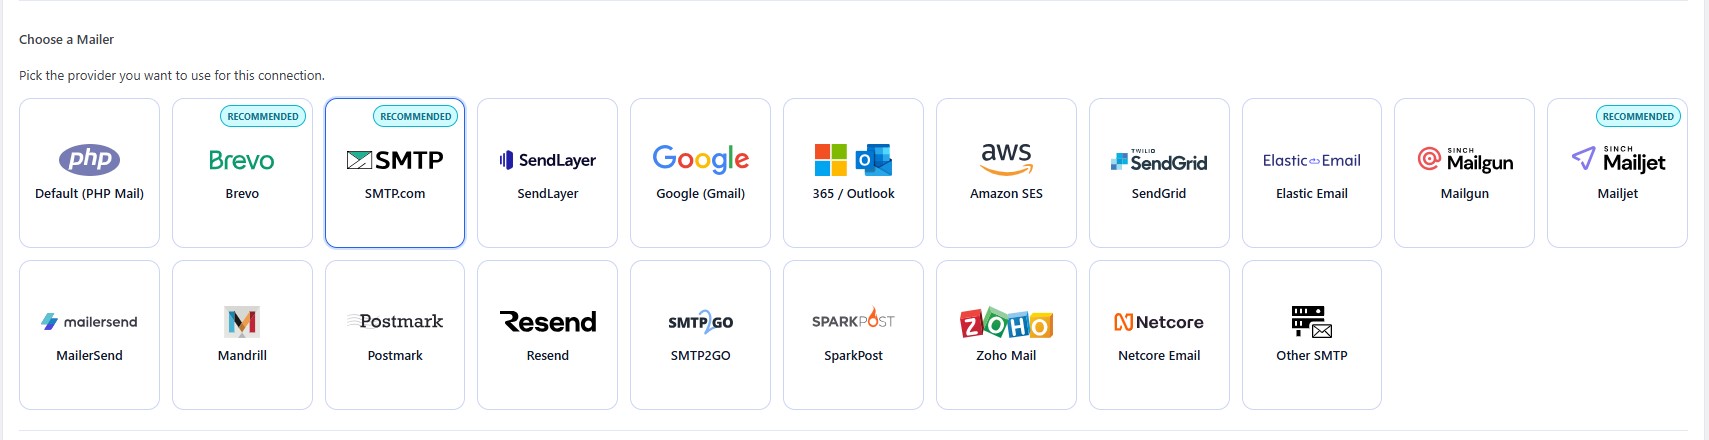
Create an API Key in SMTP.com
To complete the SMTP.com connection in Master SMTP, you will need to enter the API Key and Sender Name from your SMTP.com account.
To quickly access your API settings, click the Get API Key link in the SMTP.com section of the connection settings. This will take you to your SMTP.com API page, where you can create or copy your API Key: my.smtp.com/settings/api.
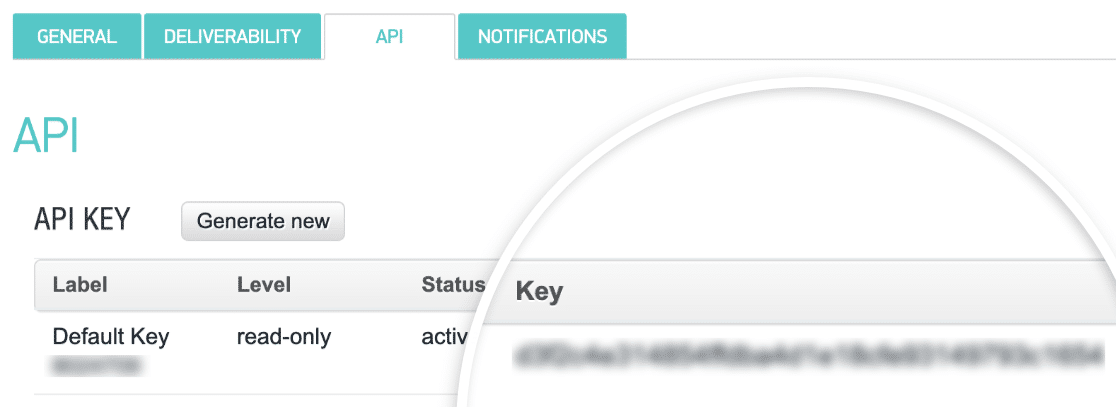
Once you have your API Key and Sender Name, return to Master SMTP and enter them in the corresponding fields to continue the setup.
SMTP.com Settings
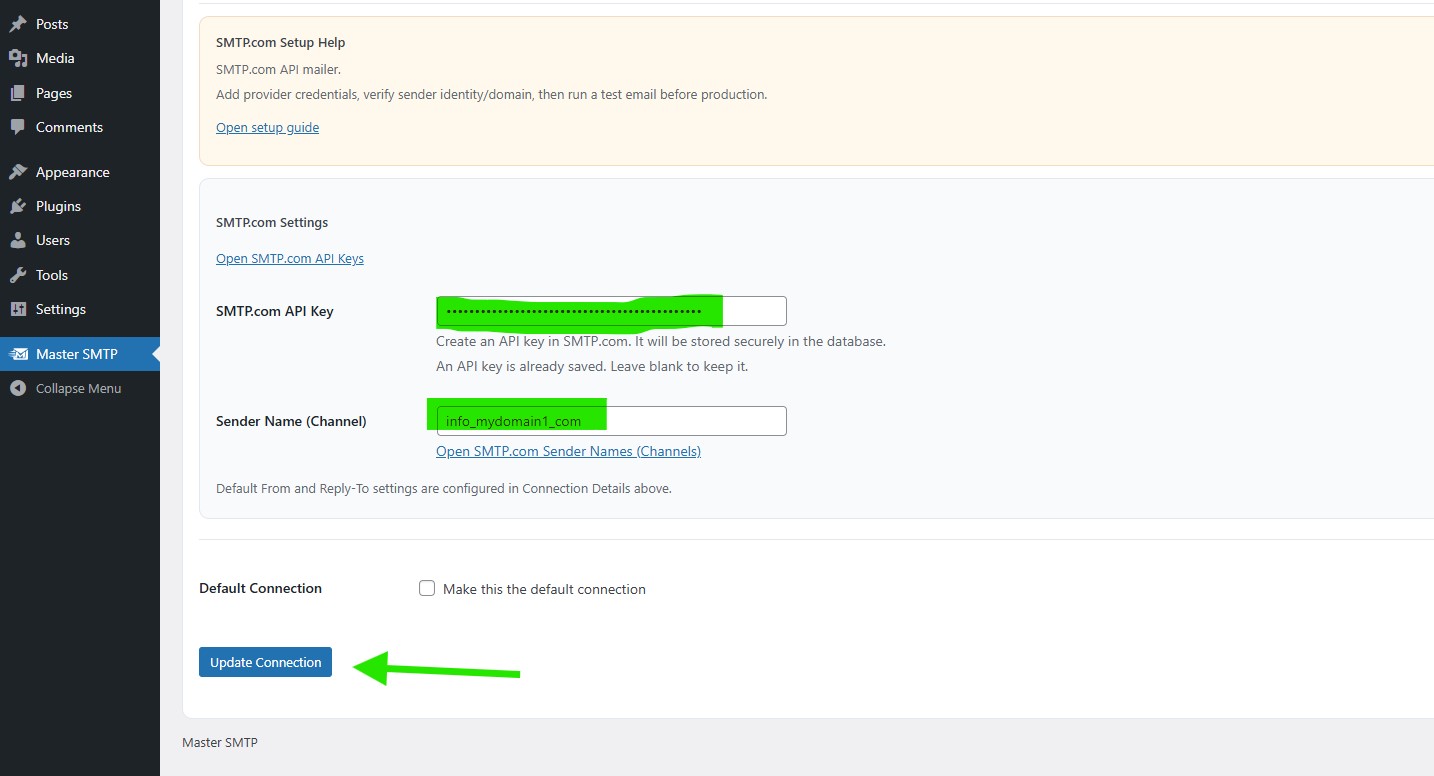
In the SMTP.com Settings section in Master SMTP, enter your SMTP.com API Key in the API Key field.
After that, move to the Sender Name field. To quickly find the correct value for this field, click the Get Sender Name link. This will open your SMTP.com senders page, where you can locate the sender name or channel you need to use: my.smtp.com/senders/.
Next, enter the Sender Name (Channel) exactly as it appears in your SMTP.com account.
If you want this SMTP.com connection to be used as your main sending connection, enable the Default Connection option. When this option is checked, Master SMTP will use this connection as the default sender unless another connection is selected by a routing rule or other configuration.
After completing all required fields, click Save Connection to save your SMTP.com connection settings.
The connection will be added to the Connections list, and you should see Connection saved. at the top of the window.
Note: The free version allows you to add only one connection. If you need multiple connections, Conditional Routing, and many other features, you should purchase the Master SMTP Pro.