Table of Contents
What Is Postmark?
Postmark is an email delivery service designed mainly for transactional email, such as password resets, order confirmations, login alerts, contact form messages, and other important site notifications. It provides both SMTP and API sending options, with a strong focus on fast delivery, inbox reliability, and message tracking. Postmark also separates transactional and promotional email streams to help protect deliverability, making it a solid choice for WordPress sites that need dependable email sending through the Master SMTP plugin.
Create a Postmark Account
To get started, create your Postmark account by visiting the Postmark pricing page:
https://postmarkapp.com/pricing
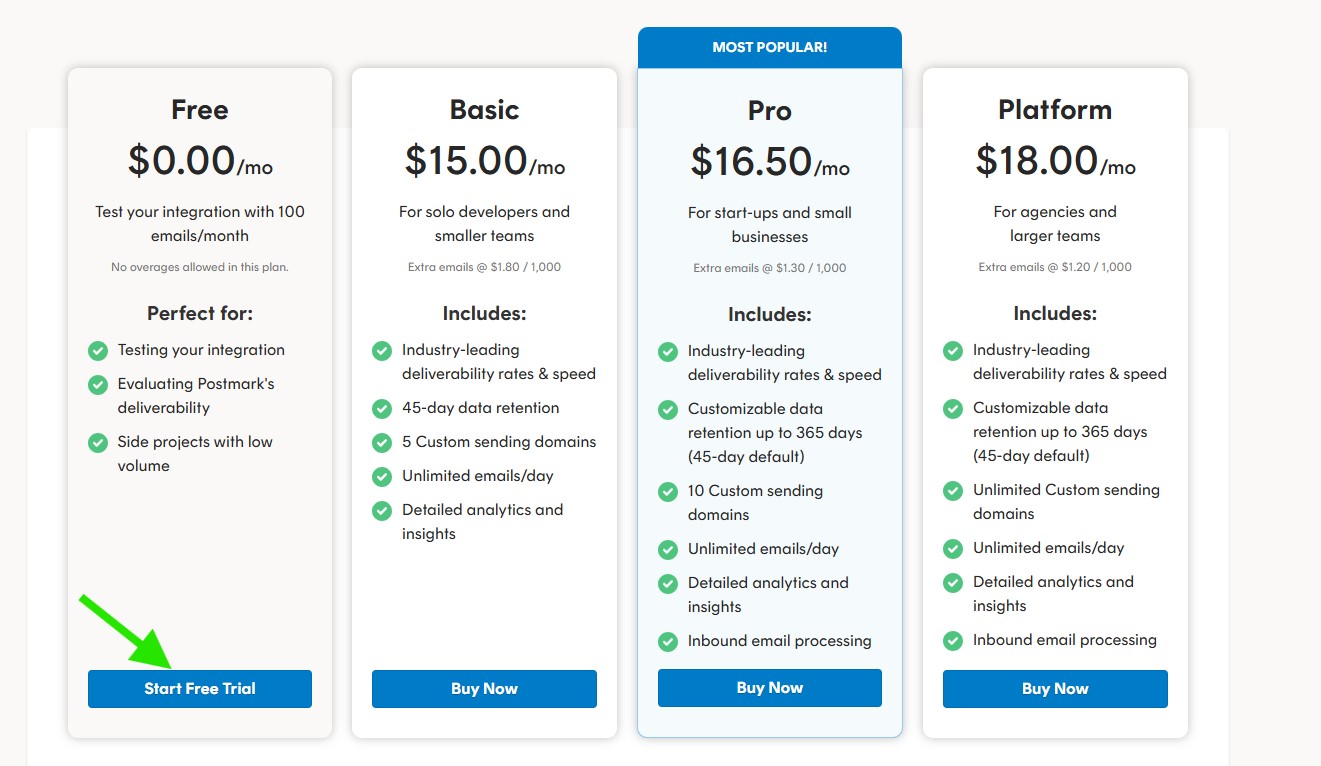
In this example, we will use the Free plan. It is a good option for testing your integration and includes up to 100 emails per month.
On the pricing page, click Start Free Trial under the Free plan to continue.
Use a business email address in the next steps to create your free Postmark account.
Use a business email address in the next steps to create your free Postmark account.
After creating your account, you will receive a confirmation email from Postmark. Open the email and click the Confirm Sender Signature button to verify your sender and activate your account.
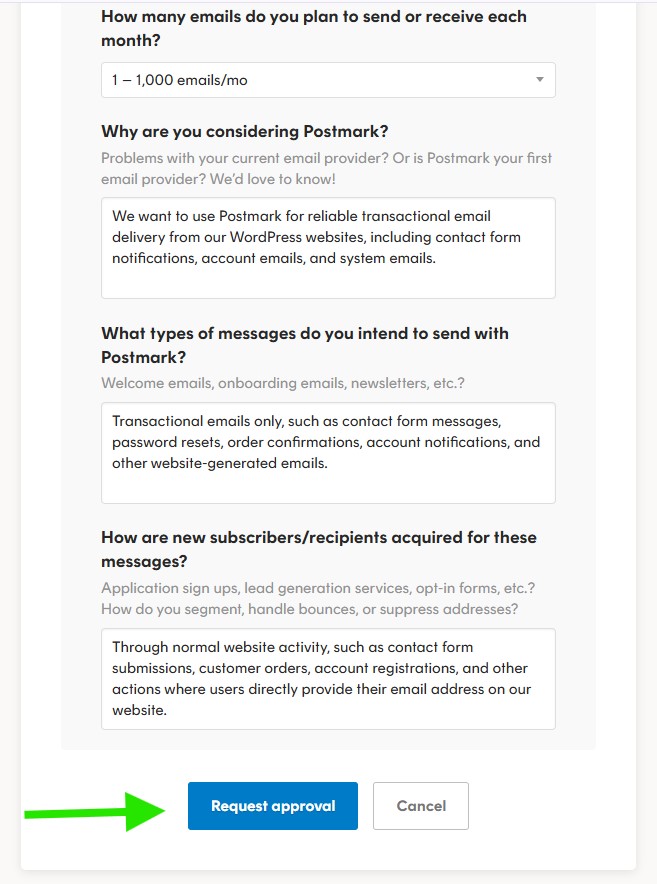
After confirming your email, log in to your Postmark account. If your account is still in Test mode, click Request approval in the top right corner and complete the approval process before using Postmark for live sending.

Fill out the approval form with your sending details, then click Request approval to submit your application. Postmark will review your request, and once approved, you can continue setting up your sending domain and server.
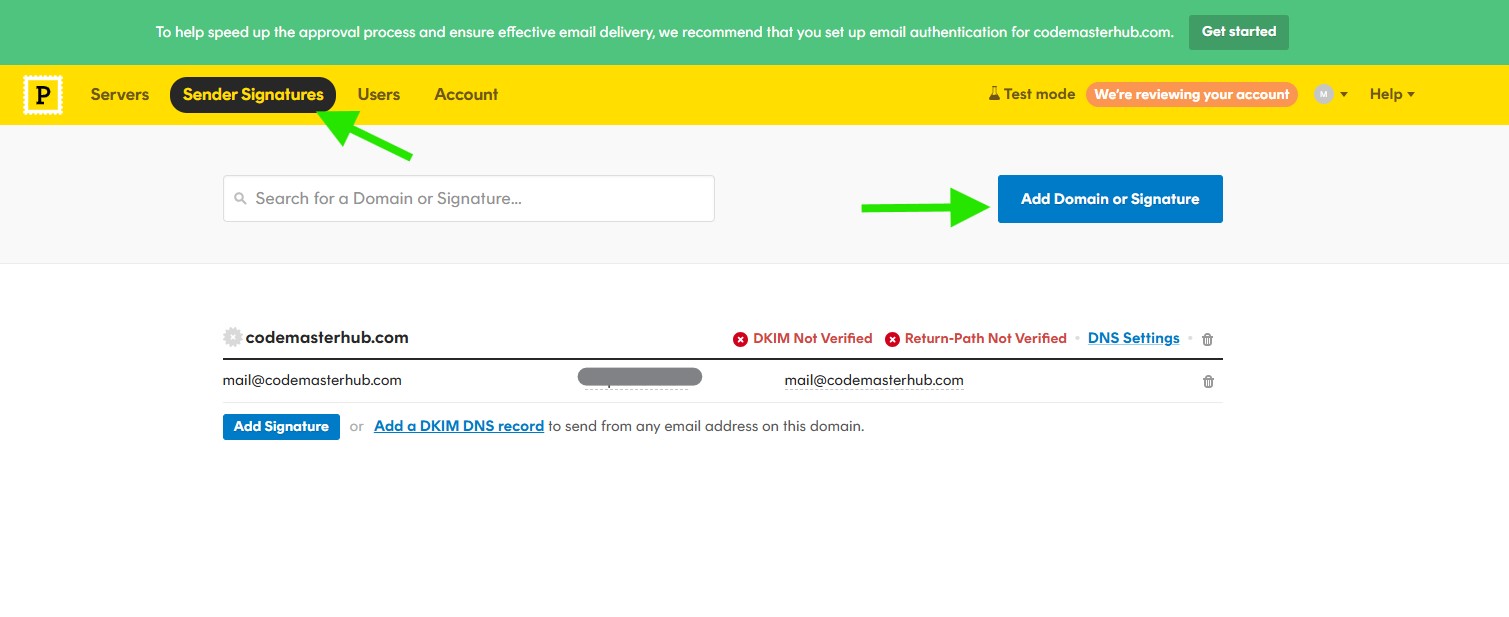
Add Your Sending Domain
Once your account is under review or approved, go to the Sender Signatures tab, then click Add Domain or Signature.
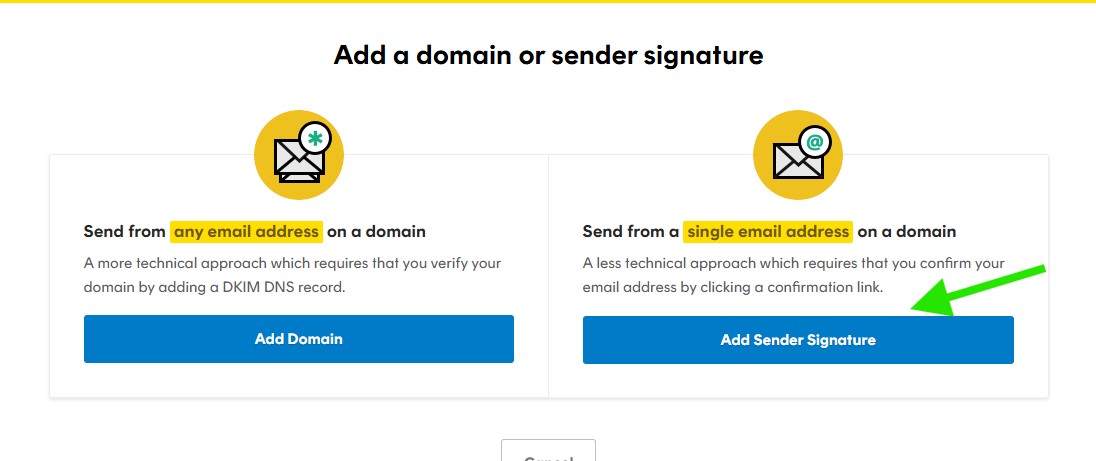
For best results, choose to add and verify your domain. This allows you to send emails from addresses on your domain and helps improve deliverability.
Adding a New Sender Signature
Note: Although you can get the Postmark mailer up and running with a Sender Signature for an individual email address, we recommend adding a domain instead to better ensure email delivery.
To send emails from a single email address, you can verify a Sender Signature. The email address associated with your account is verified during signup, but you can add as many additional email addresses as you want.
To begin, click the Add Sender Signature button.
Enter the sender details you want to use, including the From email address. You can also add an optional From name, Reply-To email, and personal note. When ready, click Create Signature.
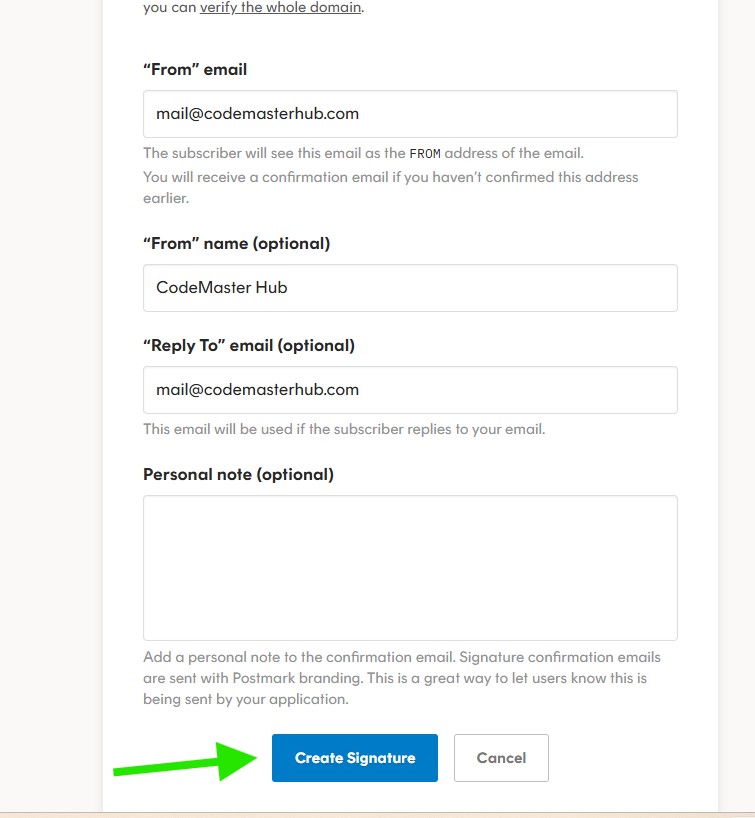
Note: If you created your Postmark account using the same email address, you do not need to add it again. A sender signature for that email is already available in your account.
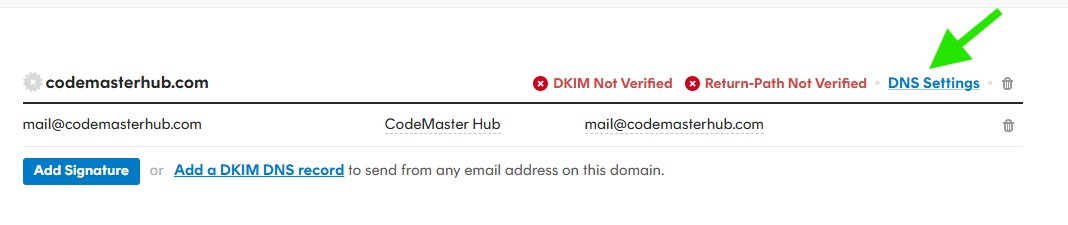
Verify Your Domain
To verify your domain, go to Sender Signatures, then click DNS Settings next to your domain.
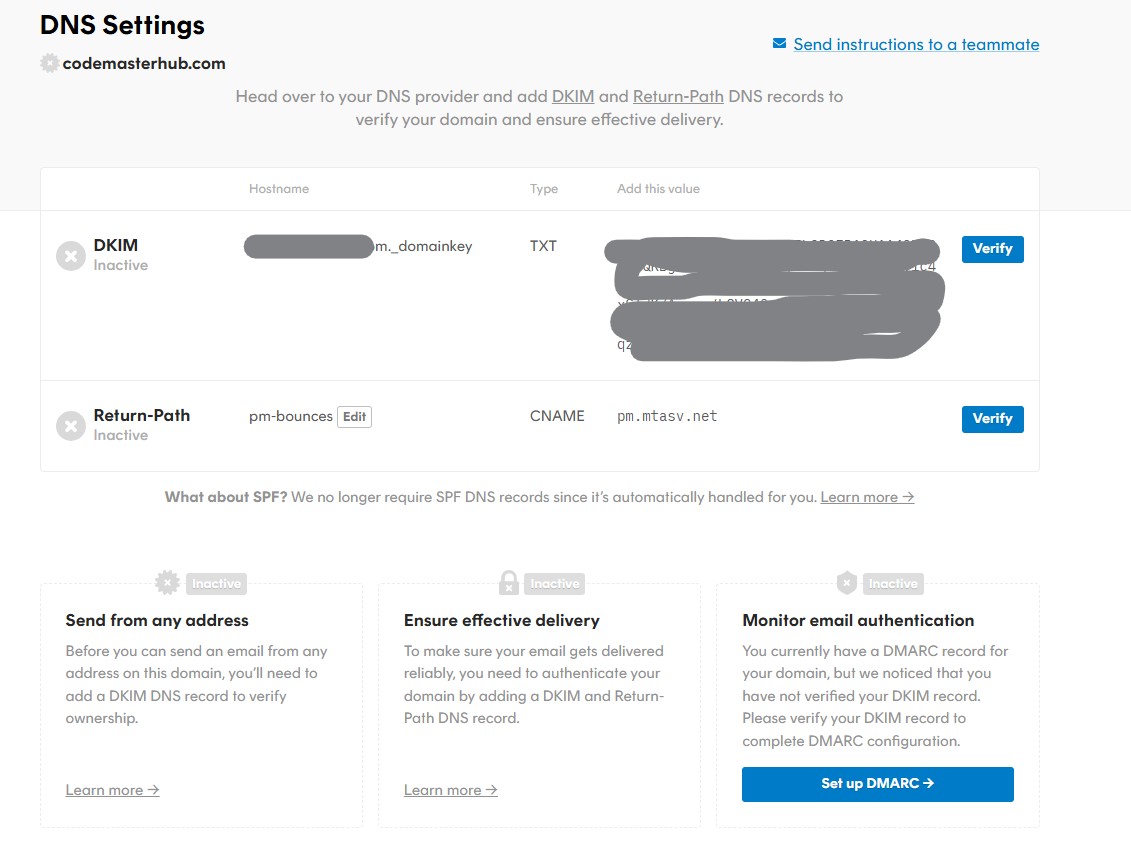
Postmark will show the DNS records you need to add to your domain DNS settings. Add the required DKIM and Return-Path records exactly as provided by Postmark.
Note: Postmark no longer requires an SPF record here, since SPF handling is managed automatically.
After adding the records at your DNS provider, return to this page and click Verify for each record.
Postmark API Token
Finding Your Postmark API Token
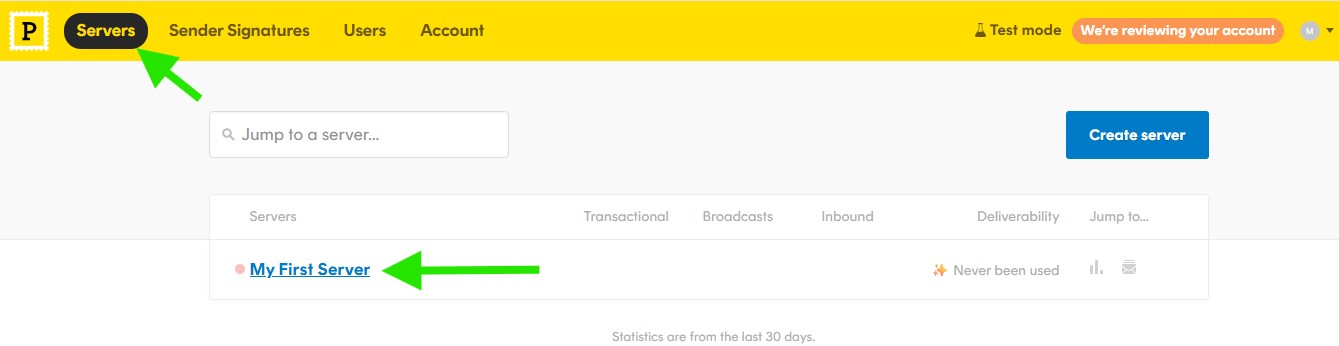
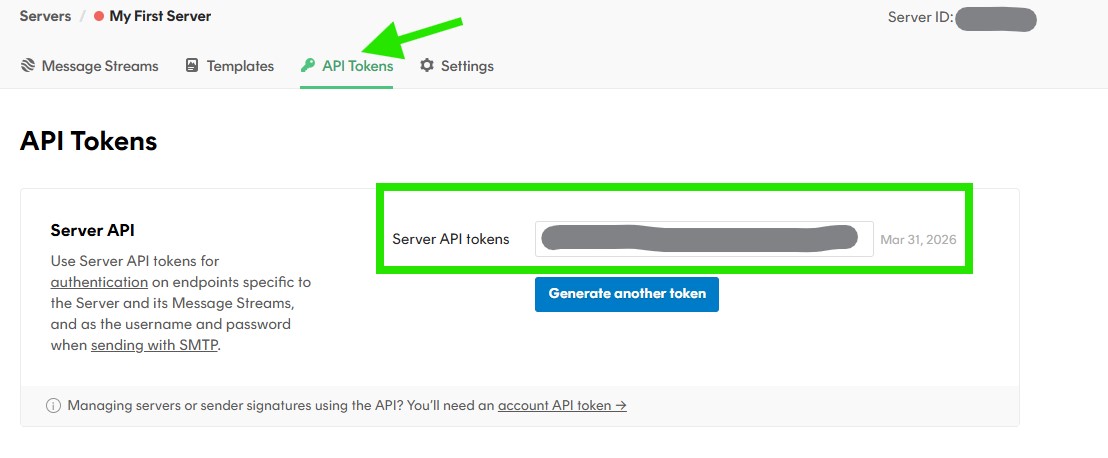
To find your Postmark API token, go to the Servers tab, then click the server you want to use.
Open the API Tokens tab to view your Server API token. Copy this token, you will need it later when configuring Postmark in the Master SMTP plugin.
Postmark Setup in Master SMTP Plugin
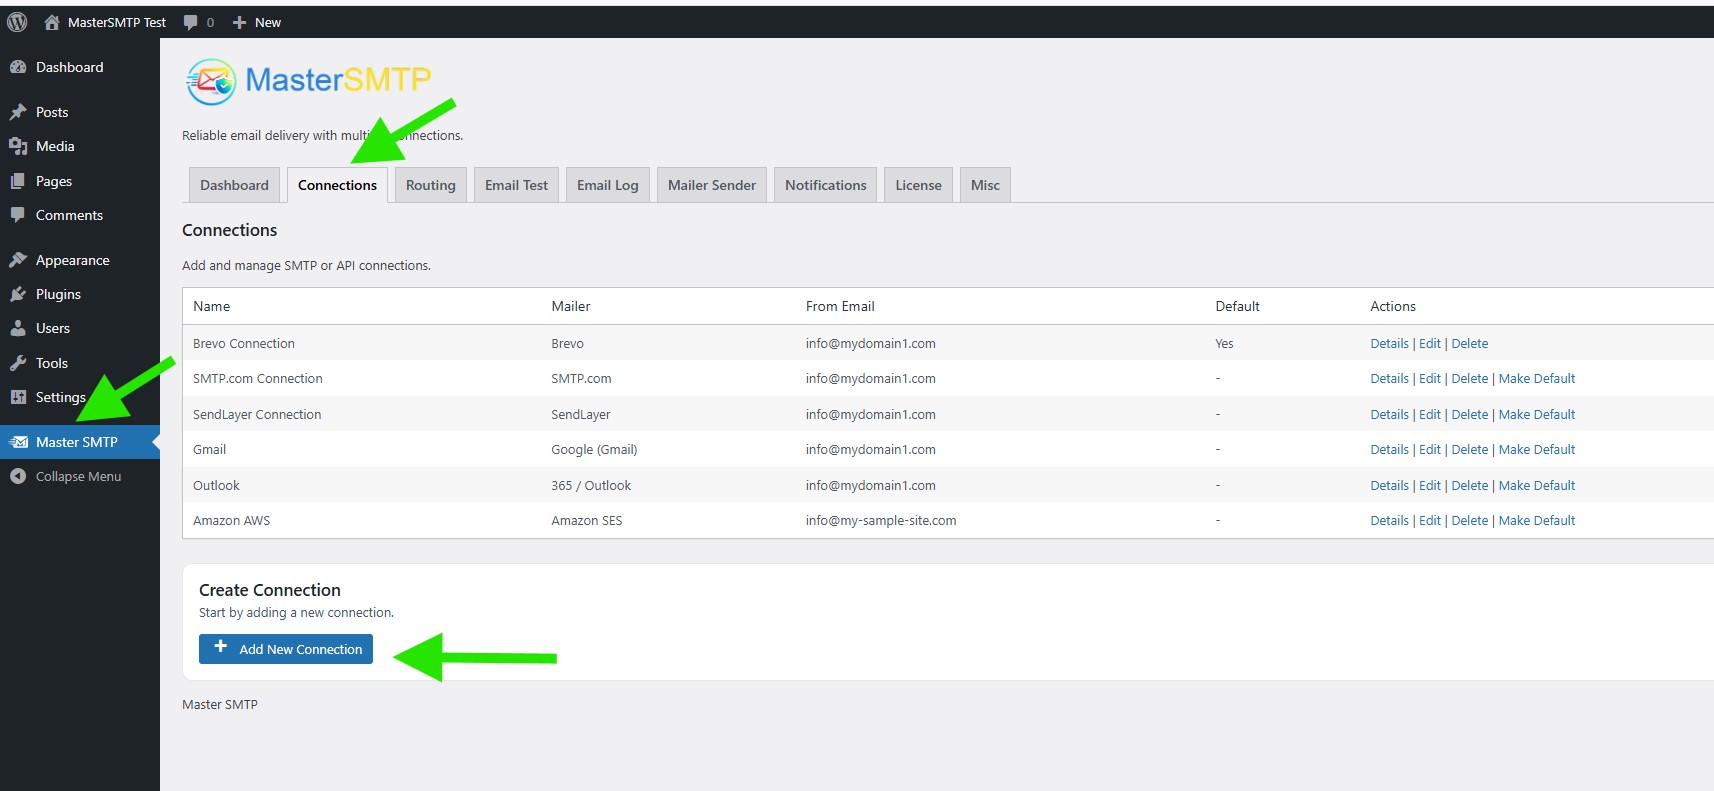
In your WordPress dashboard, go to Master SMTP > Connections, then click Create New Connection.
Configure Connection
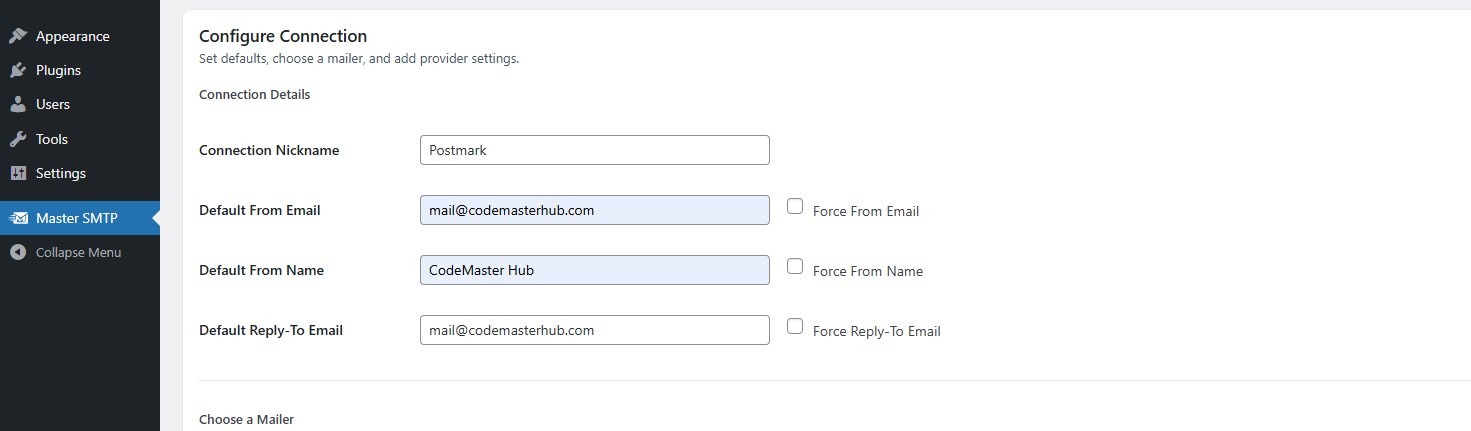
In the Configure Connection section, fill out the Connection Details fields:
Connection Details: Enter a name for this connection. This is only for you, recipients will not see it.
Default From Email: The email address used when an outgoing email does not define a From Email.
Force From Email: If enabled, this From Email will be used for all emails, even if the email has a different From Email.
Default From Name: The name used when an outgoing email does not define a From Name.
Force From Name: If enabled, this From Name will be used for all emails, even if the email has a different From Name.
Default Reply-To Email: The Reply-To address used when an outgoing email does not define a Reply-To Email.
Force Reply-To Email: If enabled, this Reply-To Email will be used for all emails, even if the email has a different Reply-To Email.
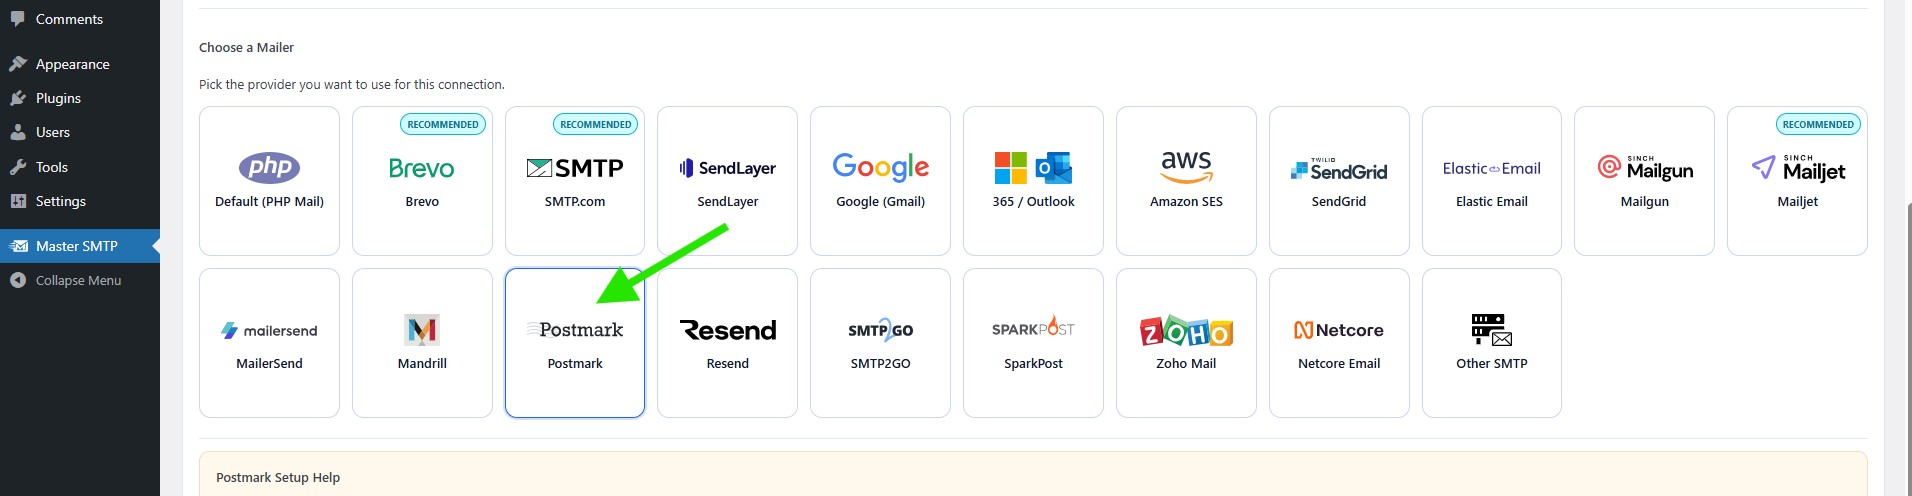
In the Choose a Mailer section, select Postmark from the grid mailer list.
Postmark Settings
In the Postmark Settings section, paste your Server API Token into the matching field.
The Message Stream ID field is optional. Leave it empty to use Postmark’s default transactional stream, or enter a specific Message Stream ID if needed.
If you want to use this as your main mailer, enable Make this the default connection, then click Save Connection.
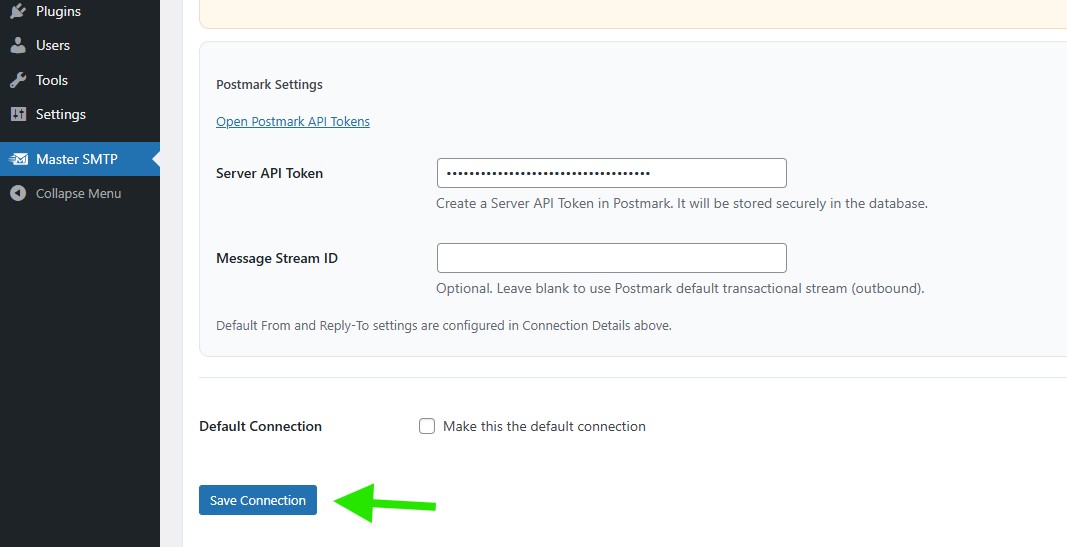
The connection will be added to the Connections list, and you should see Connection saved. at the top of the window.
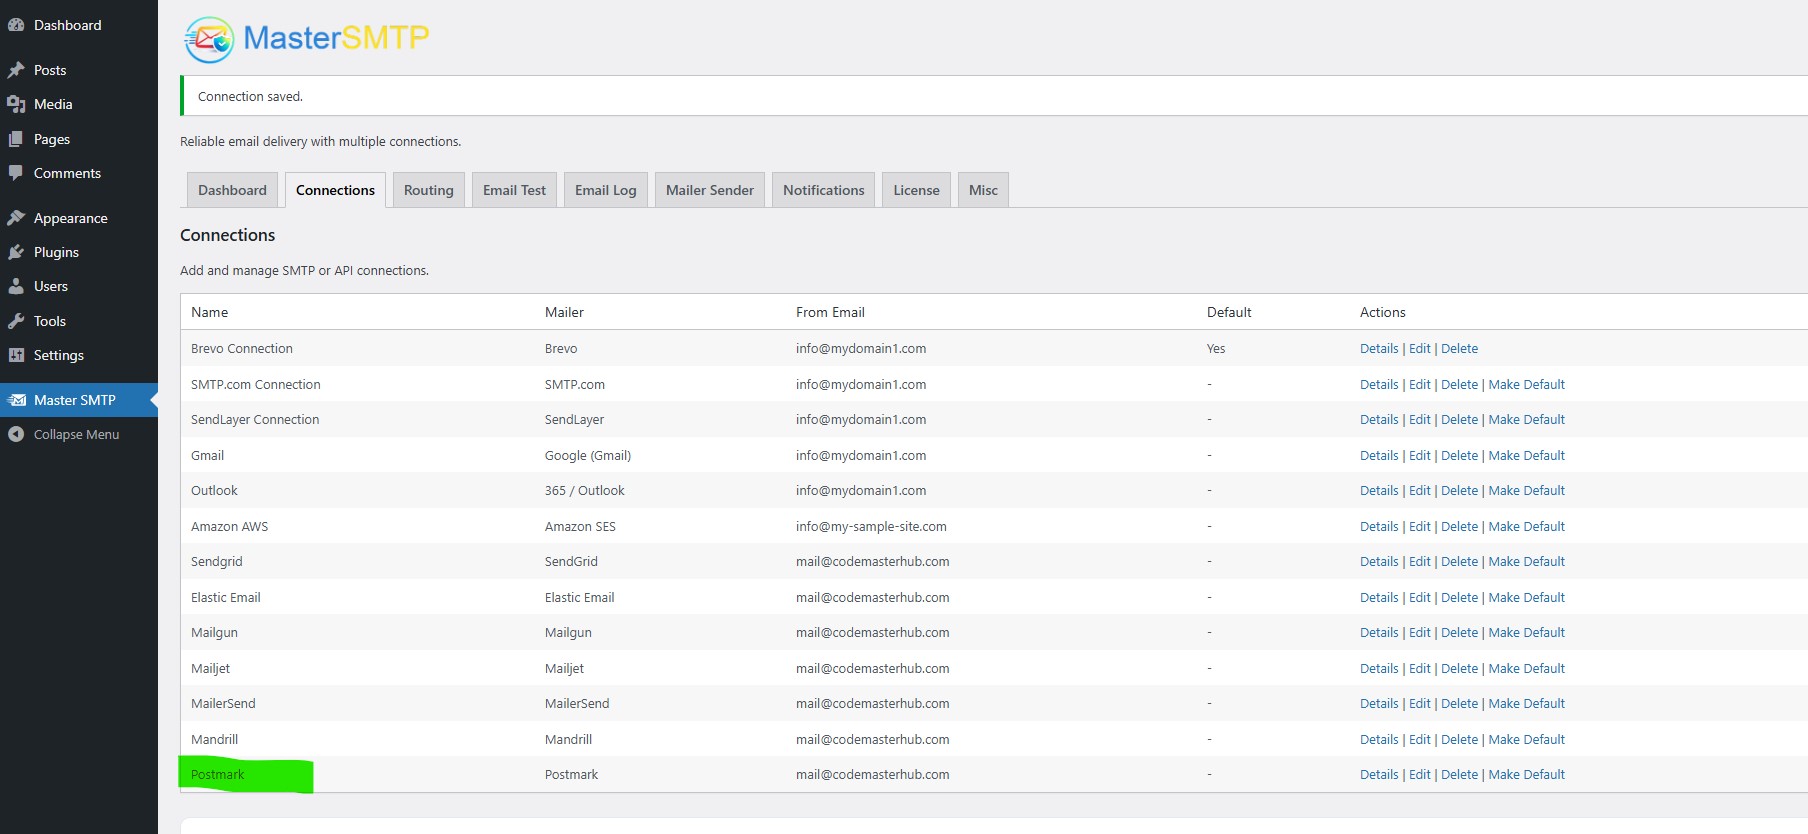
Note: The free version allows you to add only one connection. If you need multiple connections, Conditional Routing, and many other features, you should purchase the Master SMTP Pro.
Test Postmark Connection
After saving your Postmark connection, it is recommended to send a test email to make sure everything is working correctly. This helps confirm that your API Key, and connection settings have been entered properly and that your site can send emails successfully through Postmark SMTP.
For step-by-step instructions, see the test connection guide here: