Table of Contents
What Is the Microsoft 365 / Outlook.com Mailer?
The Microsoft 365 / Outlook.com Mailer lets your WordPress site send email through Microsoft’s mail servers by using a Microsoft 365 business account or an Outlook.com account. In Master SMTP, this mailer can be used for transactional emails such as contact form messages, password resets, notifications, and other website emails.
Microsoft supports authenticated SMTP for both Microsoft 365 and Outlook.com accounts, and Microsoft 365 environments may also use SMTP relay in some setups. This gives you a trusted sending infrastructure backed by Microsoft for outgoing email delivery.
To create the app required for Outlook / Microsoft 365 setup, sign in to the Microsoft Azure portal.
Setting Up Outlook in Master SMTP
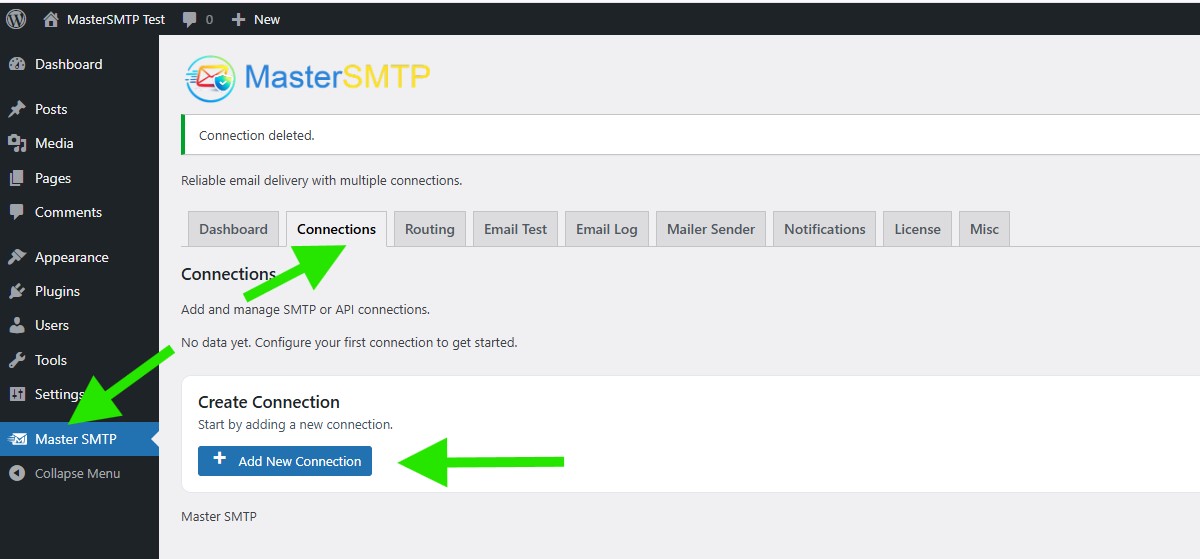
In your WordPress dashboard, go to Master SMTP > Connections, then click Create New Connection.
Configure Connection
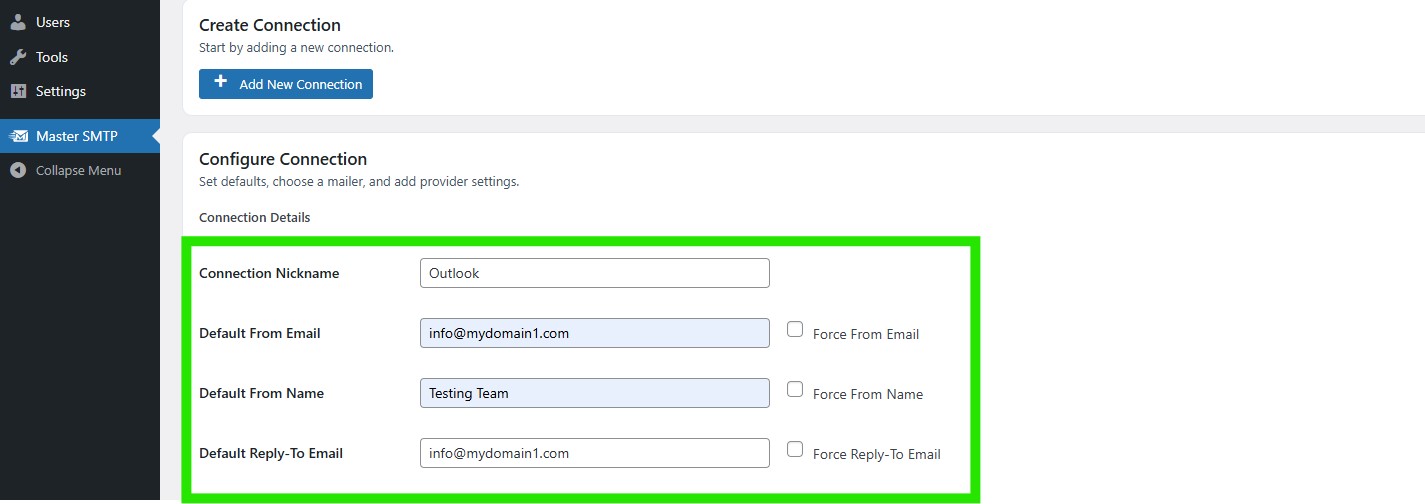
In the Configure Connection section, fill out the Connection Details fields:
Connection Details: Enter a name for this connection. This is only for you, recipients will not see it.
Default From Email: The email address used when an outgoing email does not define a From Email.
Force From Email: If enabled, this From Email will be used for all emails, even if the email has a different From Email.
Default From Name: The name used when an outgoing email does not define a From Name.
Force From Name: If enabled, this From Name will be used for all emails, even if the email has a different From Name.
Default Reply-To Email: The Reply-To address used when an outgoing email does not define a Reply-To Email.
Force Reply-To Email: If enabled, this Reply-To Email will be used for all emails, even if the email has a different Reply-To Email.
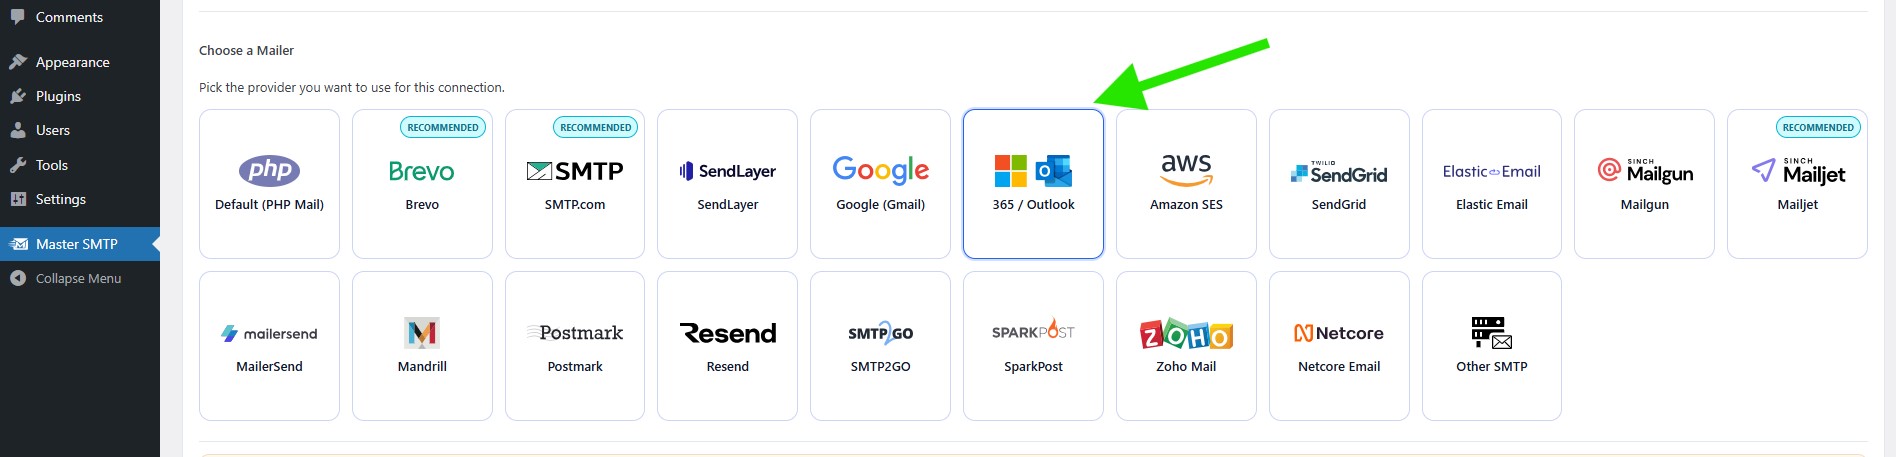
In the Choose a Mailer section, select 365 / Outlook from the grid mailer list.
Configuring a Microsoft Azure Account
To create a Microsoft Azure account, go to:
https://azure.microsoft.com/en-us/free/
Then click Try Azure for free.
If you are asked to sign in, log in with your Microsoft account.
If you do not already have an Azure account, you will be redirected to the Create your Azure free account page. Complete the required fields and follow the on-screen steps to create your account.
Create an Application ID
To create the Application ID required for the Outlook mailer, sign in to your Microsoft Azure account and open the Azure portal.
In the top search bar, search for App registrations, then click it from the results.
On the App registrations page, click New registration.
In the registration form, enter a name for your application. This name is only for your own reference in Microsoft Azure.
Under Supported account types, select Accounts in any organizational directory and personal Microsoft accounts.
If this option is not available in your account, select Accounts in any organizational directory instead.
In the Redirect URI section, choose Web from the platform dropdown.
Authorized Redirect URI: Copy the redirect URI shown in your Master SMTP Outlook settings and paste it into the URI field.
After completing the form, click Register.
Once the app is created, you will be redirected to the Overview page.
There, locate the Application (client) ID and copy it. You will use this value in the next steps inside Master SMTP.
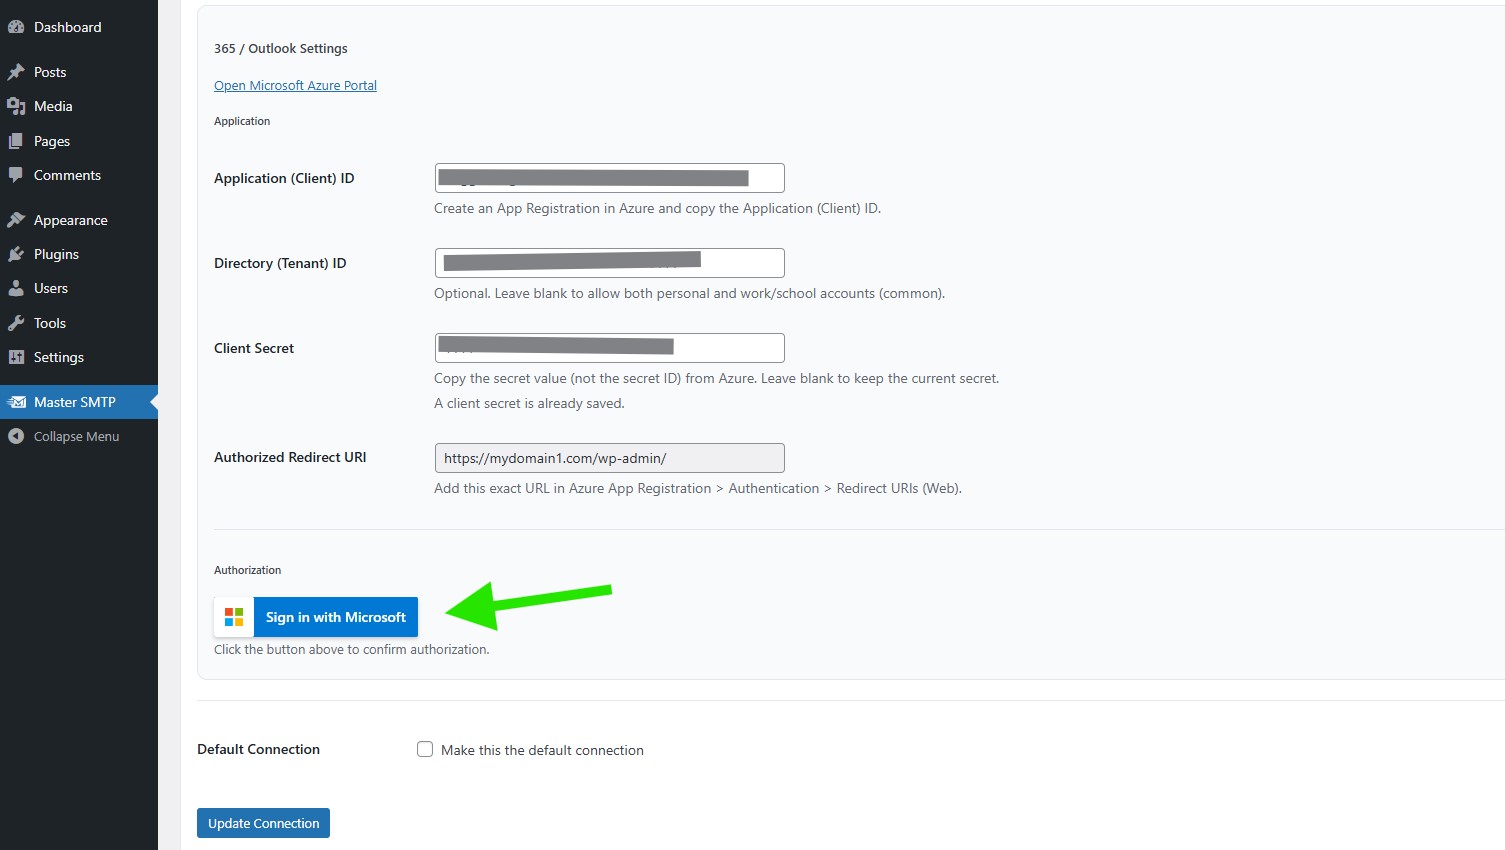
In the Microsoft 365 / Outlook Settings section, paste the Application (Client) ID, Directory (Tenant) ID, and Client Secret you copied earlier.
Default Connection: Enable this option if you want this connection to be used as your default sender.
Then click Save Connection.
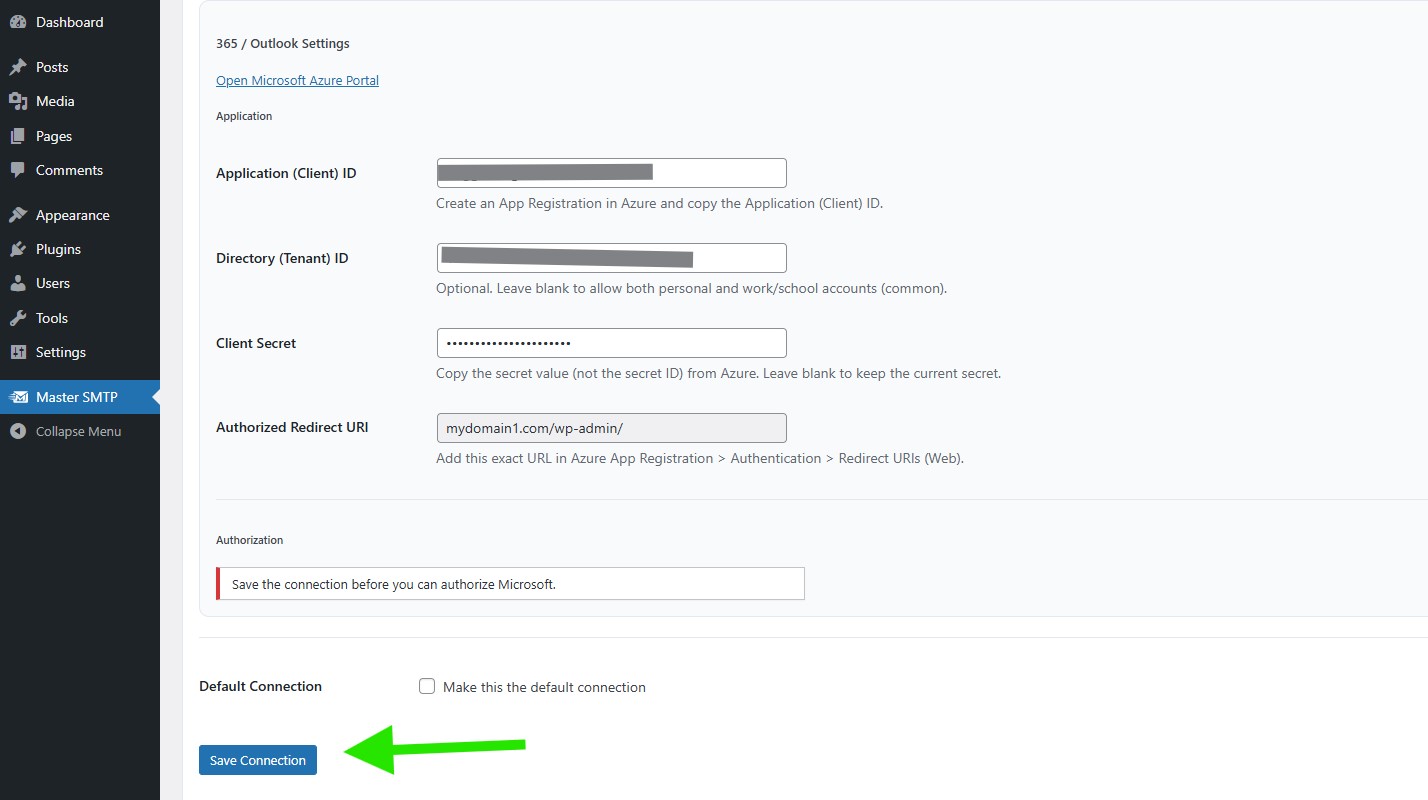
After saving the connection, the Sign in with Microsoft button will appear. Click it to connect your Microsoft account and complete the authorization process.
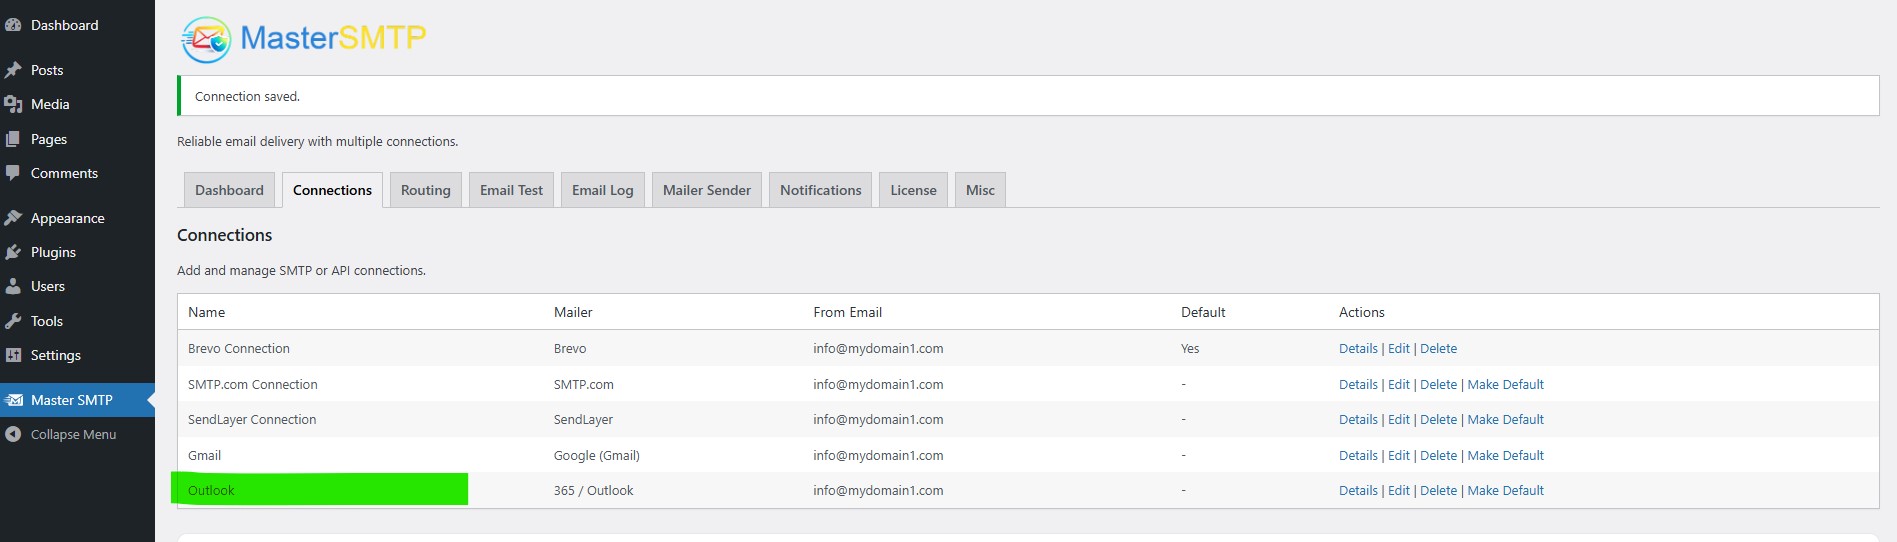
The connection will be added to the Connections list, and you should see Connection saved. at the top of the window.
Note: The free version allows you to add only one connection. If you need multiple connections, Conditional Routing, and many other features, you should purchase the Master SMTP Pro.
Test Outlook Connection
After saving your Outlook connection, it is recommended to send a test email to make sure everything is working correctly. This helps confirm that your Client ID , Client Secret, and connection settings have been entered properly and that your site can send emails successfully through Outlook SMTP.
For step-by-step instructions, see the test connection guide here: