Table of Contents
What is Netcore?
Netcore is a customer engagement and email delivery platform that helps businesses send emails at scale. Its email service supports SMTP relay, APIs, and related tools for delivering transactional, triggered, and campaign emails reliably.
For Master SMTP users, Netcore can be used as a third-party mailer to send WordPress emails through Netcore’s infrastructure instead of your web server. This can help with authentication, delivery tracking, and more reliable email sending for things like contact forms, notifications, and account emails.
Create a Netcore account
Create a Netcore API Key
To create your Netcore API key, visit https://cpaas.netcorecloud.com/app/settings/integration. You can also access this page from your Netcore dashboard by hovering over the Settings icon, then going to Integration and selecting API.
On the API page, click Create API Key, then copy and save the generated key. You will need this API key later when configuring Netcore in the Master SMTP plugin.
Netcore Setup in Master SMTP Plugin
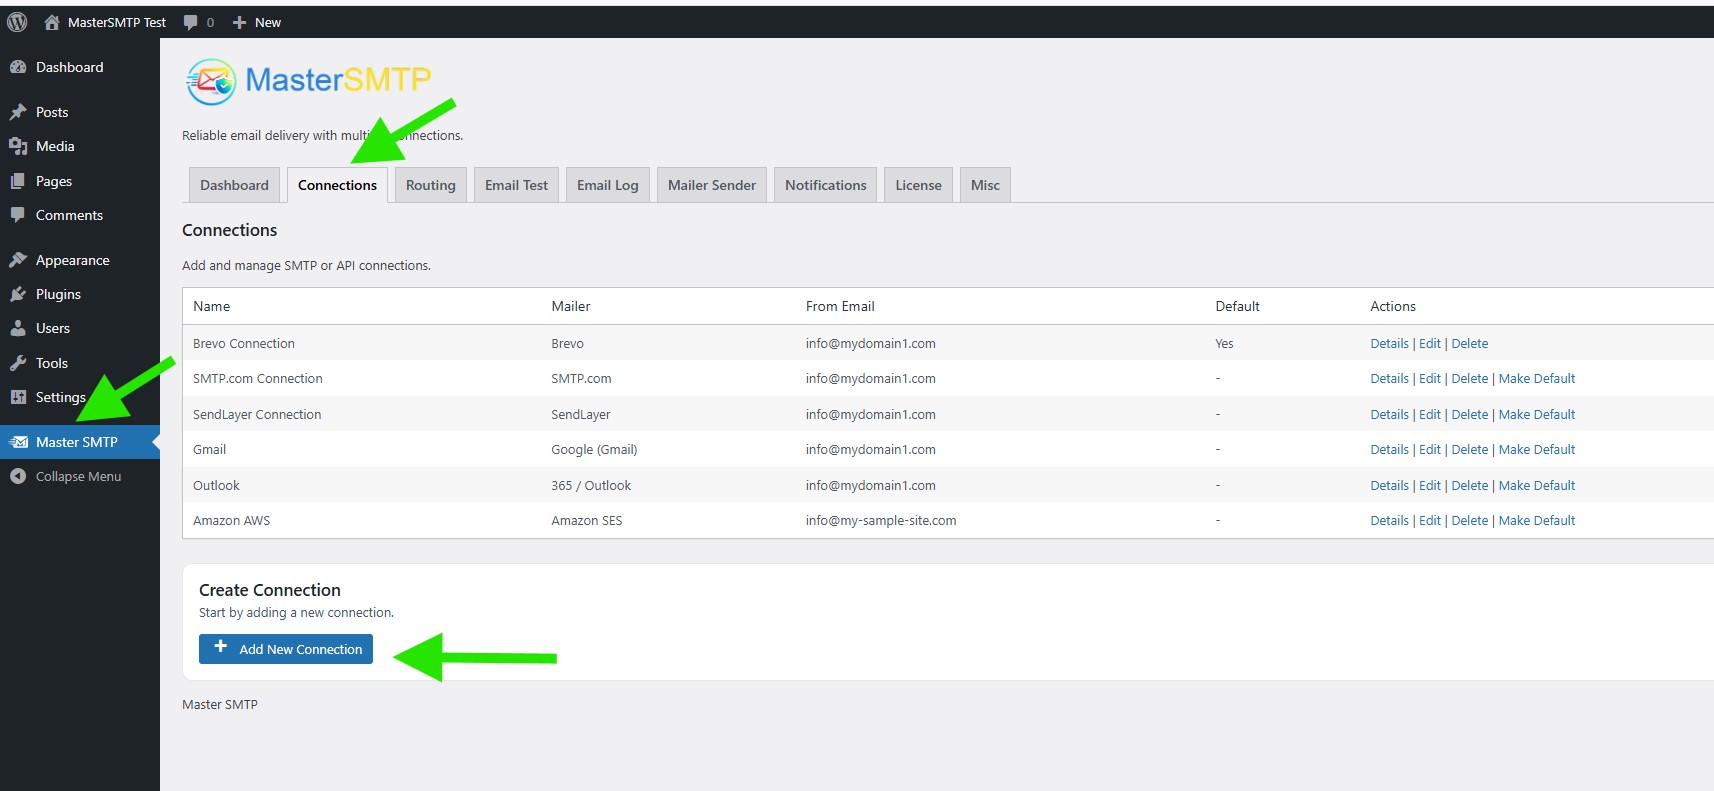
In your WordPress dashboard, go to Master SMTP > Connections, then click Create New Connection.
Configure Connection
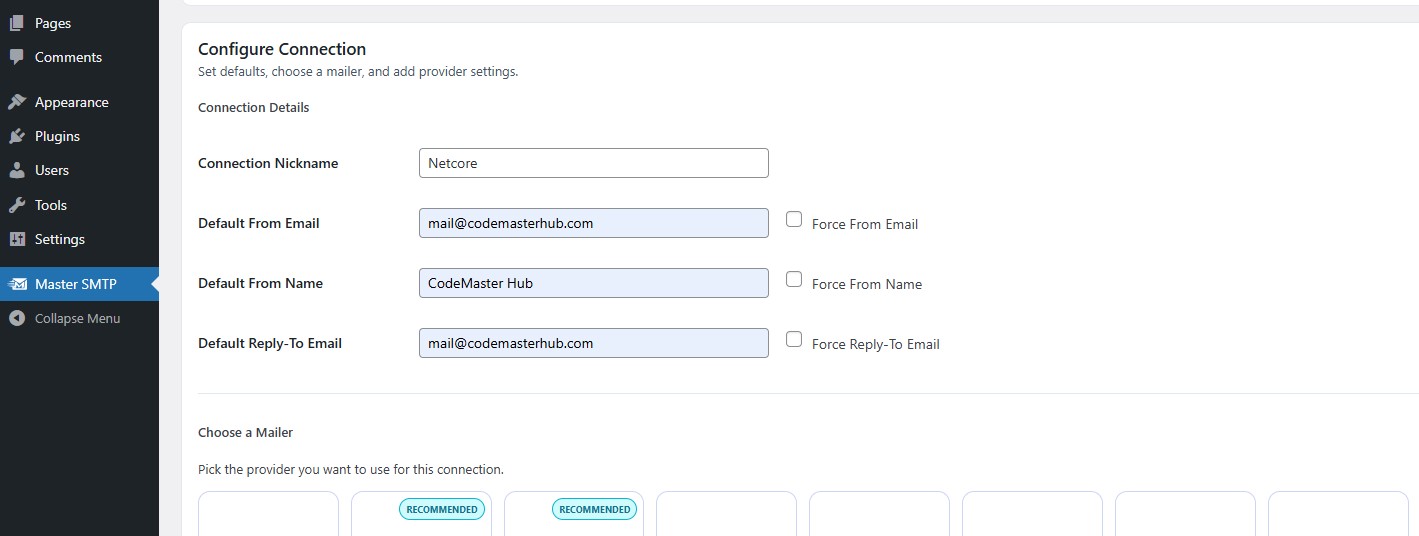
In the Configure Connection section, fill out the Connection Details fields:
Connection Details: Enter a name for this connection. This is only for you, recipients will not see it.
Default From Email: The email address used when an outgoing email does not define a From Email.
Force From Email: If enabled, this From Email will be used for all emails, even if the email has a different From Email.
Default From Name: The name used when an outgoing email does not define a From Name.
Force From Name: If enabled, this From Name will be used for all emails, even if the email has a different From Name.
Default Reply-To Email: The Reply-To address used when an outgoing email does not define a Reply-To Email.
Force Reply-To Email: If enabled, this Reply-To Email will be used for all emails, even if the email has a different Reply-To Email.
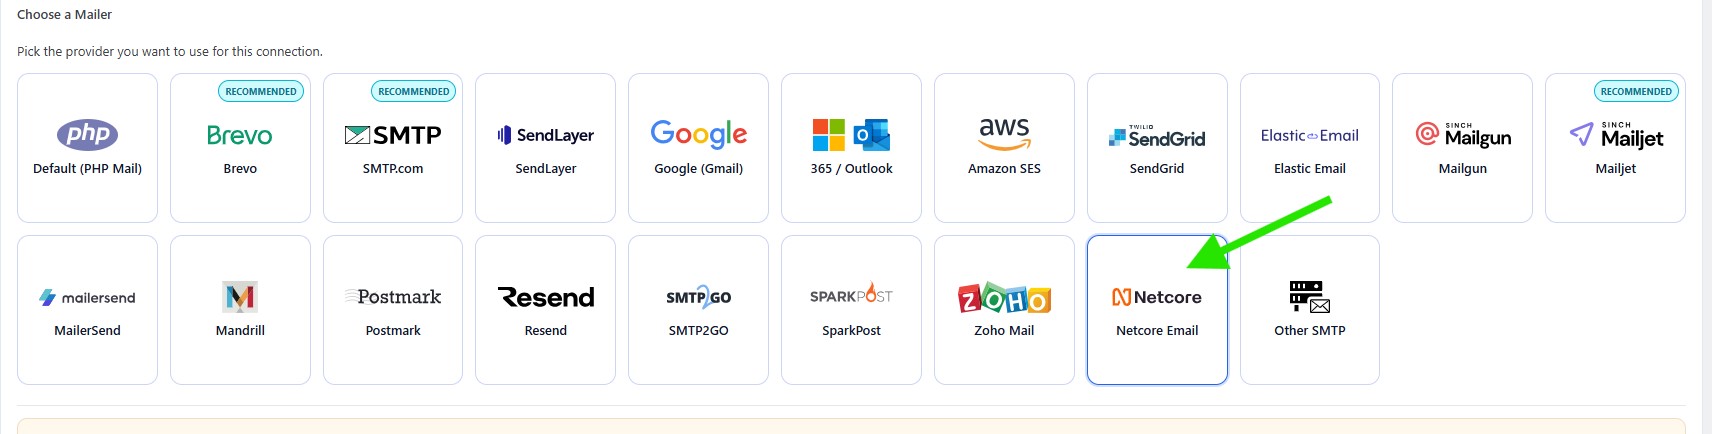
In the Choose a Mailer section, select Zoho Mail from the grid mailer list.
Netcore Email Settings
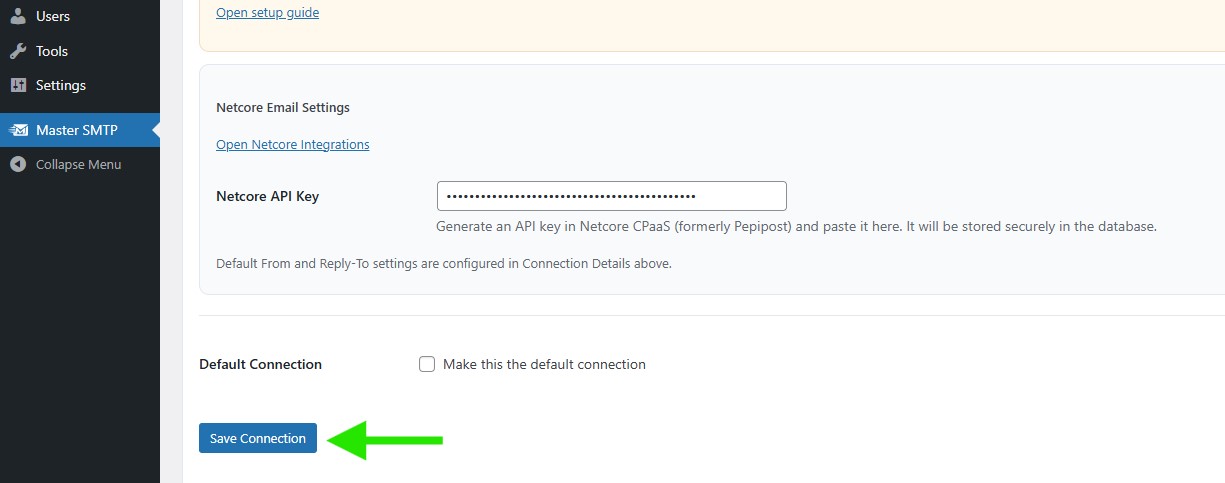
In the Netcore Email Settings section, paste your Netcore API Key into the field provided.
After entering the API key, click Save Connection to store your settings and complete the Netcore mailer setup.
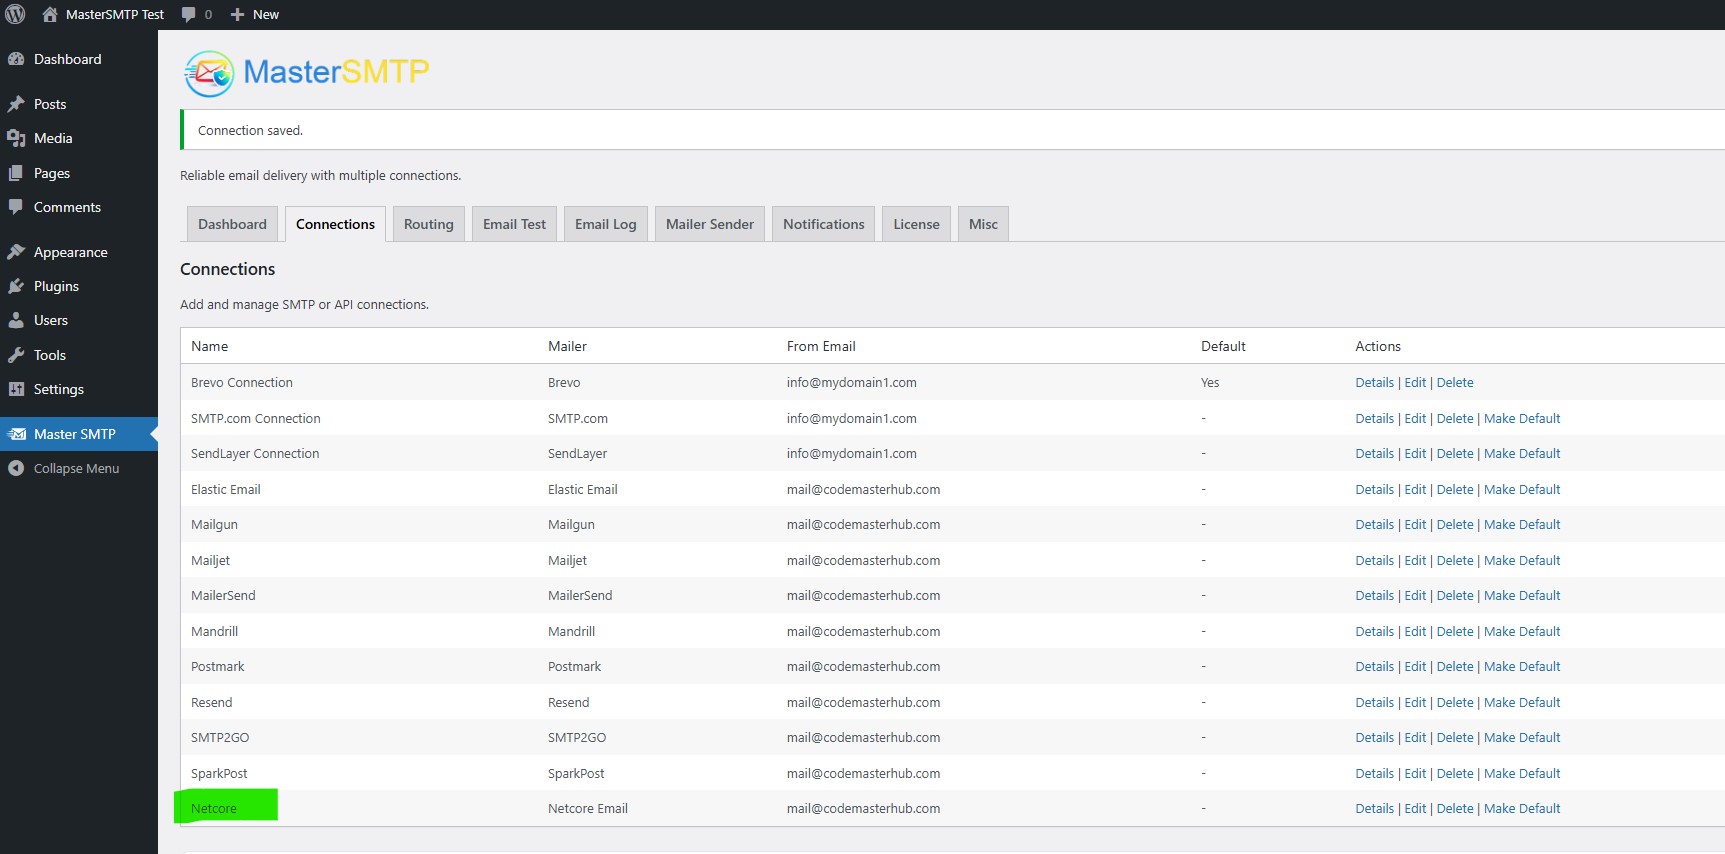
The connection will be added to the Connections list, and you should see Connection saved. at the top of the window.
Note: The free version allows you to add only one connection. If you need multiple connections, Conditional Routing, and many other features, you should purchase the Master SMTP Pro.
Test Netcore Email Connection
After saving your Netcore connection, it is recommended to send a test email to make sure everything is working correctly. This helps confirm that your connection settings have been entered properly and that your site can send emails successfully through Netcore Email SMTP.
For step-by-step instructions, see the test connection guide here: