Table of Contents
What is Mailgun?
Mailgun is an email delivery platform built for developers and businesses that need to send, receive, and track emails at scale. It offers tools for transactional email delivery, analytics, and email infrastructure, with support for both API-based sending and standard SMTP sending.
Mailgun SMTP is Mailgun’s SMTP relay service, which lets you send emails through Mailgun without running your own mail server. It uses domain-based SMTP credentials, supports TLS, and works with apps, websites, and plugins that send email through standard SMTP authentication, which makes it a practical option for WordPress sites using Master SMTP.
Creating a Mailgun Account
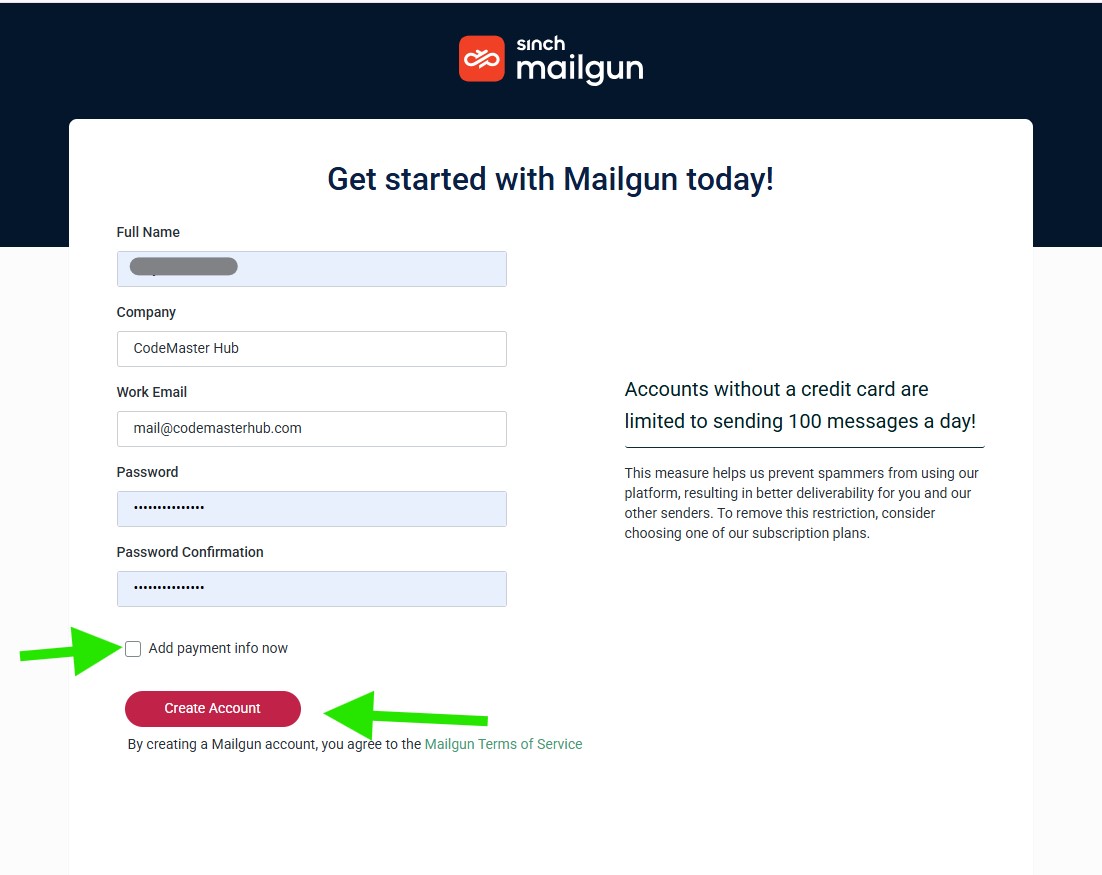
To create a new Mailgun account, open the Mailgun signup page:
https://signup.mailgun.com/new/signup
- Enter your Full Name.
- Enter your Company name.
- Enter your Work Email address.
- Create your Password.
- Confirm your Password.
- Click the Create Account button to continue.
Note: Uncheck Add payment info now if you want to start with the free plan that allows up to 100 messages per day.
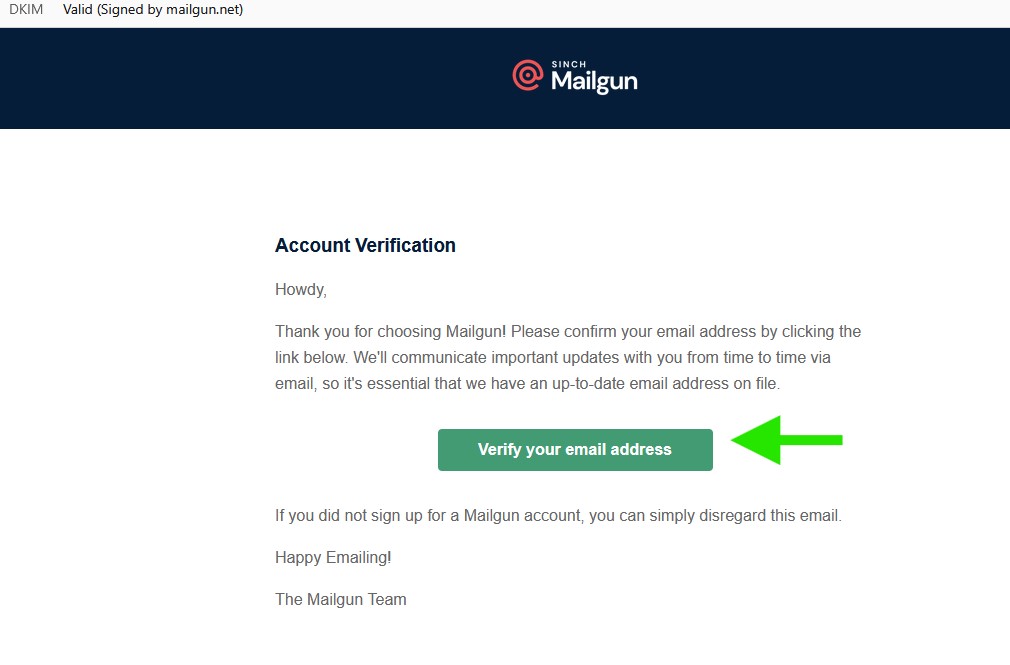
Verify Your Email Address
After creating your Mailgun account, Mailgun will send a verification email to the address you used during signup.
- Open your email inbox.
- Find the email from Mailgun with the account verification message.
- Open the email and click the Verify your email address button.
Note: If you do not see the email, check your spam or junk folder.
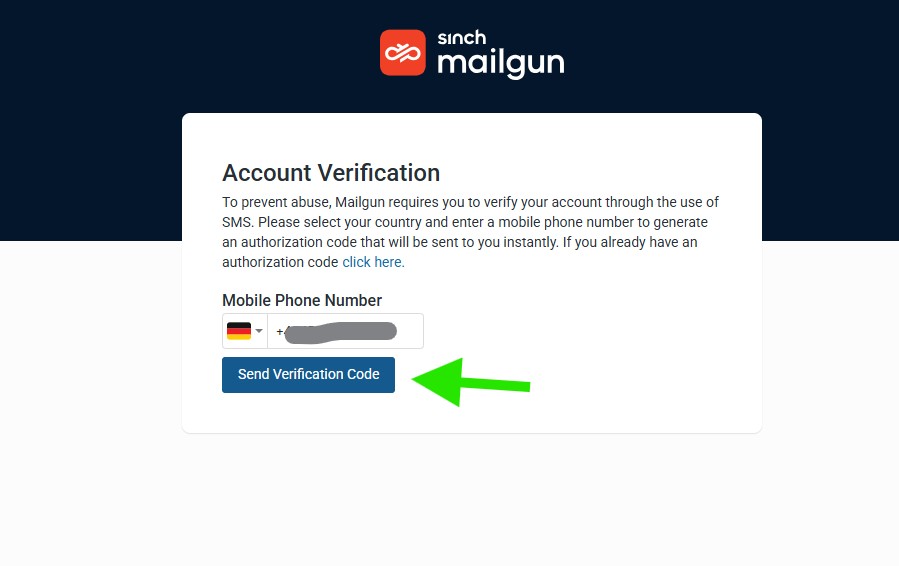
Verify Your Phone Number
After verifying your email address, Mailgun will ask you to complete account verification by SMS.
- Select your country code.
- Enter your mobile phone number.
- Click the Send Verification Code button.
- Check your phone for the SMS verification code.
- Enter the code to complete the verification process.
Note: Mailgun requires phone verification to help prevent abuse and secure new accounts.
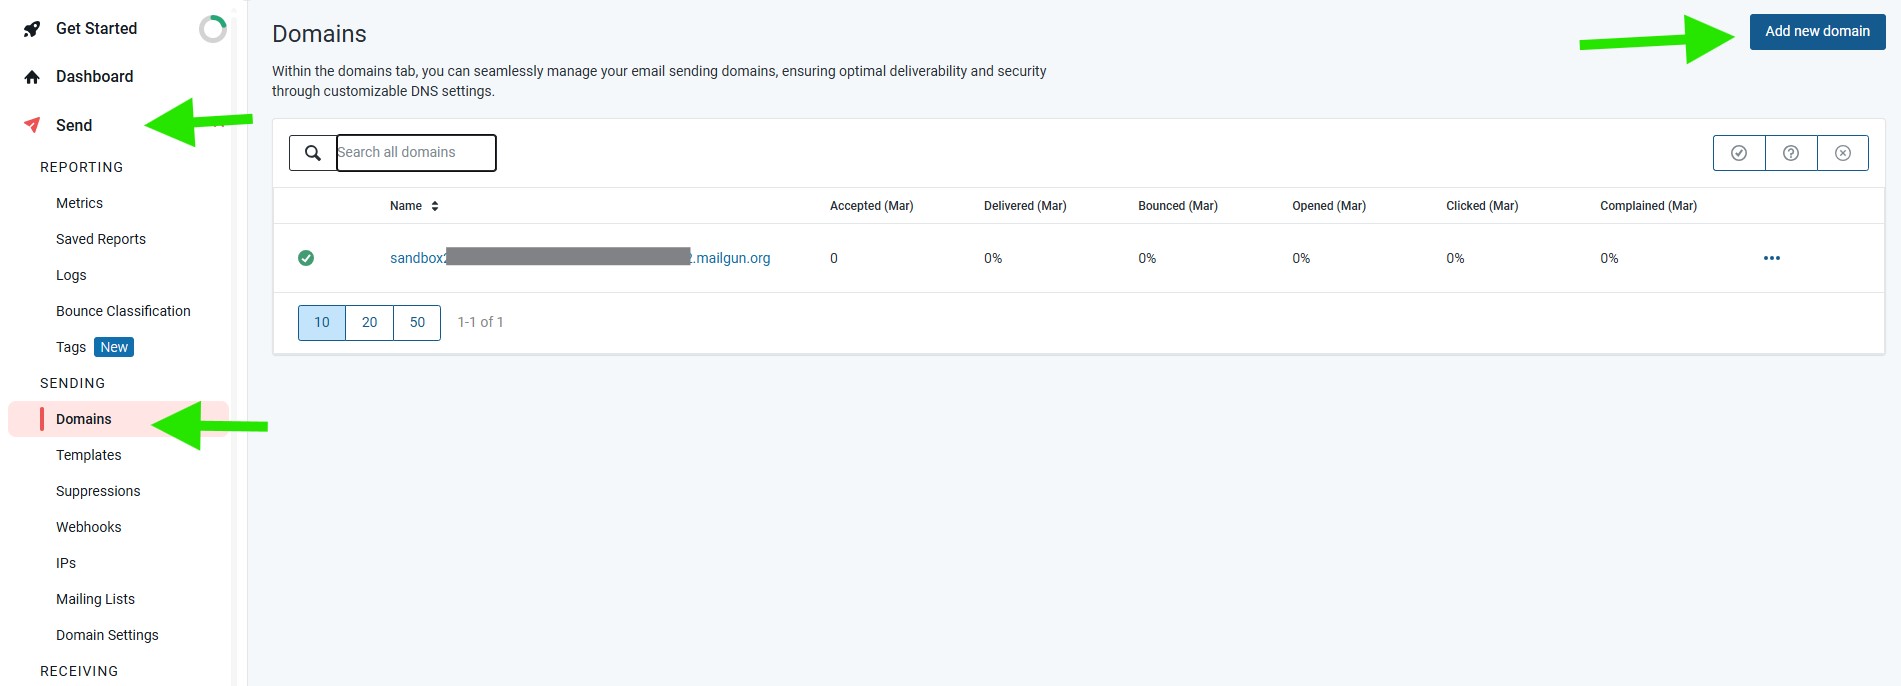
Adding a Domain
After completing account verification, you need to add your sending domain in Mailgun.
- In your Mailgun dashboard, click Send in the left sidebar.
- Click Domains.
- Click the Add new domain button.
This will open the domain setup screen, where you can add and configure your domain for sending emails.
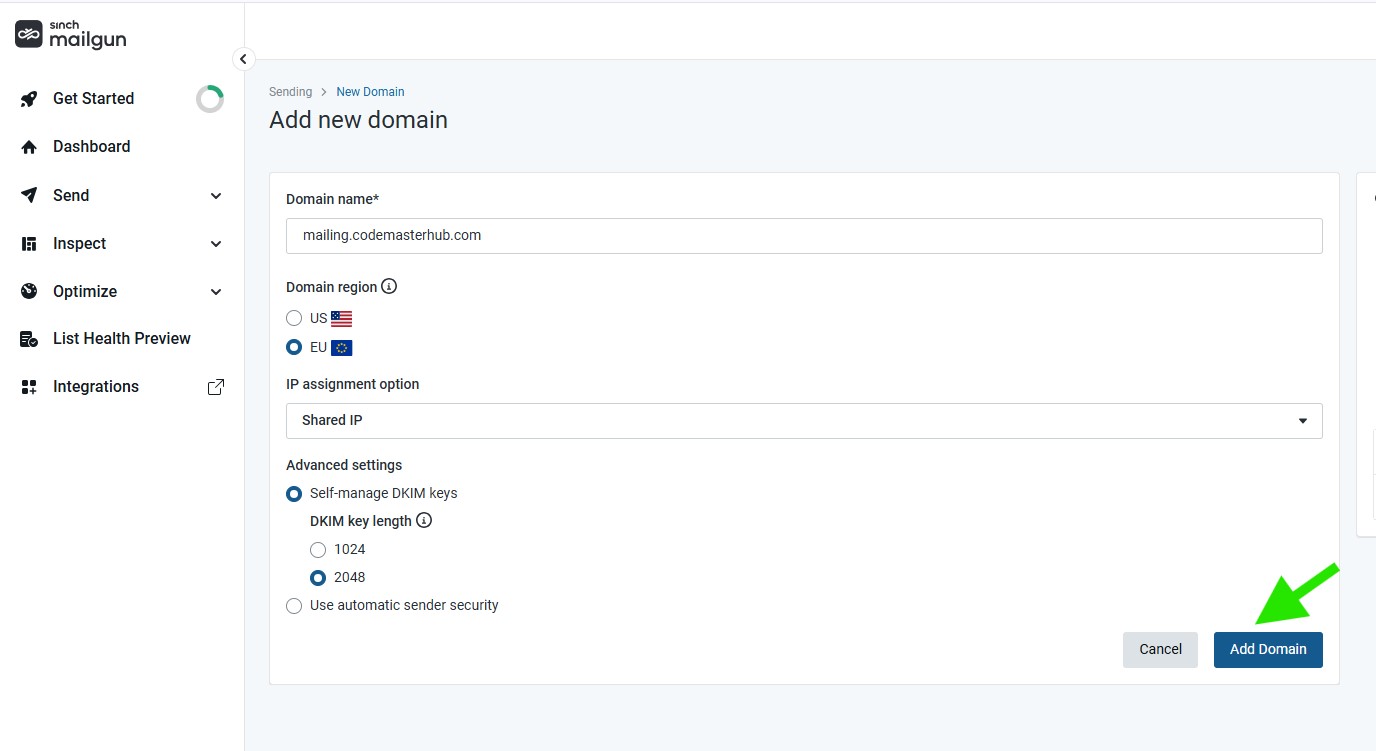
Add new domain
On the Add new domain screen, enter the domain you want to use with Mailgun.
- In the Domain name field, enter your domain or subdomain.
- Select your Domain region.
- Choose your IP assignment option.
- Review the Advanced settings if needed.
- Click the Add Domain button.
Note: Mailgun recommends using a subdomain such as mg.yourdomain.com. Using a subdomain can still allow you to send emails from your root domain, depending on your configuration.
Important: If you use a subdomain, make sure to configure the MX records for that subdomain for optimal delivery.
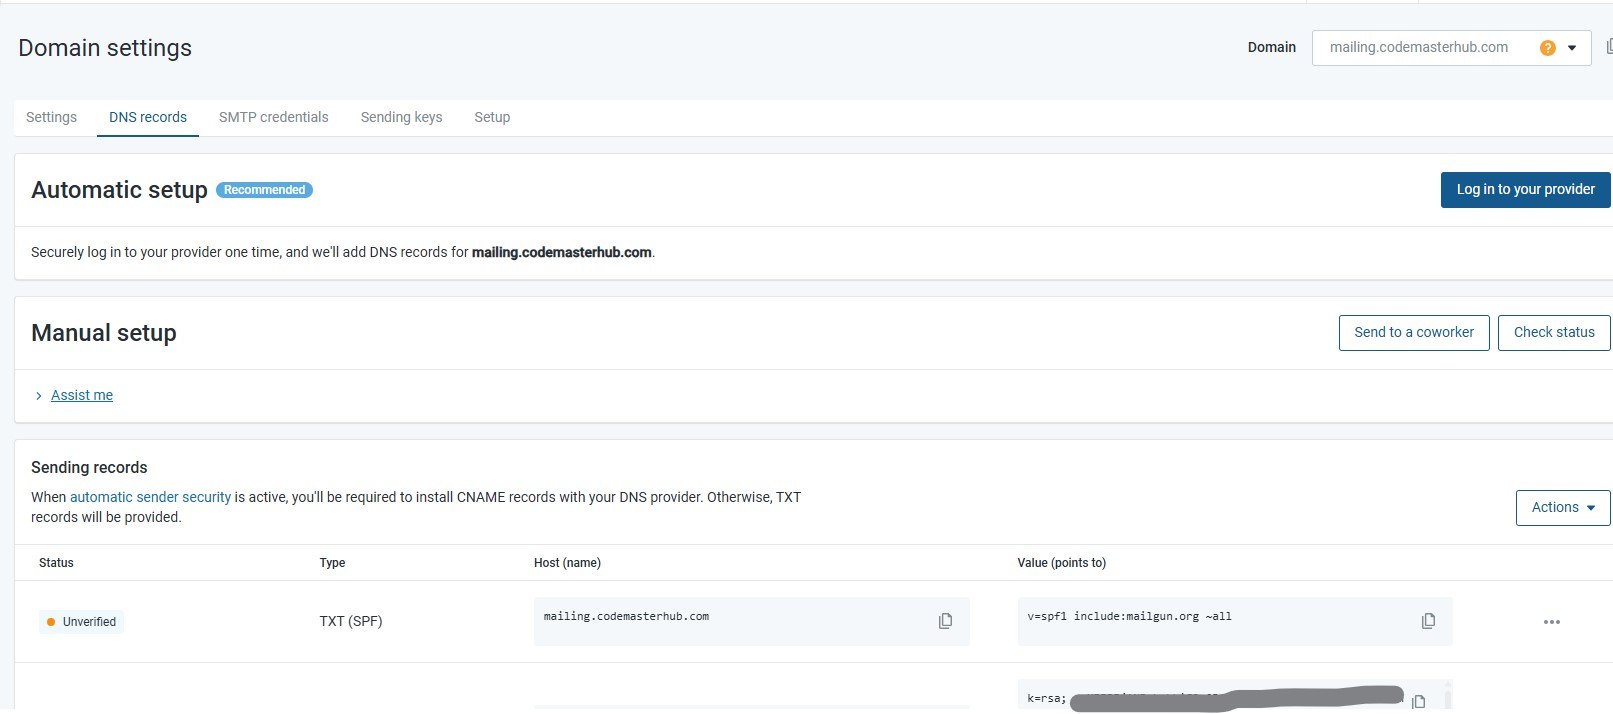
Domain settings
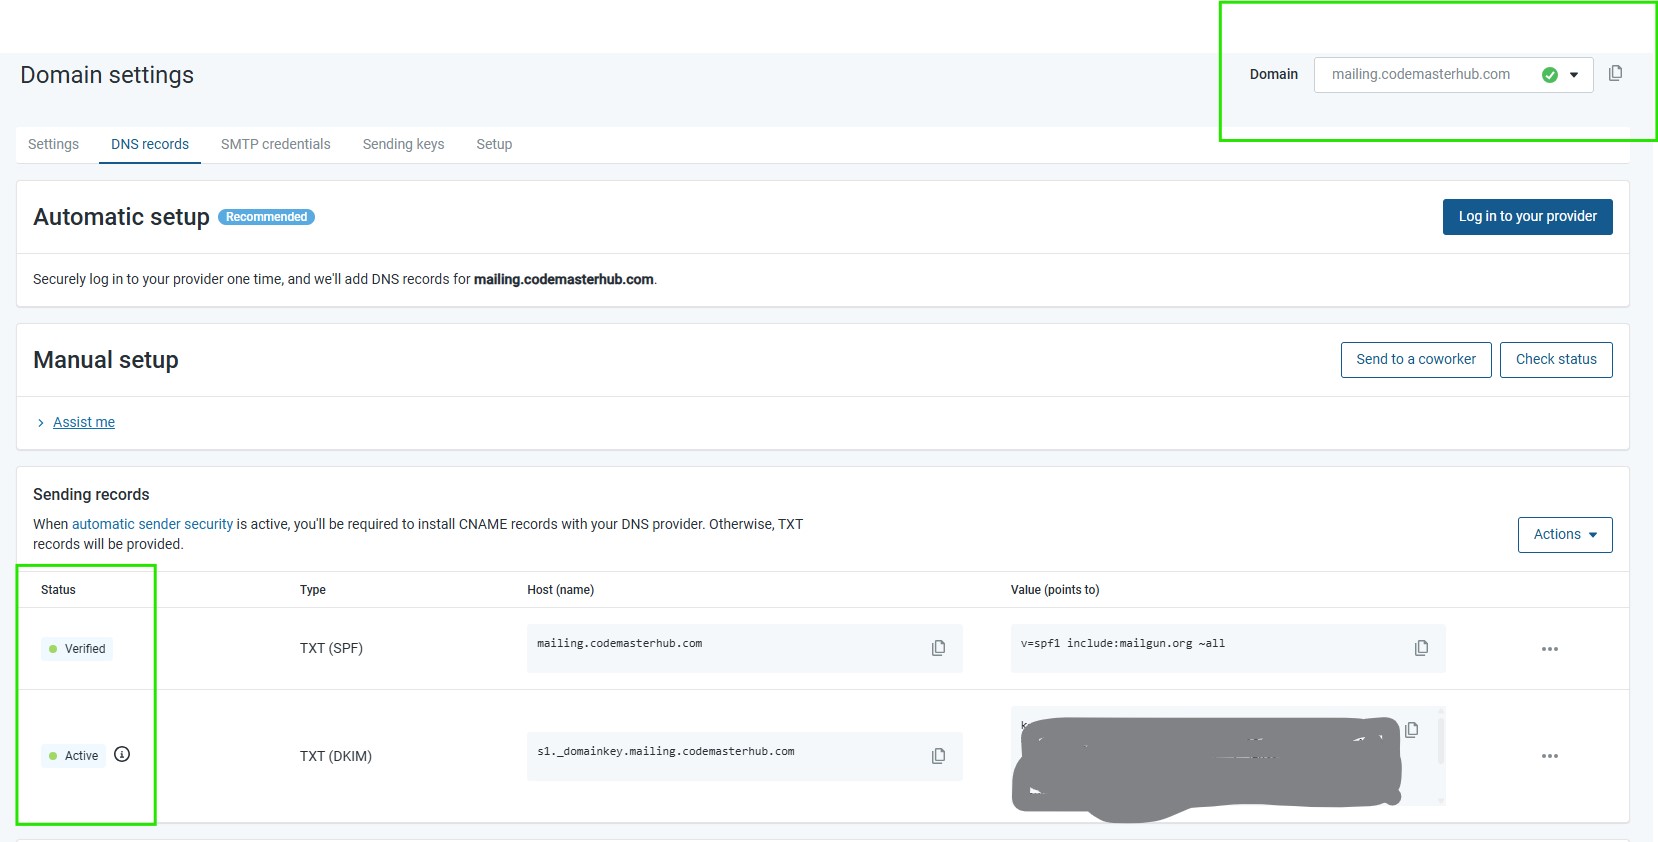
After adding your domain, Mailgun will open the Domain settings page, where you can configure the required DNS records.
You can choose one of these setup methods:
- Automatic setup: Click Log in to your provider and let Mailgun add the DNS records automatically, if your DNS provider is supported.
- Manual setup: Copy the required DNS records from Mailgun and add them manually in your domain DNS zone.
Under the DNS records tab, Mailgun will display the records you need to add, such as SPF and DKIM.
Note: If you prefer full control or your DNS provider is not supported for automatic setup, use the manual setup option and enter the records yourself.
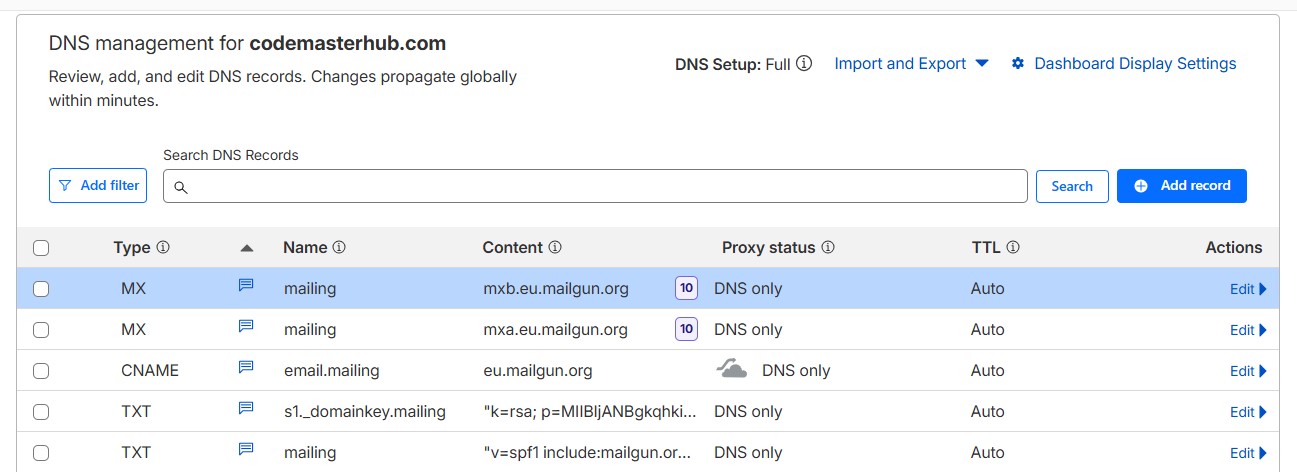
The screenshot below shows the Mailgun DNS records added manually in Cloudflare. Make sure the CNAME record is set to DNS only and is not proxied.
Check domain status
After adding the DNS records to your domain, return to the Mailgun Domain settings page and click the Check status button.
Mailgun will verify the records and update the domain status after the DNS changes are detected.
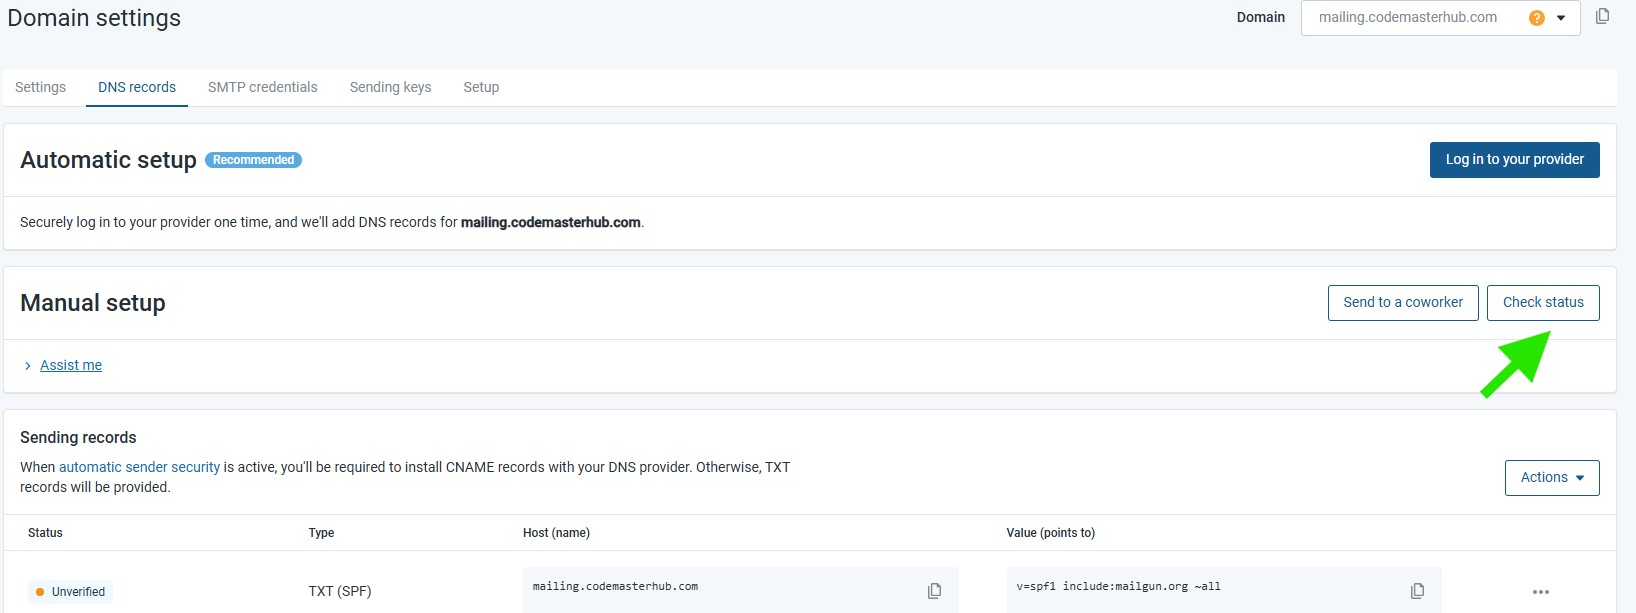
If the domain verification is successful, you will see a green check icon next to the domain name, and the DNS records in the table will show statuses such as Verified or Active.
Create Mailgun API Key
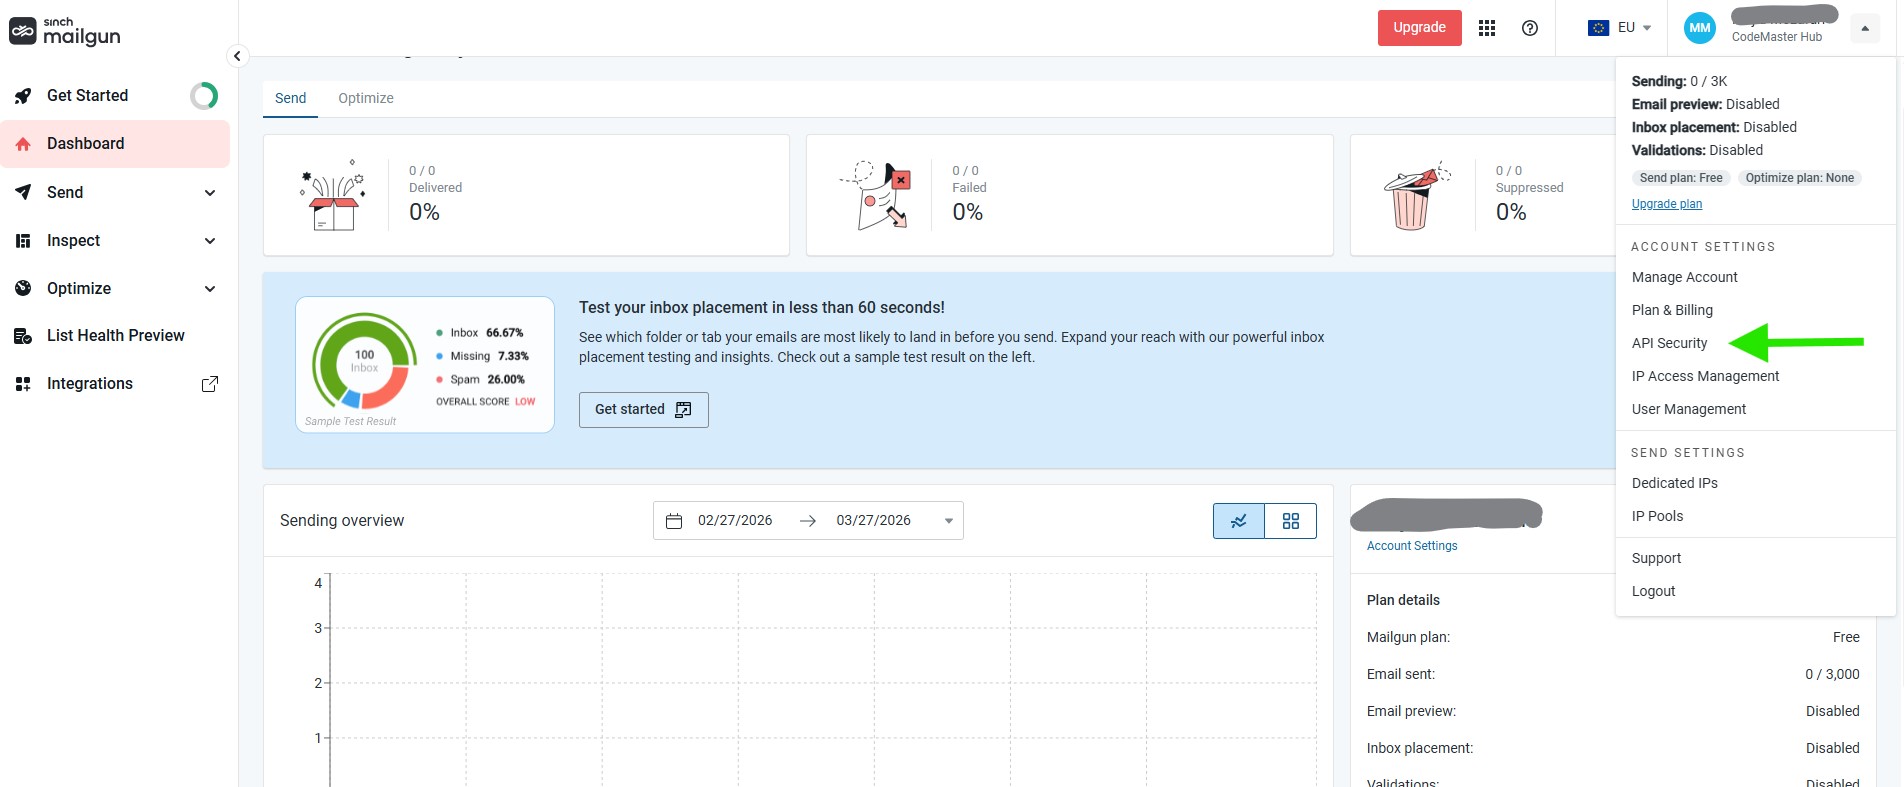
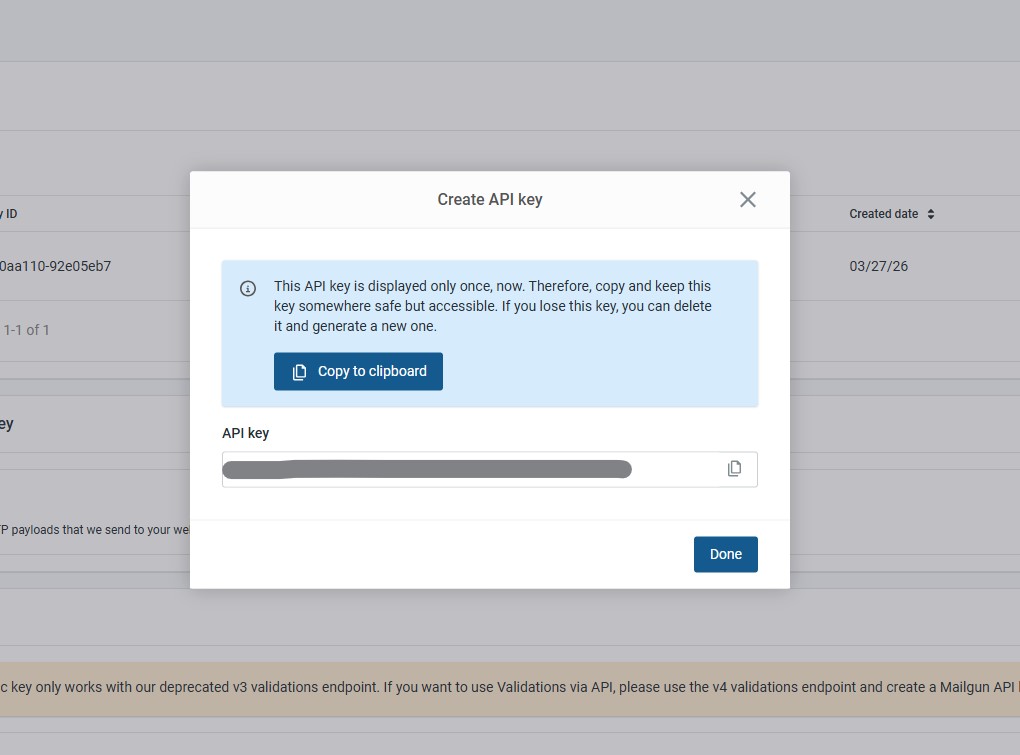
To create a Mailgun API key, click the arrow next to your profile name in the top right corner to open the account menu, then click API Security.
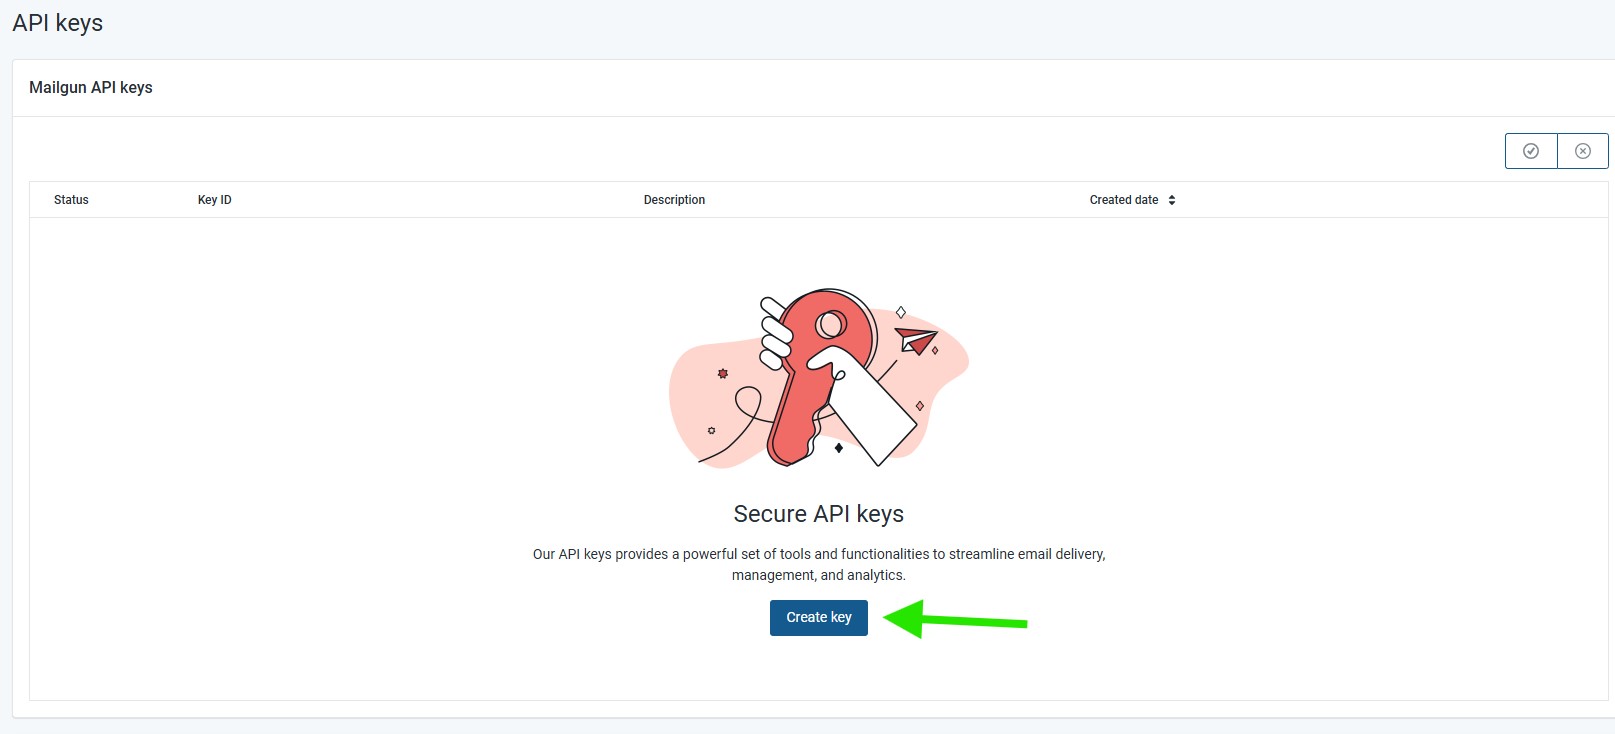
On the API keys page, click the Create key button.
In the popup, enter a description for the API key, for example API Key for Master SMTP Plugin, then click Create Key.
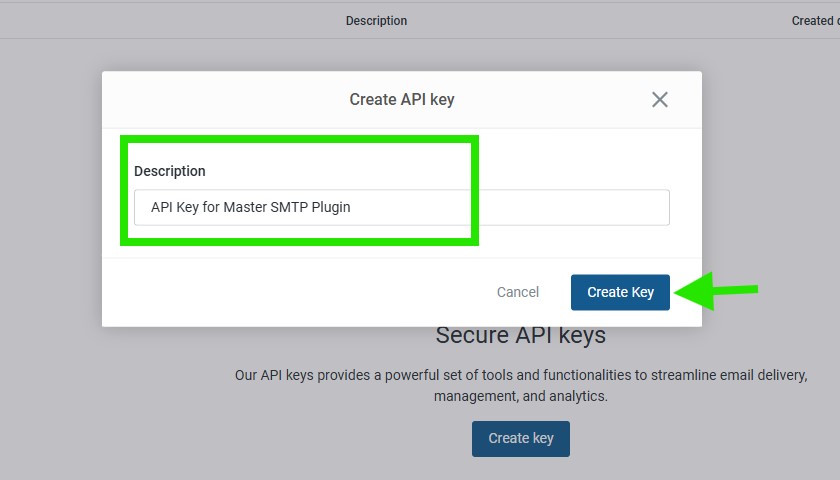
Copy the API key and save it in a safe place. You will need it in the next step when configuring Mailgun in the Master SMTP plugin.
Mailgun Setup in Master SMTP Plugin
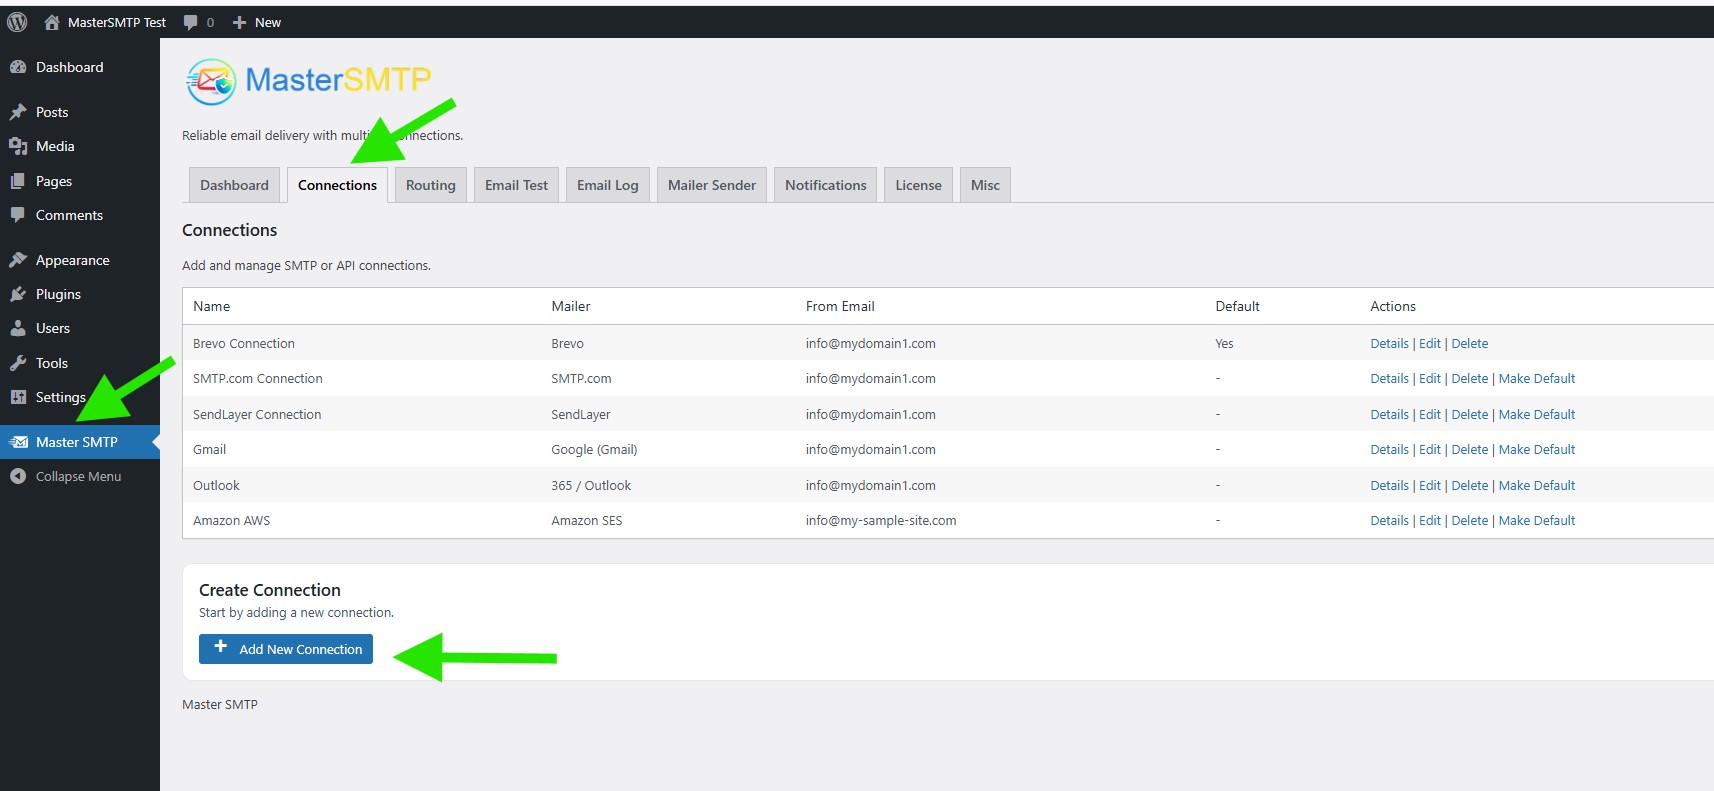
In your WordPress dashboard, go to Master SMTP > Connections, then click Create New Connection.
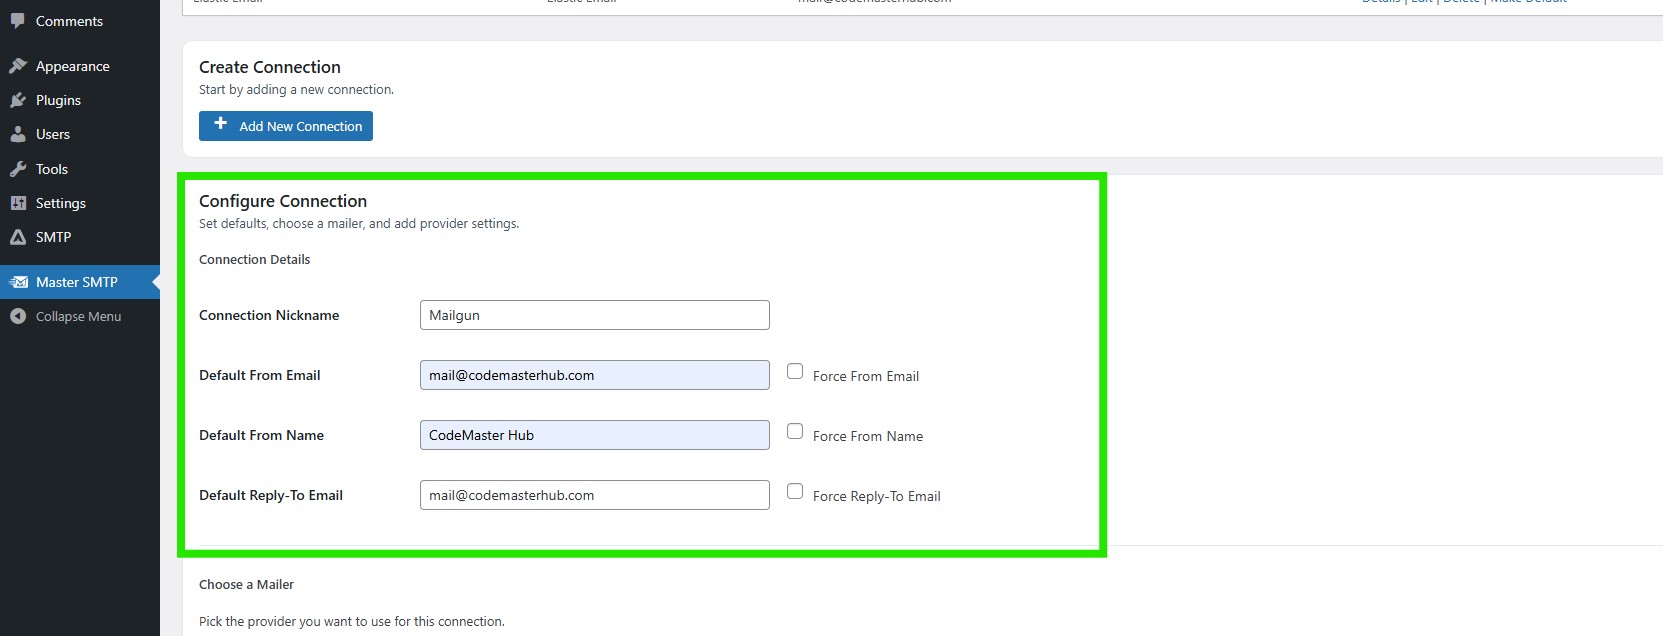
Configure Connection
In the Configure Connection section, fill out the Connection Details fields:
Connection Details: Enter a name for this connection. This is only for you, recipients will not see it.
Default From Email: The email address used when an outgoing email does not define a From Email.
Force From Email: If enabled, this From Email will be used for all emails, even if the email has a different From Email.
Default From Name: The name used when an outgoing email does not define a From Name.
Force From Name: If enabled, this From Name will be used for all emails, even if the email has a different From Name.
Default Reply-To Email: The Reply-To address used when an outgoing email does not define a Reply-To Email.
Force Reply-To Email: If enabled, this Reply-To Email will be used for all emails, even if the email has a different Reply-To Email.
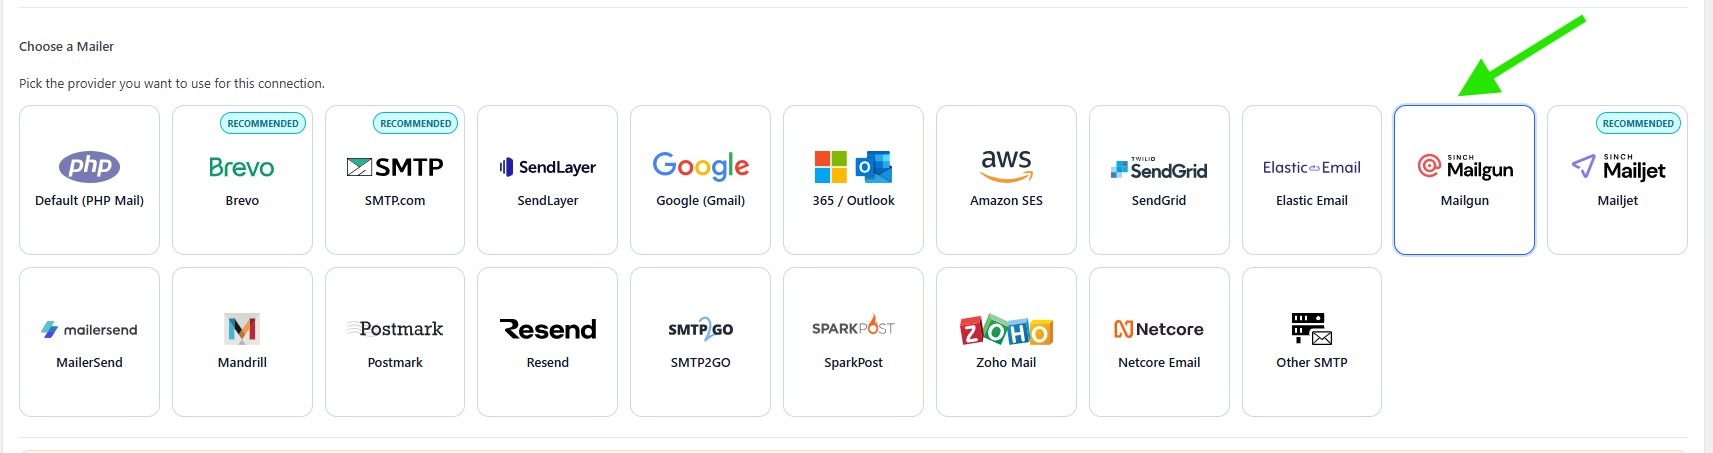
In the Choose a Mailer section, select Mailgun from the grid mailer list.
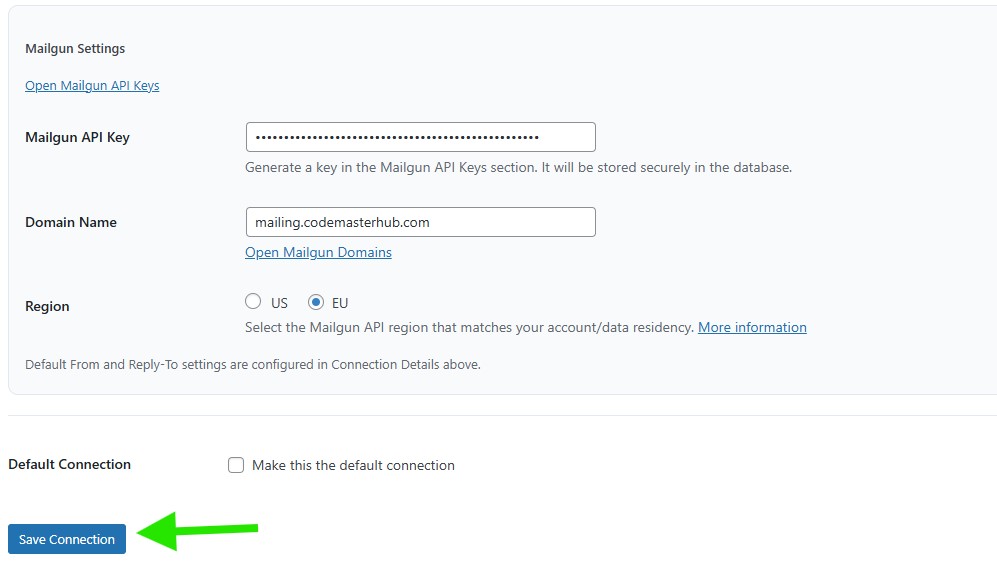
Mailgun Settings
In the Mailgun Settings section, enter your Mailgun details:
- Mailgun API Key: Paste the API key you copied from your Mailgun account.
- Domain Name: Enter the Mailgun sending domain you added and verified.
- Region: Select the Mailgun region that matches your account, either US or EU.
If you want to use this connection as your main mailer, enable Make this the default connection under Default Connection.
After entering the details, click the Save Connection button.
The connection will be added to the Connections list, and you should see Connection saved. at the top of the window.
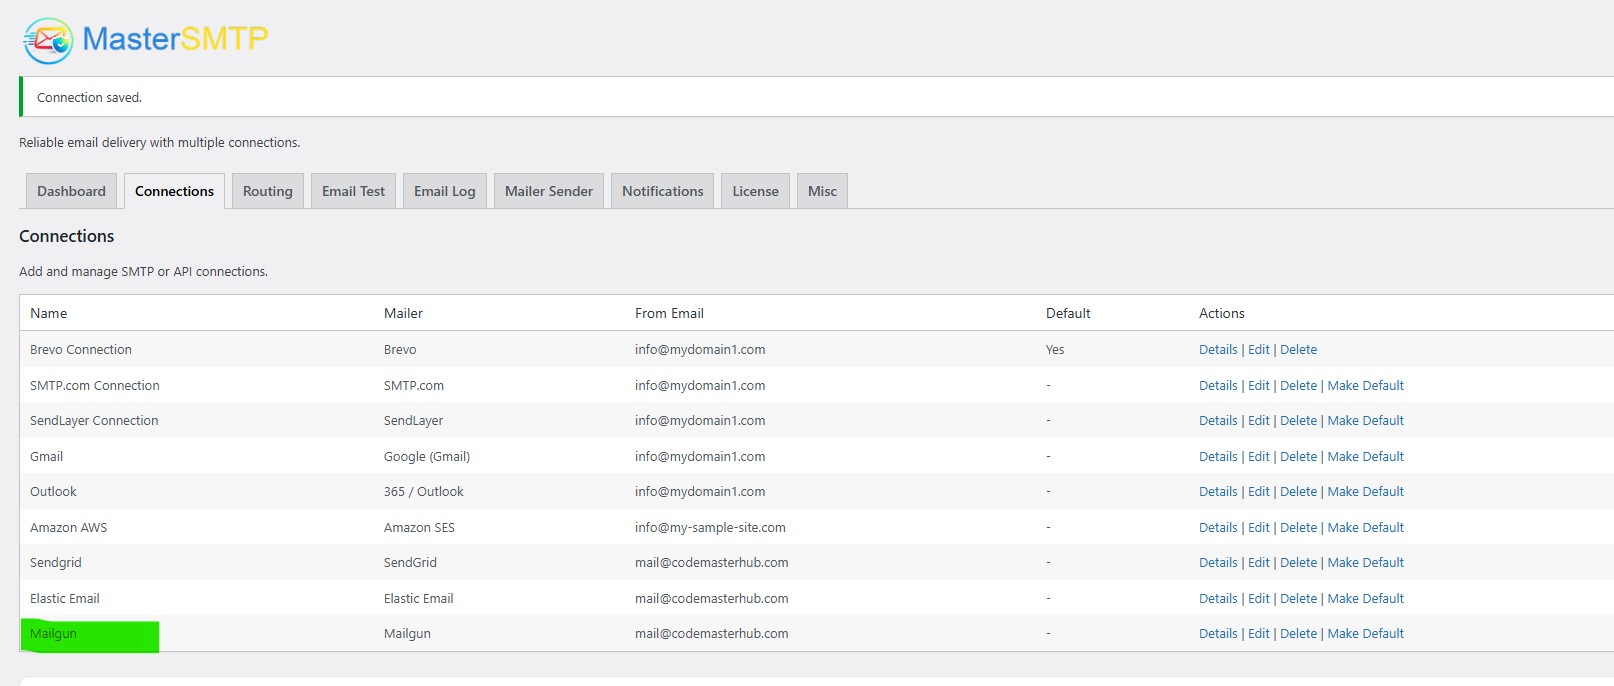
Note: The free version allows you to add only one connection. If you need multiple connections, Conditional Routing, and many other features, you should purchase the Master SMTP Pro.
Test Mailgun Connection
After saving your Mailgun connection, it is recommended to send a test email to make sure everything is working correctly. This helps confirm that your API Key , and connection settings have been entered properly and that your site can send emails successfully through Mailgun SMTP.
For step-by-step instructions, see the test connection guide here: