Table of Contents
What Is Gmail SMTP?
Gmail SMTP is Google’s outgoing mail service that allows websites, apps, and email clients to send email through Google’s mail servers. In Master SMTP, it can be used to send WordPress emails through a Gmail account or a Google Workspace account.
This can be a useful option for sending contact form messages, notifications, password reset emails, order emails, and other transactional messages from your website.
Depending on your setup, Google may allow sending through authenticated SMTP for individual accounts or through SMTP relay for Google Workspace environments. This gives you a familiar and trusted sending infrastructure backed by Google.
Create a Project in Google Cloud Console
Creating or Choosing a Project
To begin, sign in to Google Cloud Console:
https://console.cloud.google.com/home/dashboard
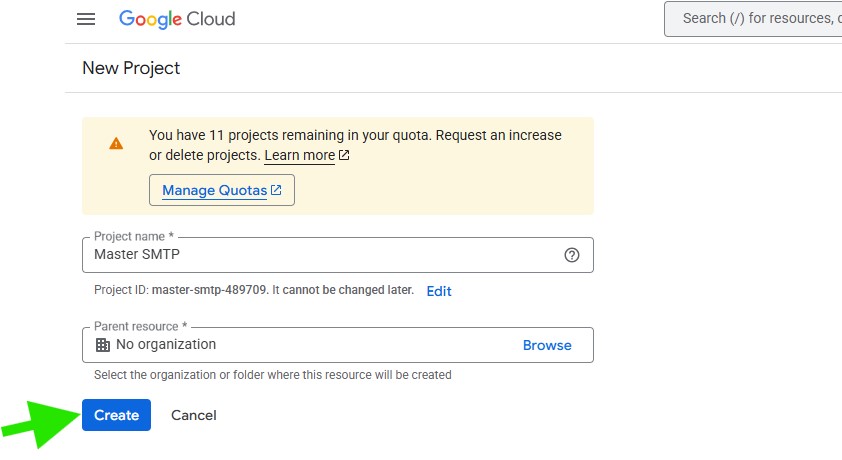
After opening the dashboard, click Create Project.
Note! The Create Project button may be different or in a different position depending on your workspace and whether or not you have a previous project.

In the New Project window, enter a name for your project and complete any additional fields shown for your account, such as organization, location, or billing account.
Then click Create to continue.
Enabling the Gmail API
Next, you need to enable the Gmail API for your project.
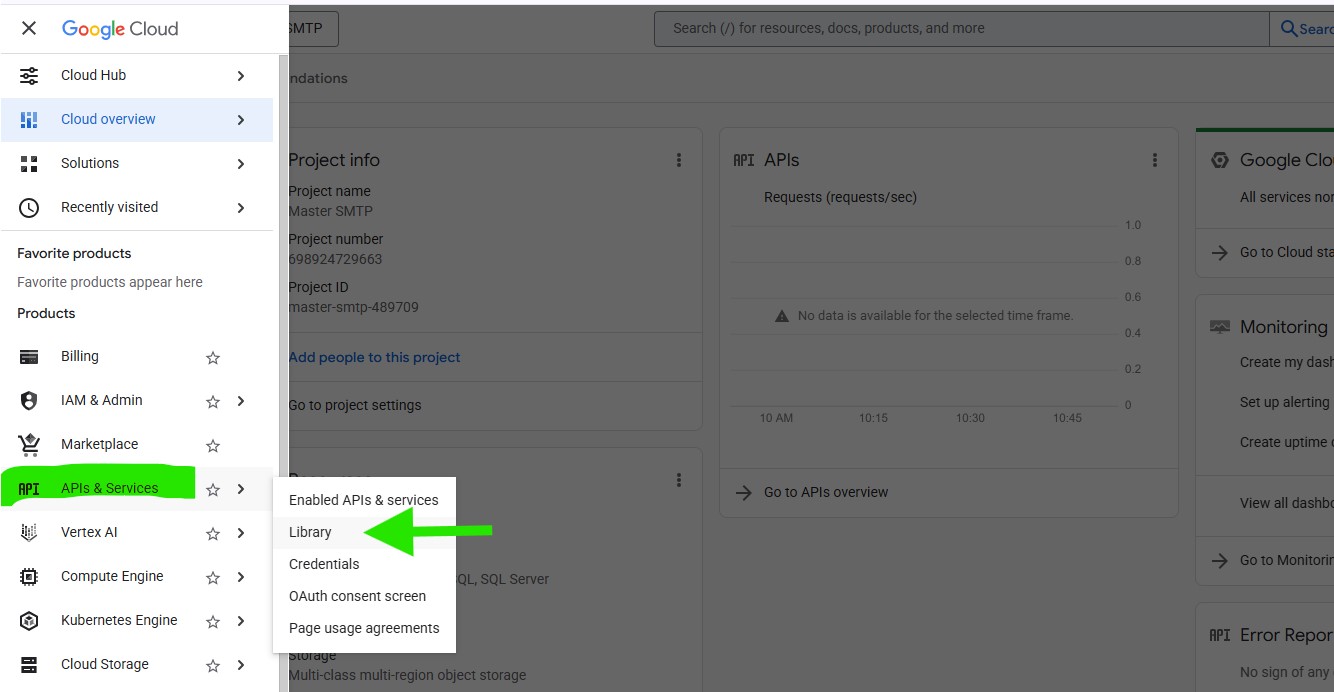
In your Google Cloud Console sidebar, go to APIs & Services > Library.
If needed, make sure the correct project is selected at the top of the page.
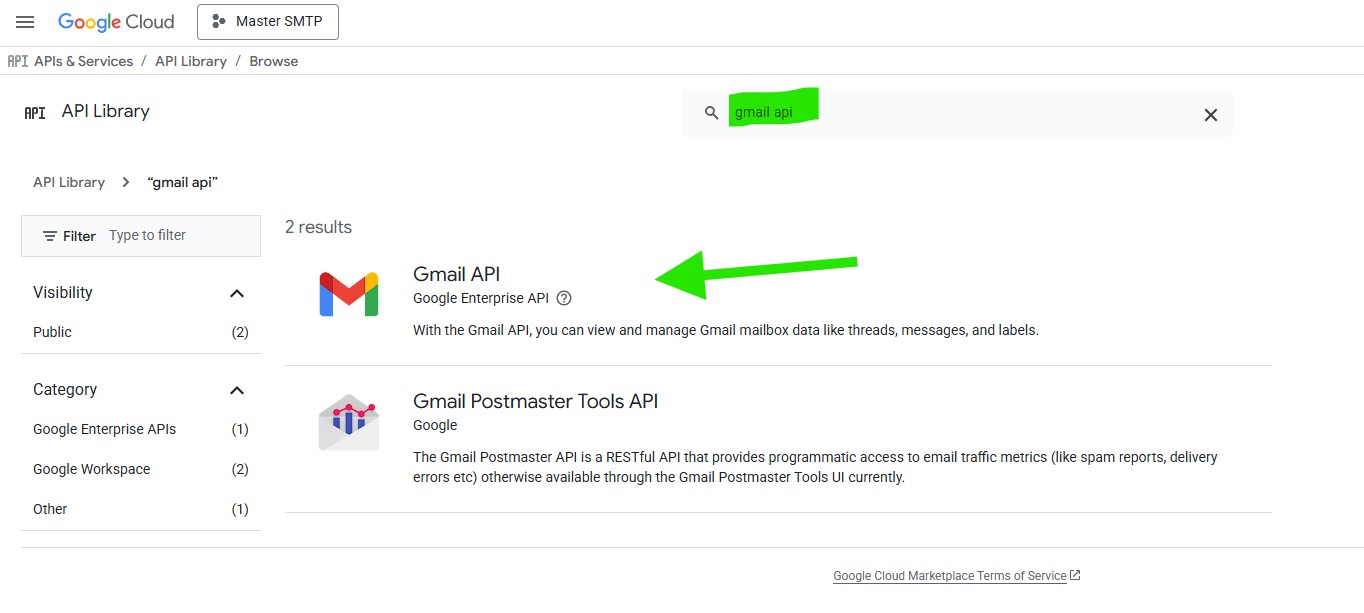
In the API Library, search for Gmail API and click it from the results.
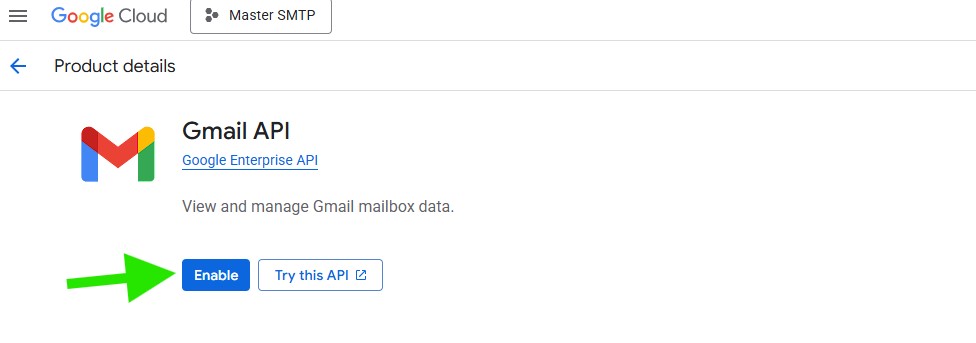
Then click Enable to activate the Gmail API for your project.
Creating Application Credentials
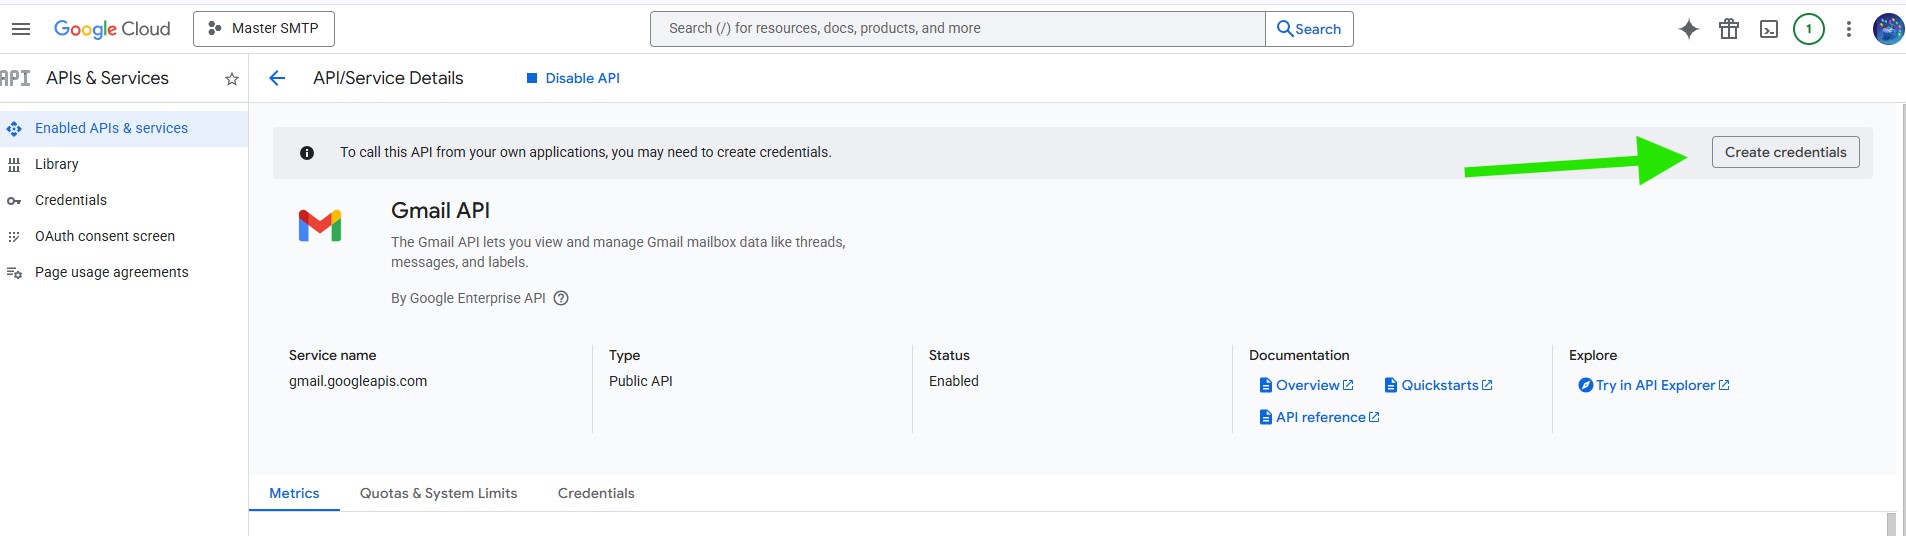
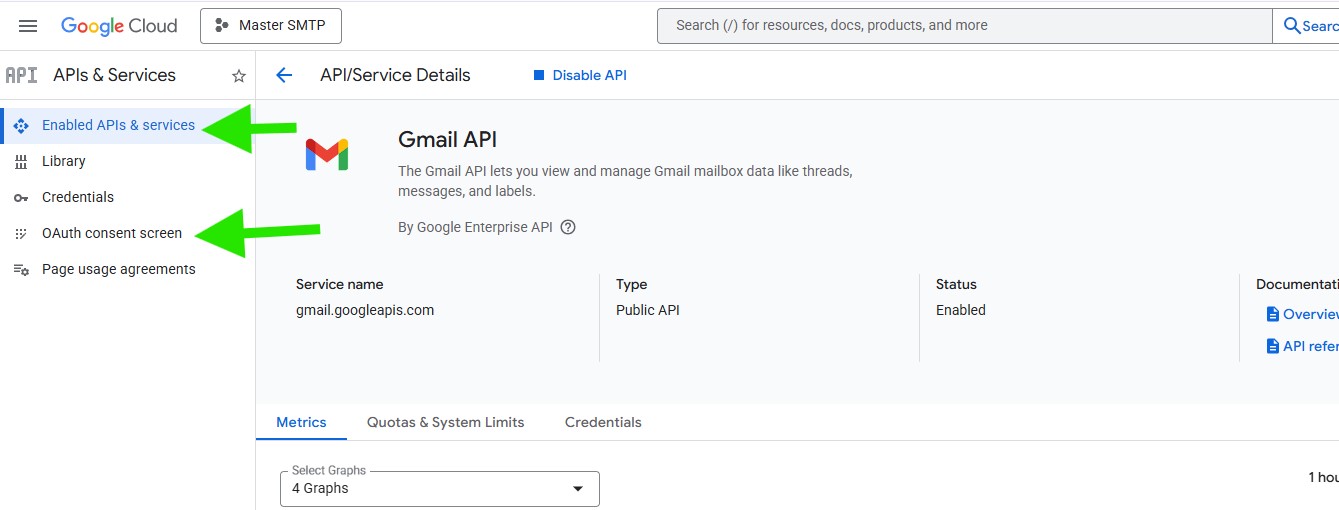
After you enable the Gmail API, you may be redirected to the Gmail API Overview page.
From there, click Create Credentials to begin creating the credentials required for your application.
If you are not redirected automatically, go to APIs & Services > Credentials in Google Cloud Console, then click Create Credentials.
Choose the Credential Type
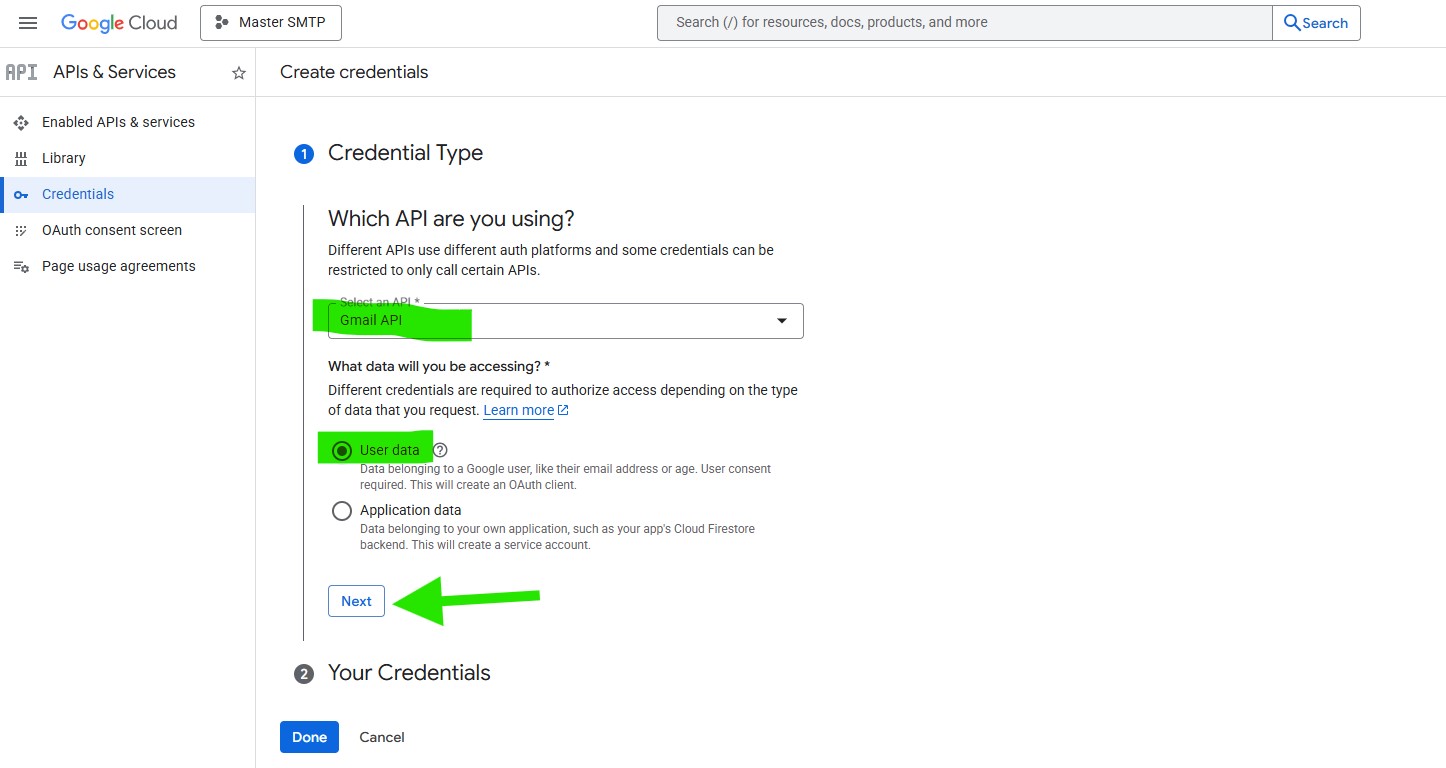
After clicking Create Credentials, Google may open a setup wizard to help you choose the correct credential type for your project.
If the wizard appears, select Gmail API from the Select an API dropdown.
Under What data will you be accessing?, choose User data.
Then click Next to continue.
Configuring Your OAuth Consent Screen
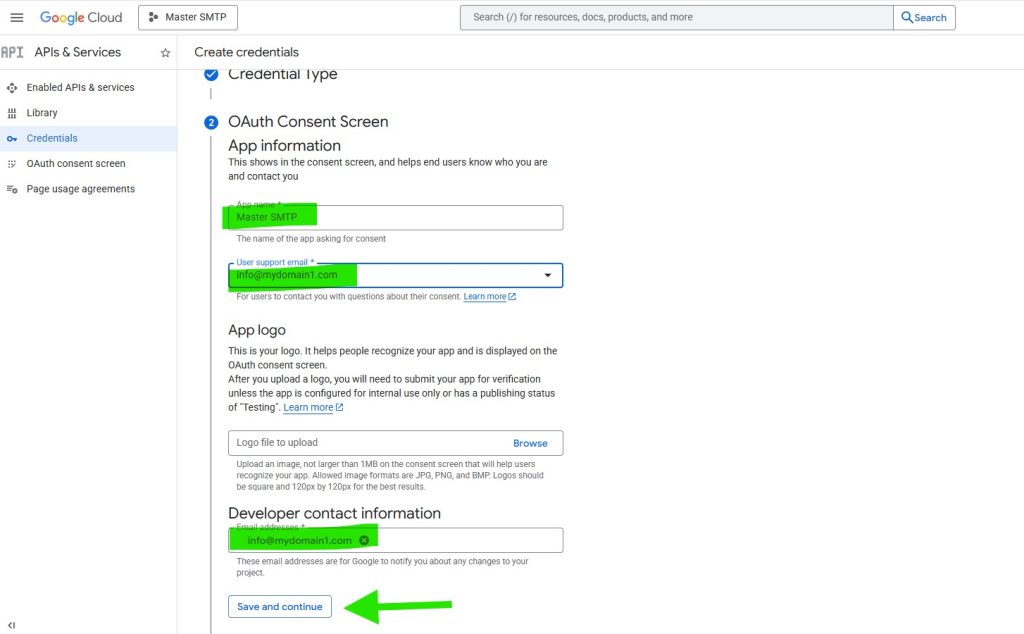
Google will now ask for some basic information about your app.
This setup is mainly for your own use, especially if only you will connect the app. Even so, some fields are still required.
App name: Enter a name for your app. This can be any name you want, such as Master SMTP App.
User support email: Select your email address from the available options.
App logo: You can upload a logo for your app if you want. This is optional.
Developer contact information: Enter an email address where Google can contact you about this project.
After completing these fields, click Save and continue.
Configuring Scopes (Optional)
This step is optional for this setup and can be skipped. In the Scopes section, scroll down to the bottom of the page and click Save and Continue to proceed.Setting Up Your OAuth Client ID
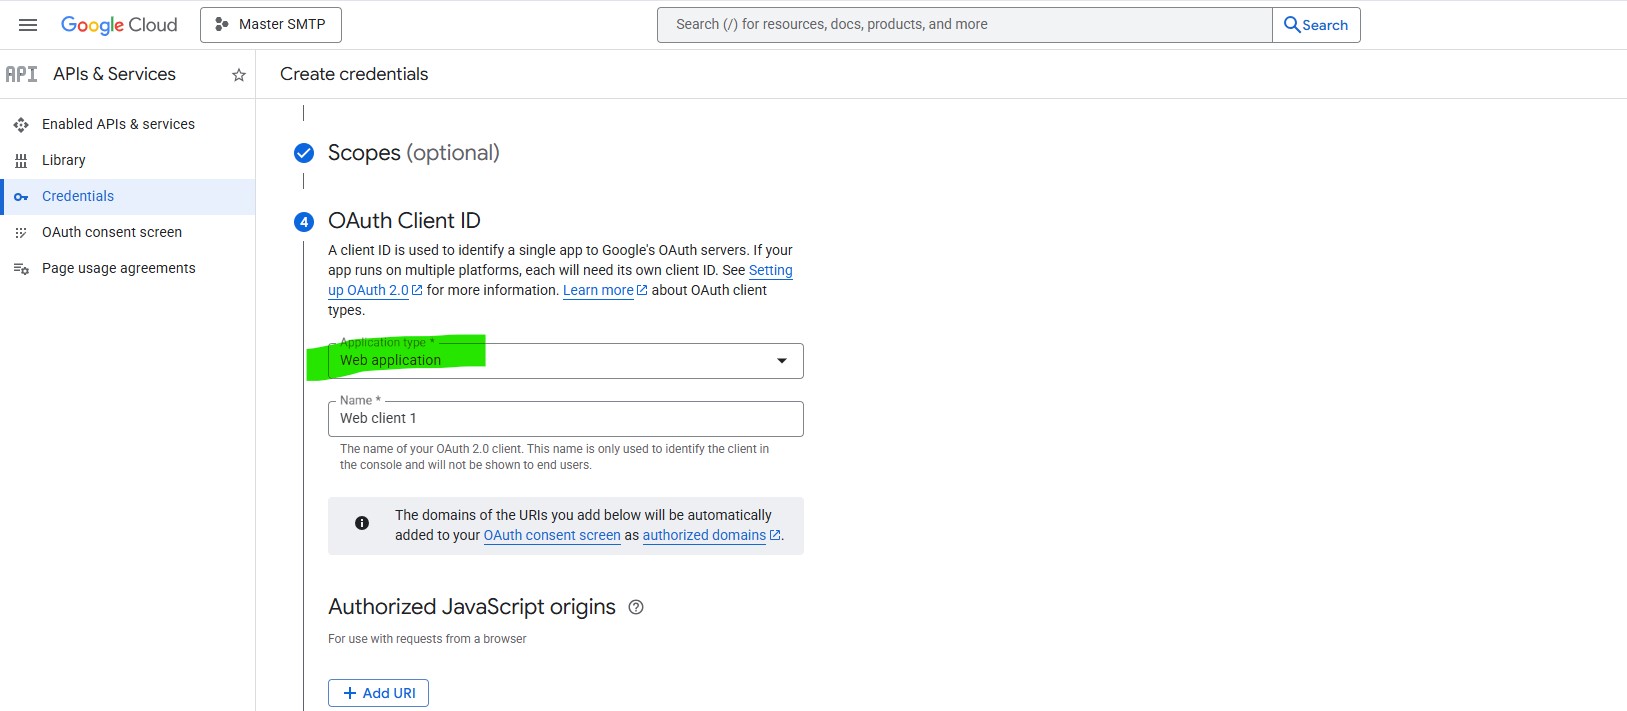
Next, you need to enter some details for your OAuth Client ID.
From the Application type dropdown, select Web application.
After selecting this option, additional fields will appear automatically for your OAuth client configuration.
Setting Up Your OAuth Client ID
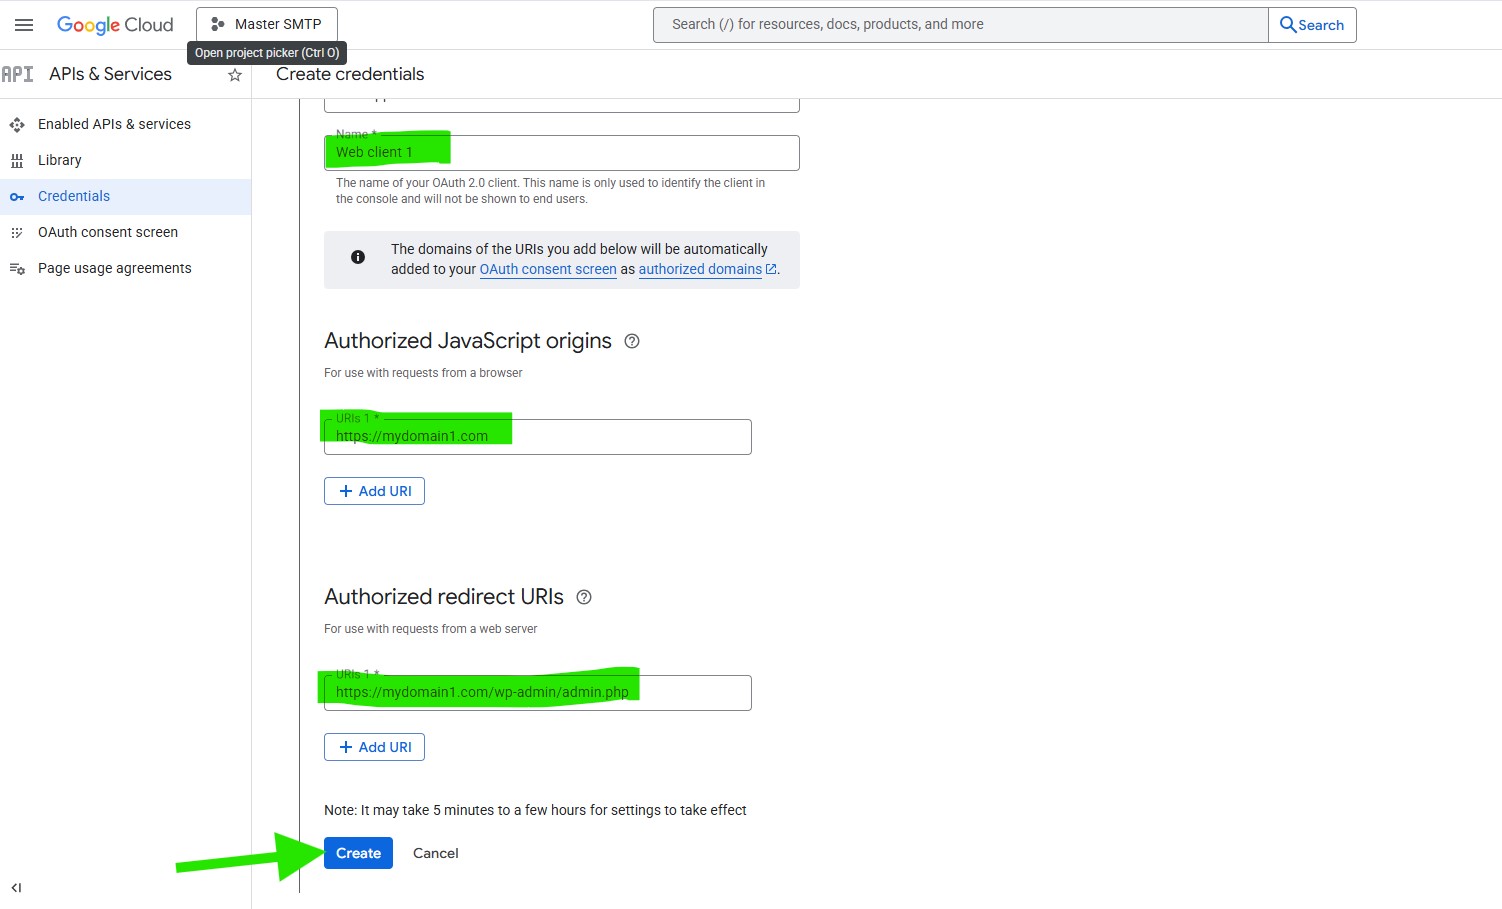
Next, complete the OAuth client fields.
Name: Enter a name for your OAuth 2.0 client. This name is only used to identify the client in Google Cloud Console and will not be shown to end users.
Google may automatically add the domains from the URIs you enter below to your OAuth consent screen as authorized domains.
Authorized JavaScript origins: This section is used for requests sent directly from a browser.
Authorized redirect URIs: This section is used for requests sent from a web server.
Copy the redirect URL shown in your Master SMTP Gmail setup and paste it into the Authorized redirect URIs field.
After that, click Create.
Note: It may take 5 minutes to a few hours for Google’s settings to take effect.
Your Credentials
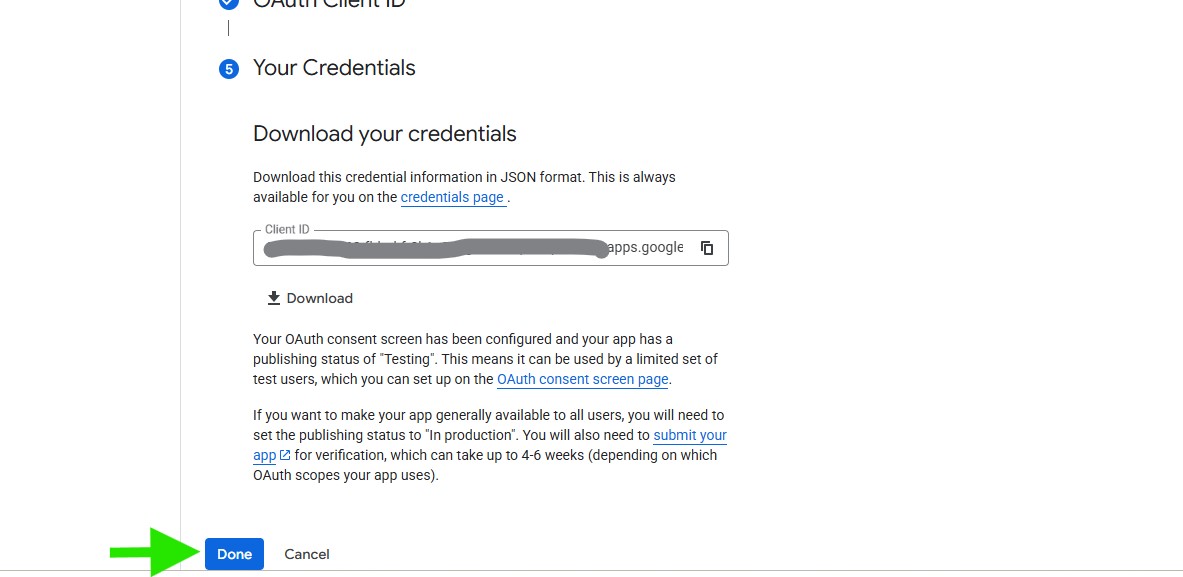
After the OAuth client is created, Google will show your application credentials, including the Client ID.
You can copy the Client ID now or return to it later in the next steps.
When you are finished, click Done.
Updating the Publishing Status From Testing to Production
After creating your OAuth app, review its audience and publishing status.
In Google Cloud Console, go to Google Auth platform > Audience. In some older Google Cloud layouts, this may appear under APIs & Services > OAuth consent screen.
Next, click Audience. In the Publishing status section, click Publish app.

In the Push to production popup, click Confirm.
Granting Your Site Google / Gmail Permissions
Next, in the Clients panel, locate your app under OAuth 2.0 Client IDs, then click the pencil icon to edit it.

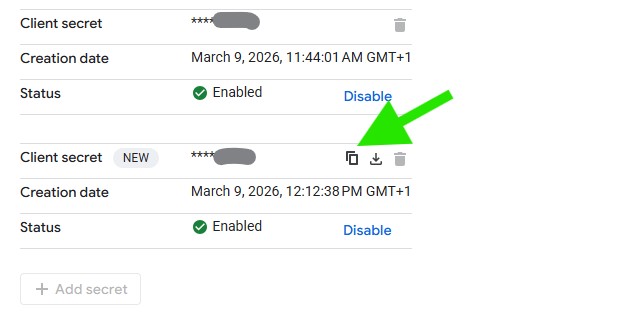
In the Additional information section, under Client secrets, click Add Secret to create a secret key.
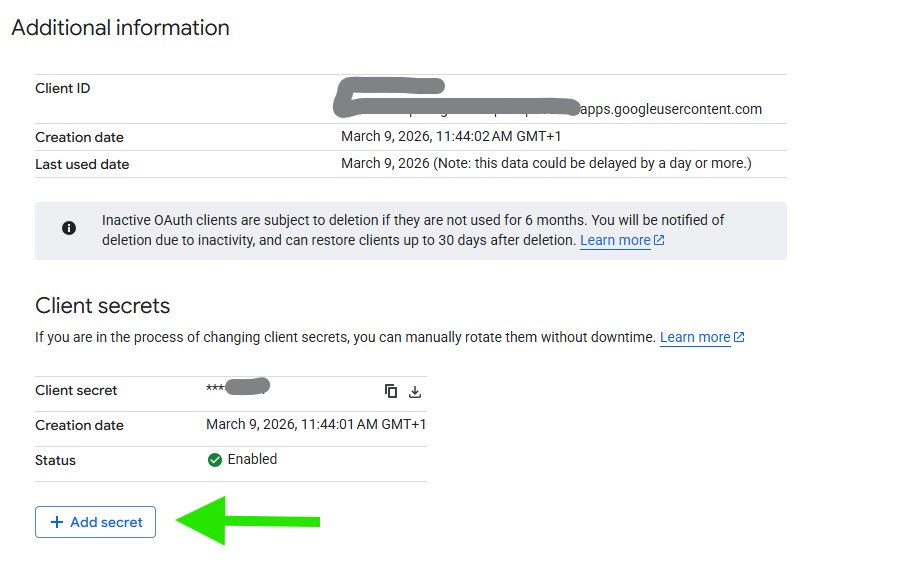
You will now see the new Client secret listed below the default one. Click the copy icon to copy its value.
Then copy both the Client ID and Client Secret, and paste them into the corresponding fields in your Master SMTP Gmail settings.
Setting Up Gmail on Master SMTP
In your WordPress dashboard, go to:
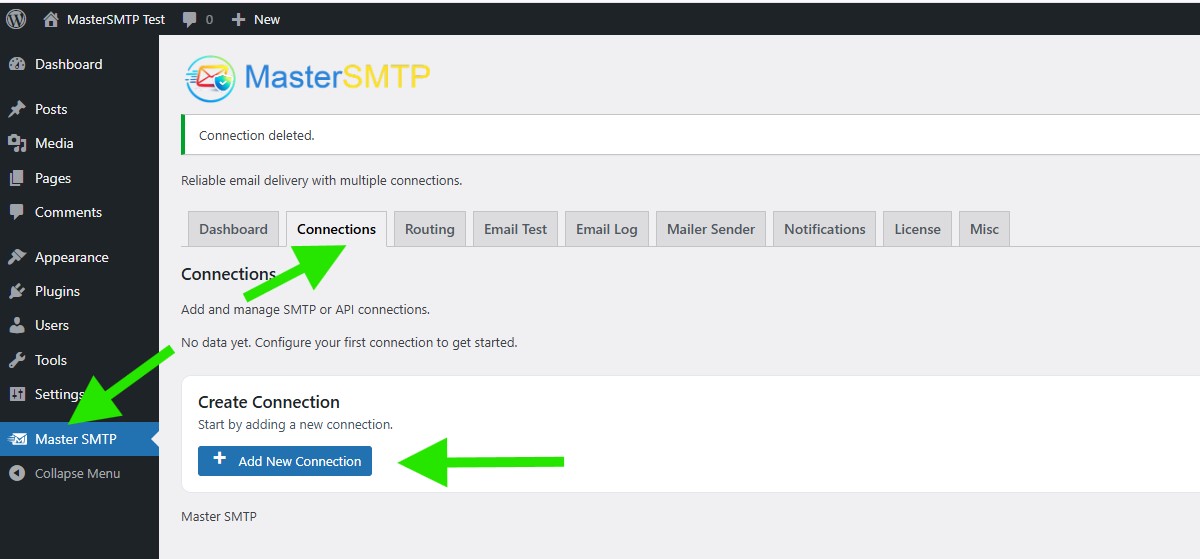
Master SMTP > Connections
In the Create Connection section, click Add New Connection.
Configure Connection
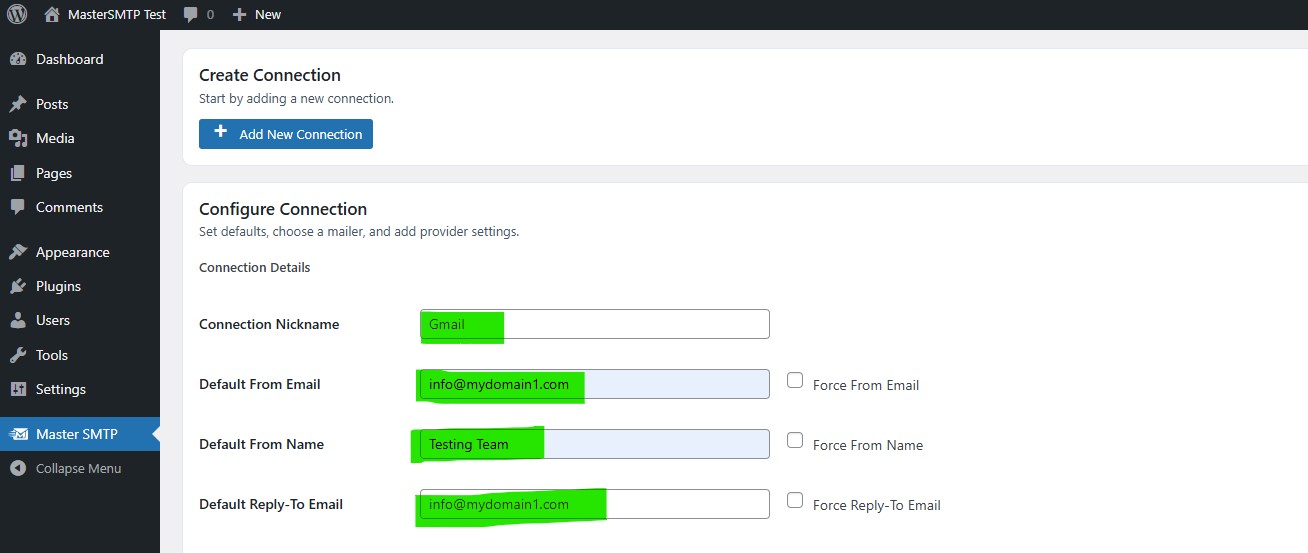
In the Configure Connection section, fill out the Connection Details fields:
Connection Details: Enter a name for this connection. This is only for you, recipients will not see it.
Default From Email: The email address used when an outgoing email does not define a From Email.
Force From Email: If enabled, this From Email will be used for all emails, even if the email has a different From Email.
Default From Name: The name used when an outgoing email does not define a From Name.
Force From Name: If enabled, this From Name will be used for all emails, even if the email has a different From Name.
Default Reply-To Email: The Reply-To address used when an outgoing email does not define a Reply-To Email.
Force Reply-To Email: If enabled, this Reply-To Email will be used for all emails, even if the email has a different Reply-To Email.
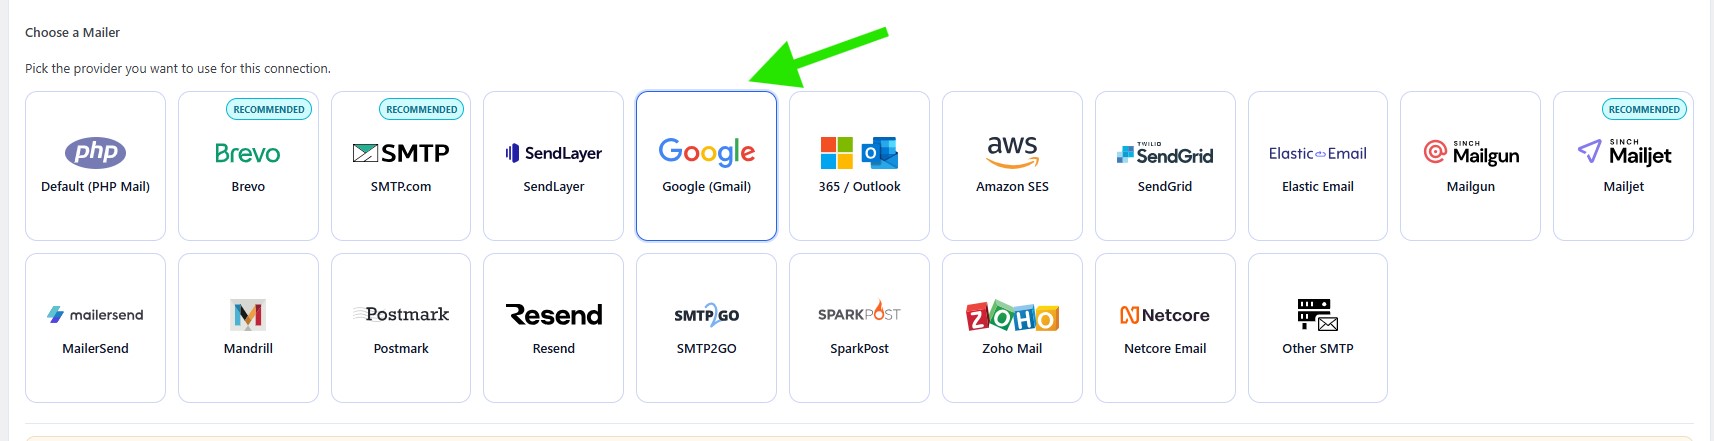
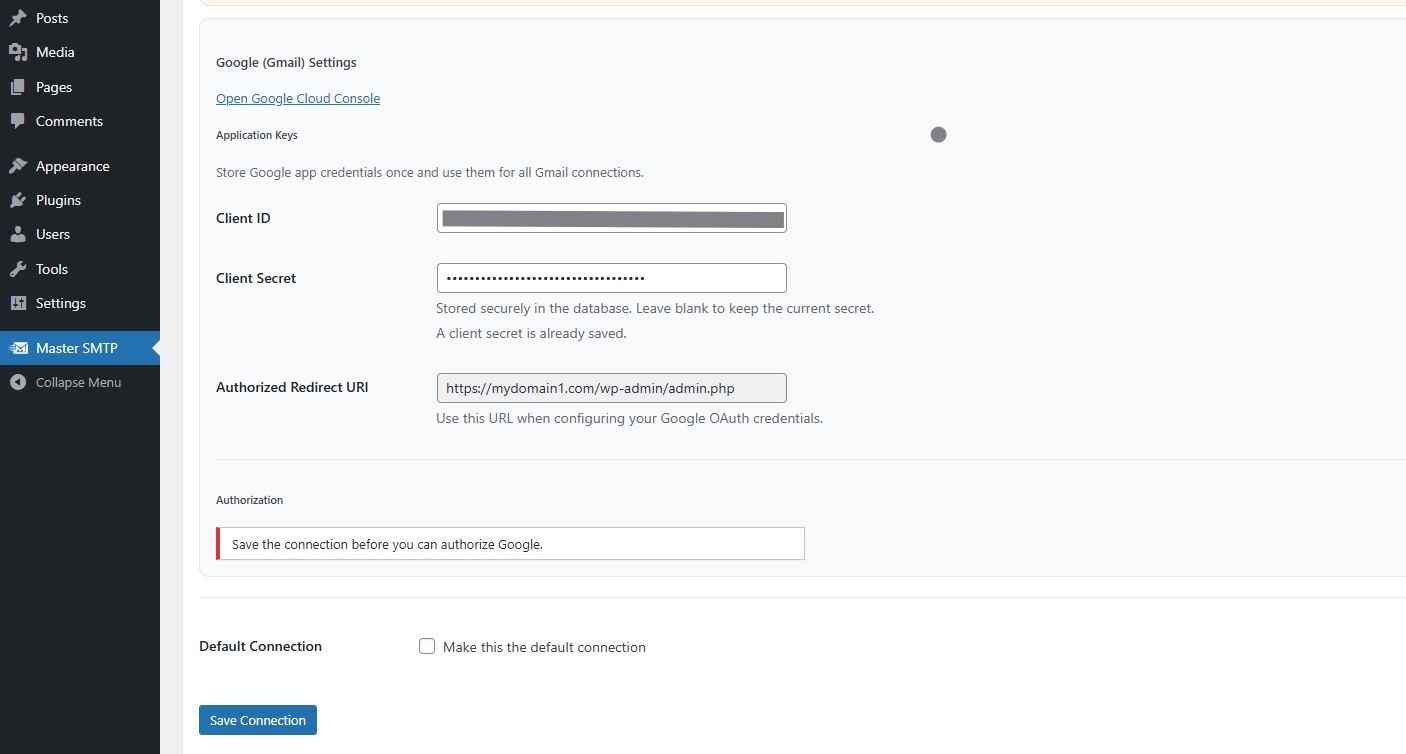
In the Choose a Mailer section, select Google (Gmail) from the grid mailer list.
In the Google (Gmail) Settings section, paste the Client ID and Client Secret you copied from the Additional information section.
Default Connection: Enable this option if you want this connection to be used as your default sender.
Then click Save Connection.
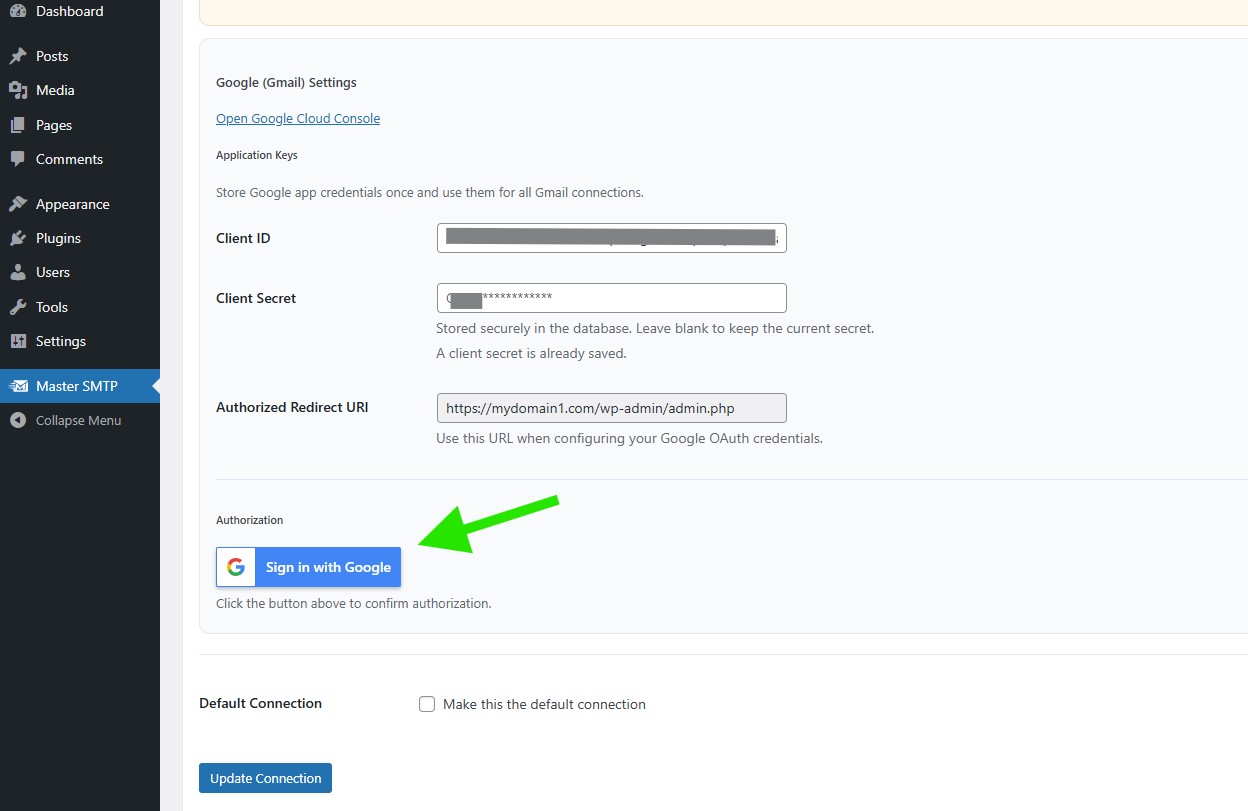
After saving the connection, the Sign in with Google button will appear on the same screen. Click it, then complete the Google authorization process to finish the setup.
After the setup is completed, you will be redirected back to your WordPress dashboard.
The connection will be added to the Connections list, and you should see Connection saved. at the top of the window.
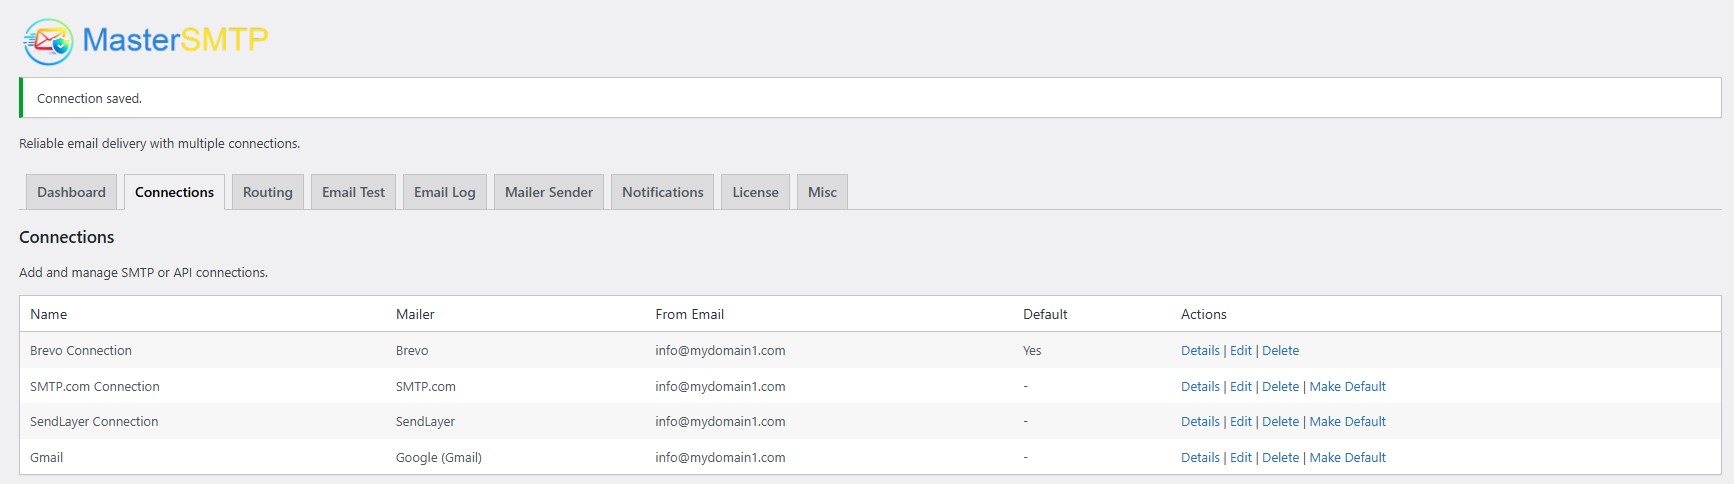
Note: The free version allows you to add only one connection. If you need multiple connections, Conditional Routing, and many other features, you should purchase the Master SMTP Pro.
Test Gmail Connection
After saving your Gmail connection, it is recommended to send a test email to make sure everything is working correctly. This helps confirm that your Client ID , Client Secret, and connection settings have been entered properly and that your site can send emails successfully through Gmail SMTP.
For step-by-step instructions, see the test connection guide here: