Table of Contents
What is Elastic Email SMTP
Elastic Email is an email communication platform that offers tools for email marketing, transactional email sending, and integrations through API and SMTP. It is designed to help businesses send newsletters, automated emails, and system-generated messages from one platform.
Elastic Email SMTP is Elastic Email’s SMTP relay service, which lets you send emails from your website, server, or application using standard SMTP credentials. In WordPress, it can be used with Master SMTP to route outgoing emails through Elastic Email for easier setup, domain-based sending, and access to delivery logs and performance tracking.
Creating an Elastic Email Account
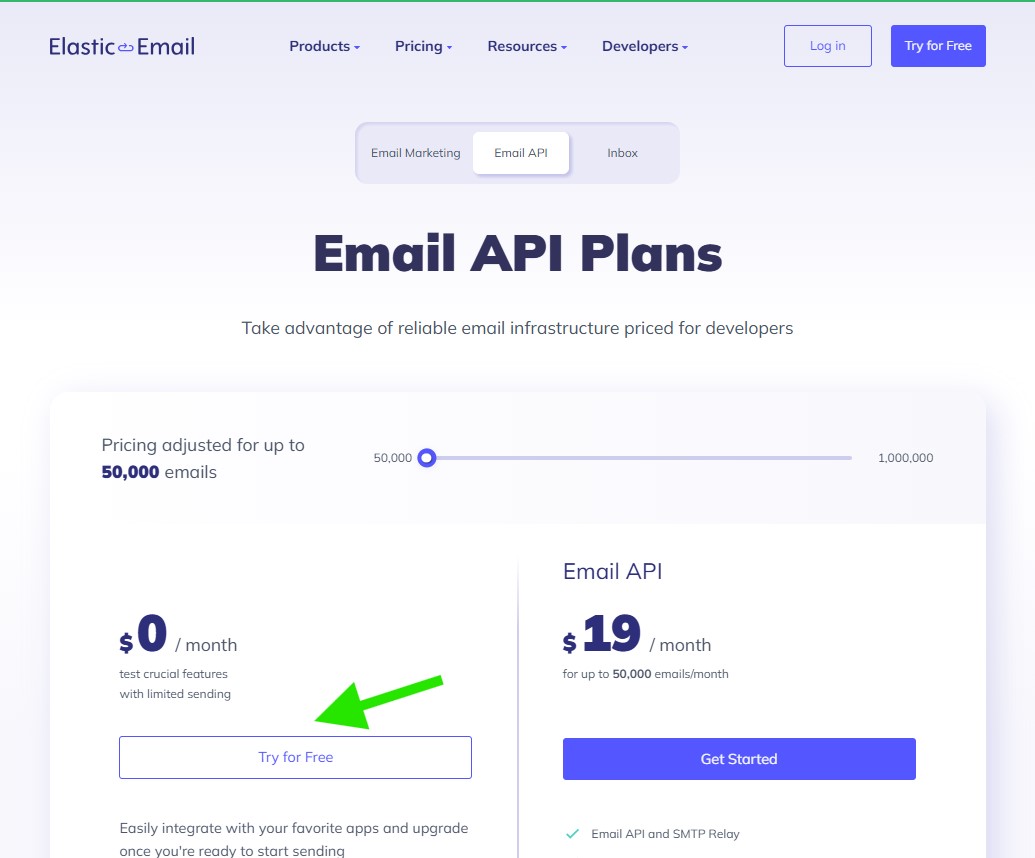
To create your Elastic Email account, open the Elastic Email Email API pricing page and make sure the Email API tab is selected. Then click the Try for Free button to begin the registration process.
Elastic Email offers a free plan for testing basic features with limited sending, so you can get started without choosing a paid plan right away. A credit card is not required unless you want to upgrade to a paid plan later.
After you sign up, Elastic Email will send a verification email to the address you used during registration. Once you verify your email address and log in to your account, you can access the dashboard and continue with the SMTP setup in Master SMTP.
Enter Your Details
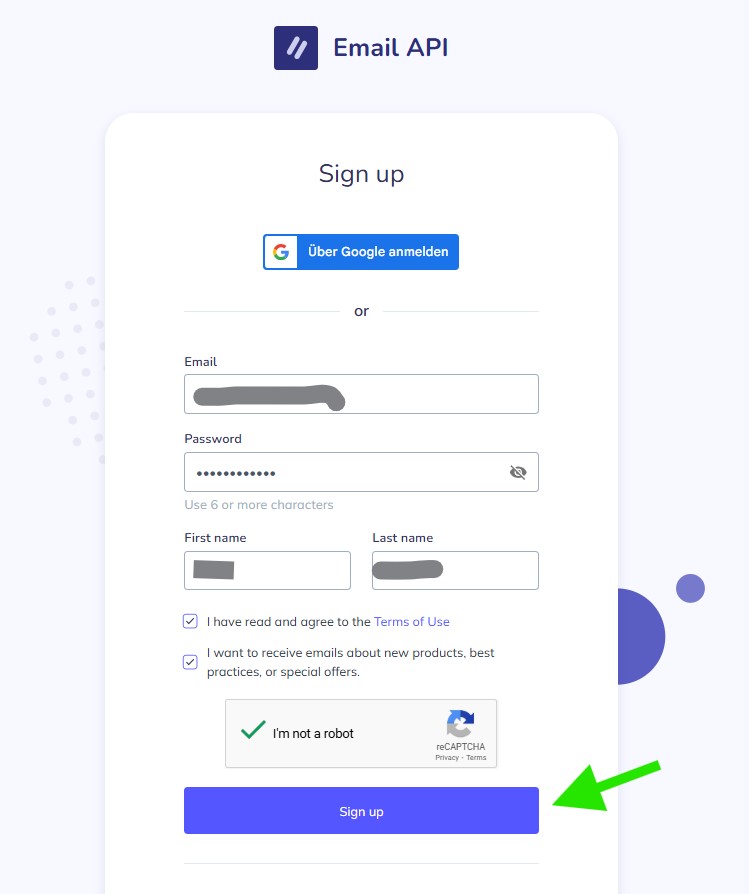
On the signup page, you can create your Elastic Email account by entering your details in the form. You can also choose to sign up with your Google account if you prefer.
Enter your email address, create a password, then fill in your first name and last name. After that, check the box to agree to the Terms of Use.
You can also choose whether you want to receive emails about new products, best practices, or special offers. This option is optional, so you can leave it unchecked if you do not want promotional emails.
Complete the reCAPTCHA verification, then click the Sign up button to create your account.
Tell Elastic Email About Your Business
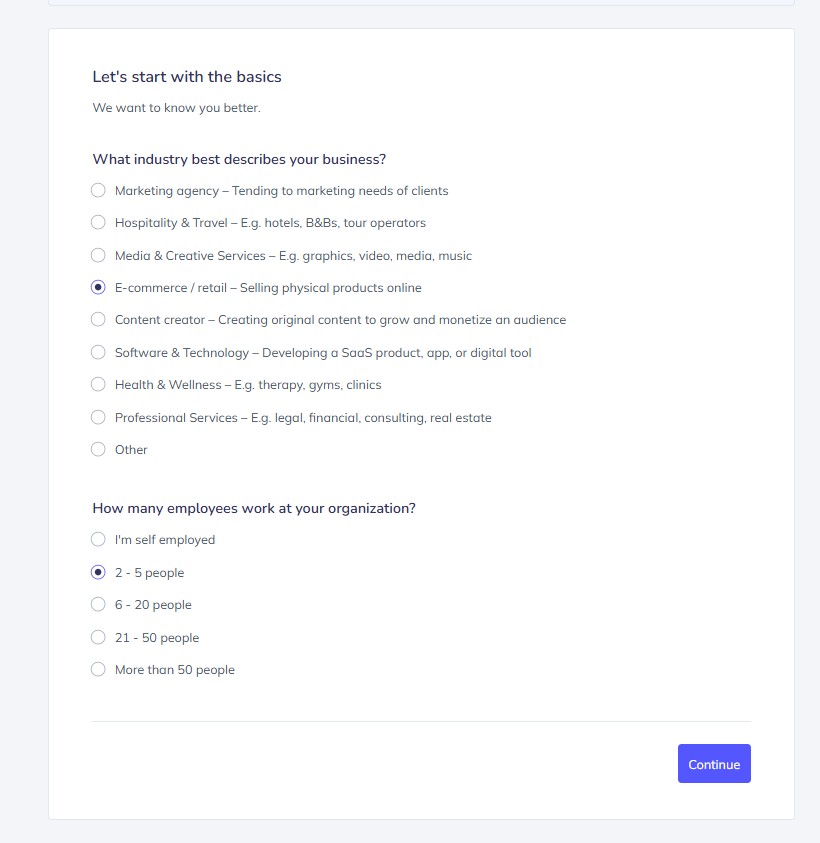
After creating your account, Elastic Email will ask a few basic questions about your business. This step helps personalize your account setup and dashboard experience.
Select the industry that best describes your business, then choose the number of employees in your organization.
Once you have selected the appropriate options, click the Continue button to move to the next step.
Answer the Onboarding Questions
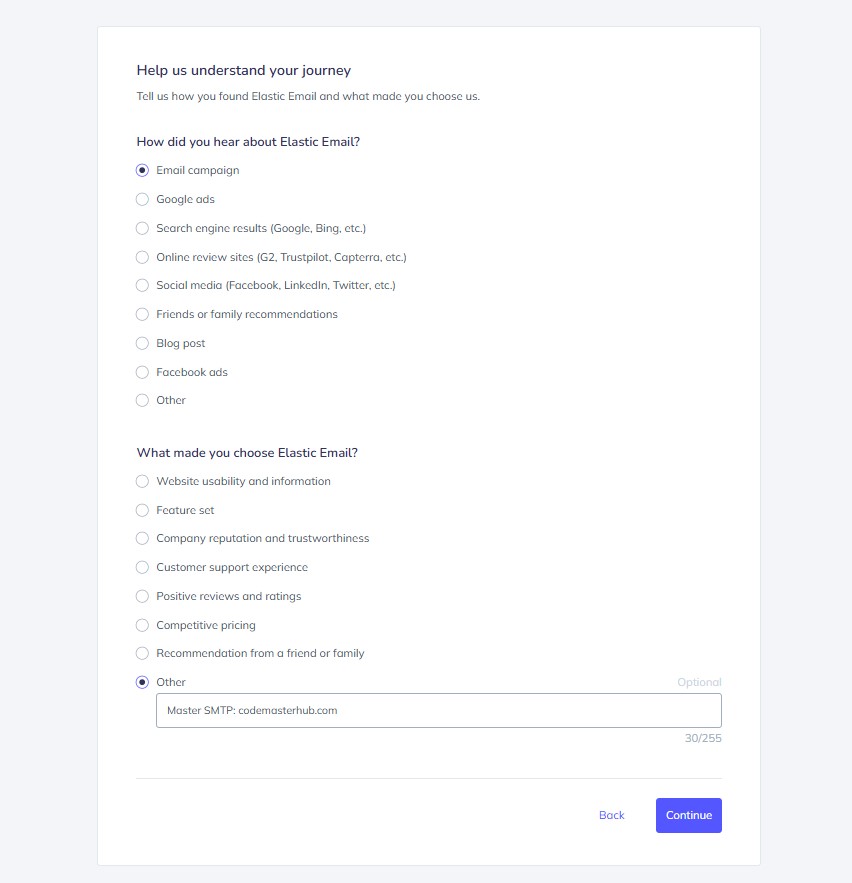
Elastic Email will now ask how you heard about their service and what made you choose it. Select the answers that best match your situation.
If you choose Other for the second question, you can also enter a short custom message in the optional text field.
After completing both questions, click the Continue button to proceed.
Complete the Final Onboarding Survey
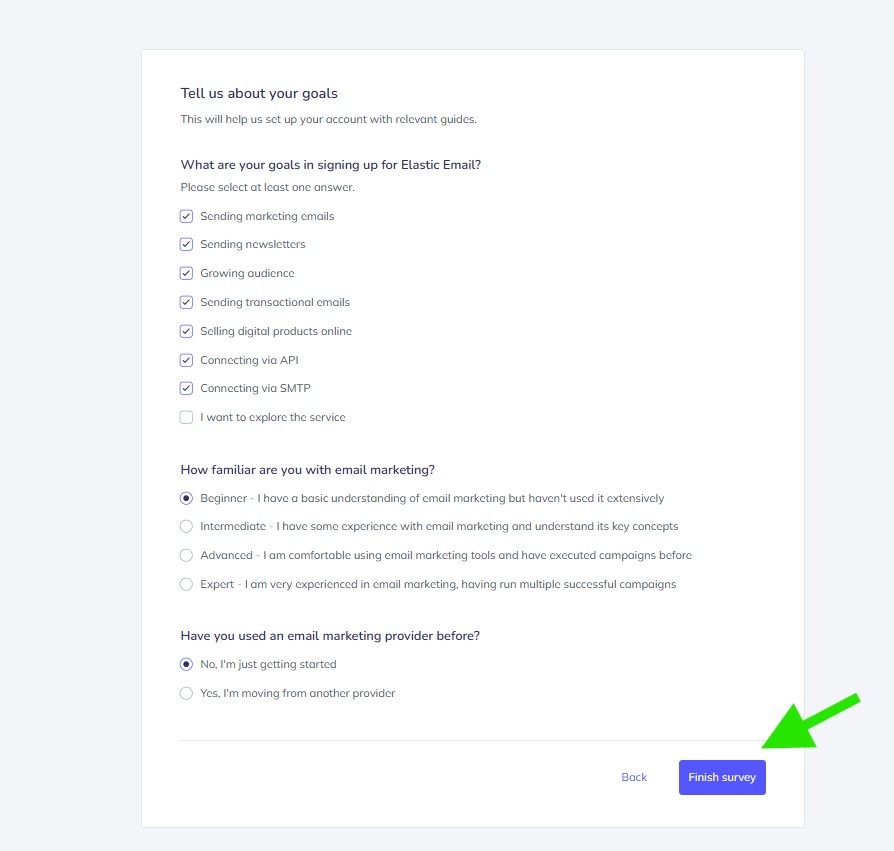
Elastic Email will ask a few final questions about your goals, your experience with email marketing, and whether you have used another email marketing provider before.
Select the options that best match your needs. You can choose one or more goals, then select your experience level and indicate whether you are new to email marketing or moving from another provider.
After completing the survey, click the Finish survey button to continue to your Elastic Email account dashboard.
Verifying Your Domain
Before using Elastic Email SMTP in Master SMTP, you should verify your sending domain in your Elastic Email account. Domain verification helps confirm that you own the domain and improves email deliverability.
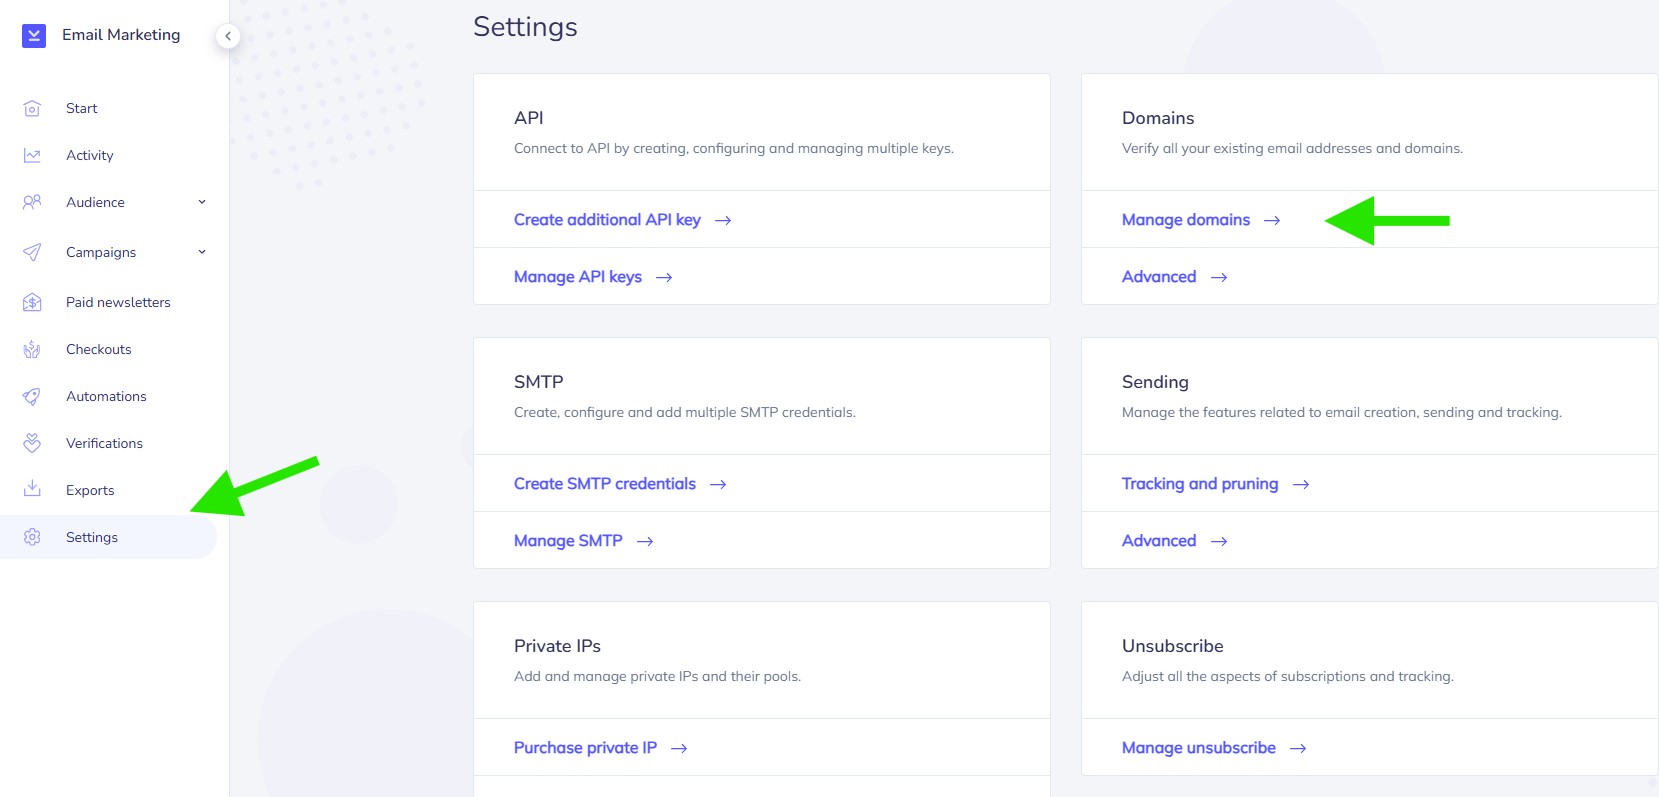
In the Elastic Email dashboard, open the left sidebar and click Settings. In the Domains section, click Manage domains to start the domain setup process.
On the next screen, you can add your domain and follow the verification steps provided by Elastic Email.
Start Domain Verification
On the Domains page, make sure the Domain verification tab is selected. Then click the Start Verification button in the top right corner. This will begin the process of adding and verifying your domain in Elastic Email.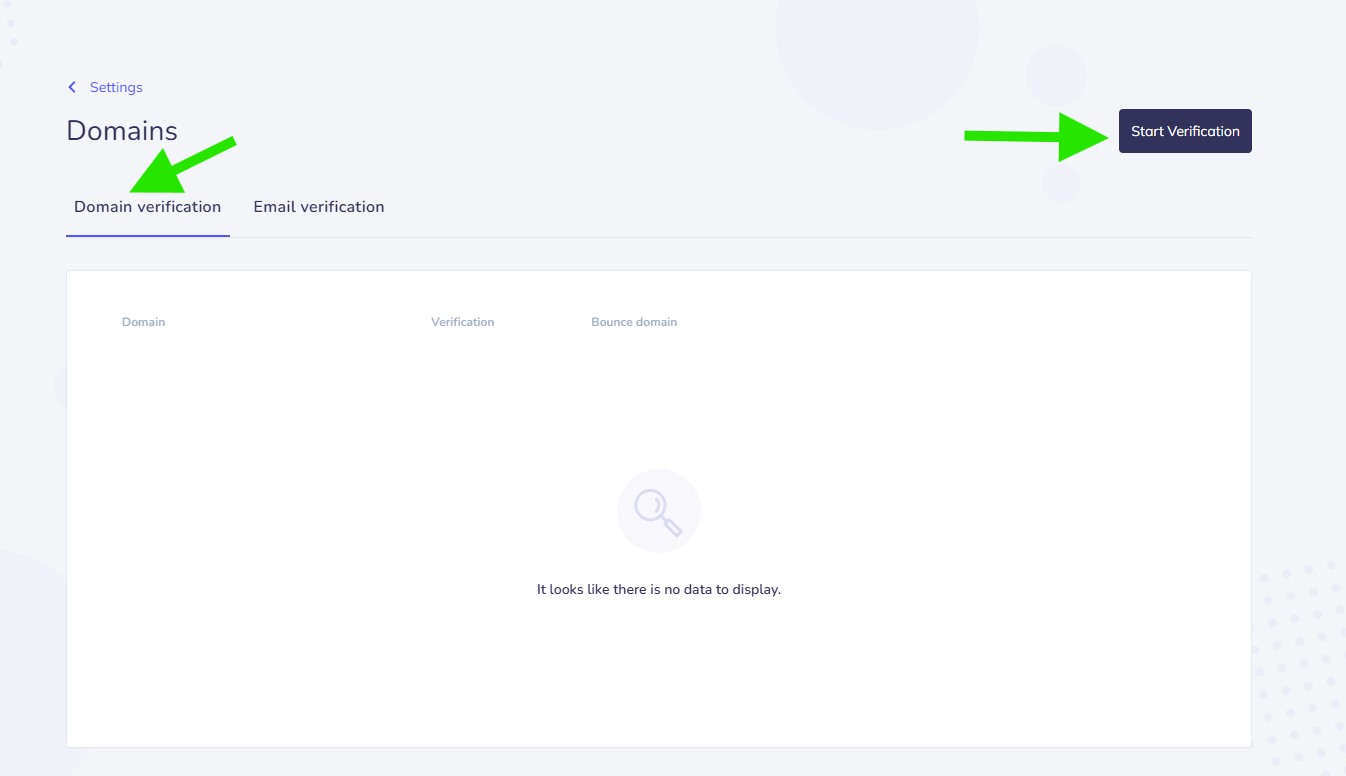
Choose Domain Verification
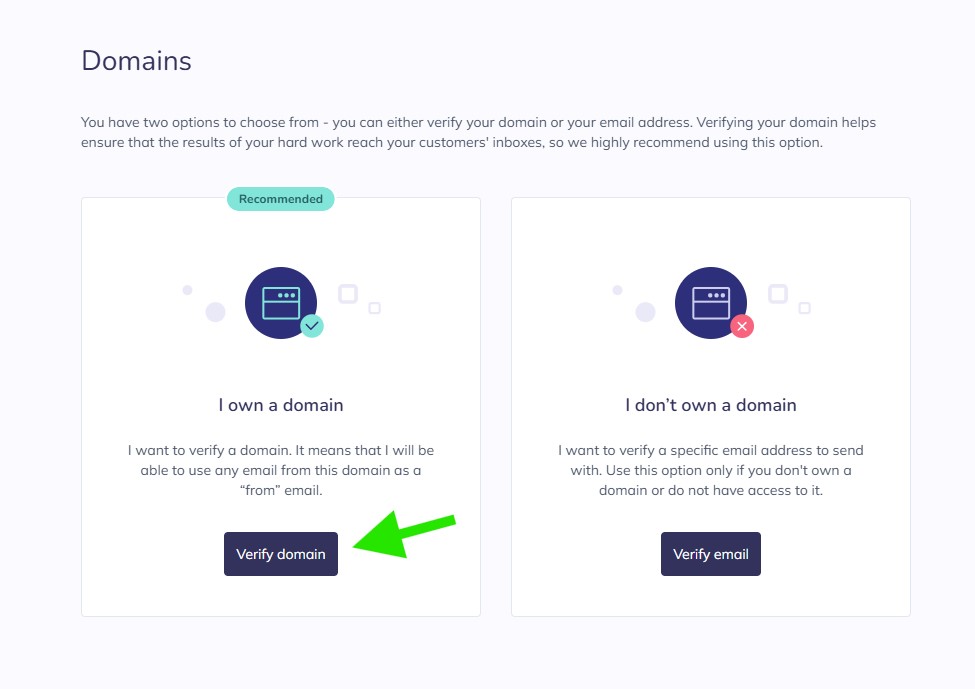
Elastic Email will show two verification options. Since you want to verify your sending domain, click the Verify domain button under the I own a domain option.
This is the recommended option because it allows you to use email addresses from your domain as the From Email address and helps improve deliverability.
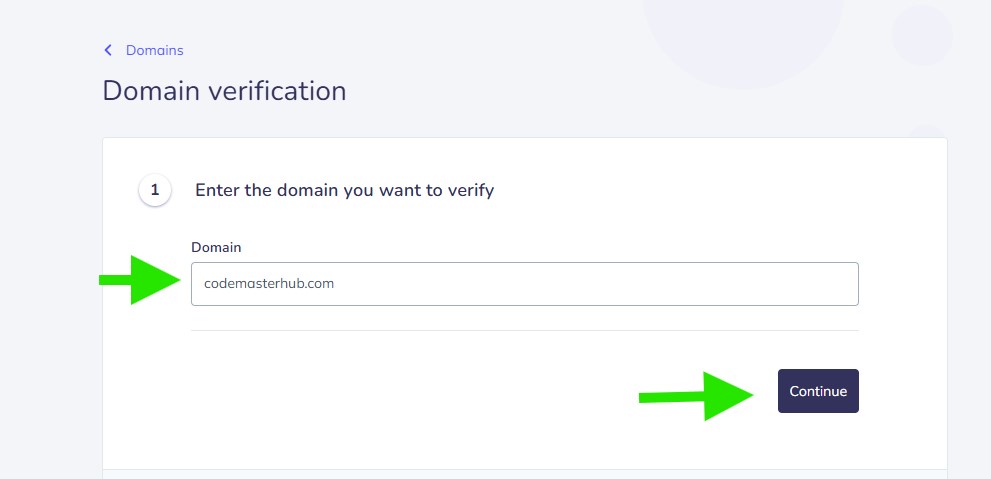
Enter Your Domain
In the Domain field, enter the domain name you want to verify, such as codemasterhub.com.
After entering your domain, click the Continue button to move to the next step.
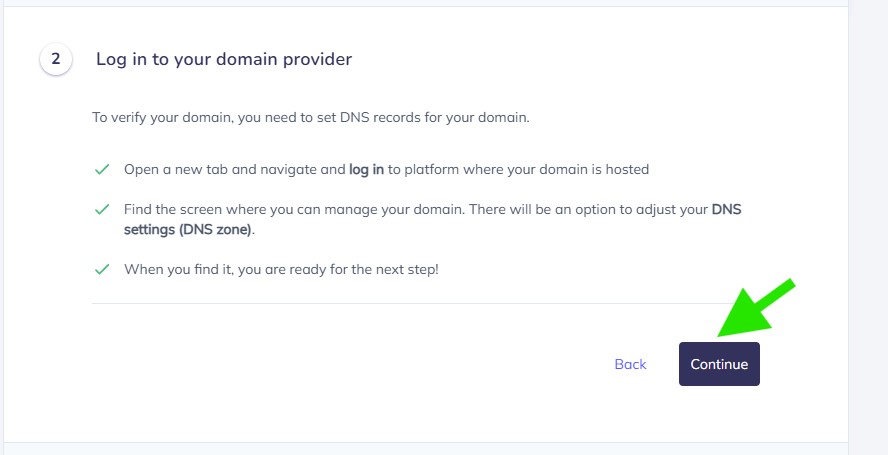
Log In to Your Domain Provider
Elastic Email will now ask you to log in to the platform where your domain is managed. This is usually your domain registrar, hosting provider, or DNS provider.
Open your domain provider in a new browser tab, then find the DNS management area for your domain. This may be labeled as DNS settings, DNS zone, or DNS records.
Once you are ready to add the required DNS records, return to Elastic Email and click Continue.
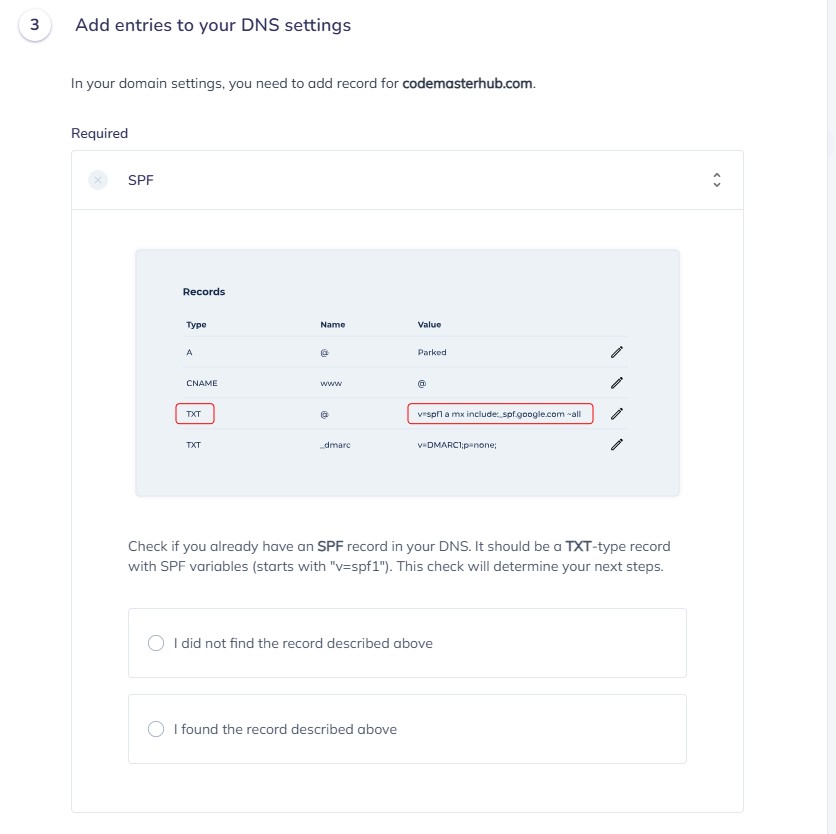
Check for an Existing SPF Record
Elastic Email will first ask you to check whether your domain already has an SPF record in its DNS settings.
Look for a TXT record for your domain that starts with v=spf1. This is your SPF record. Elastic Email uses this check to decide the correct next step for your domain verification setup.
If you do not see an SPF TXT record, select I did not find the record described above. If you already have one, select I found the record described above.
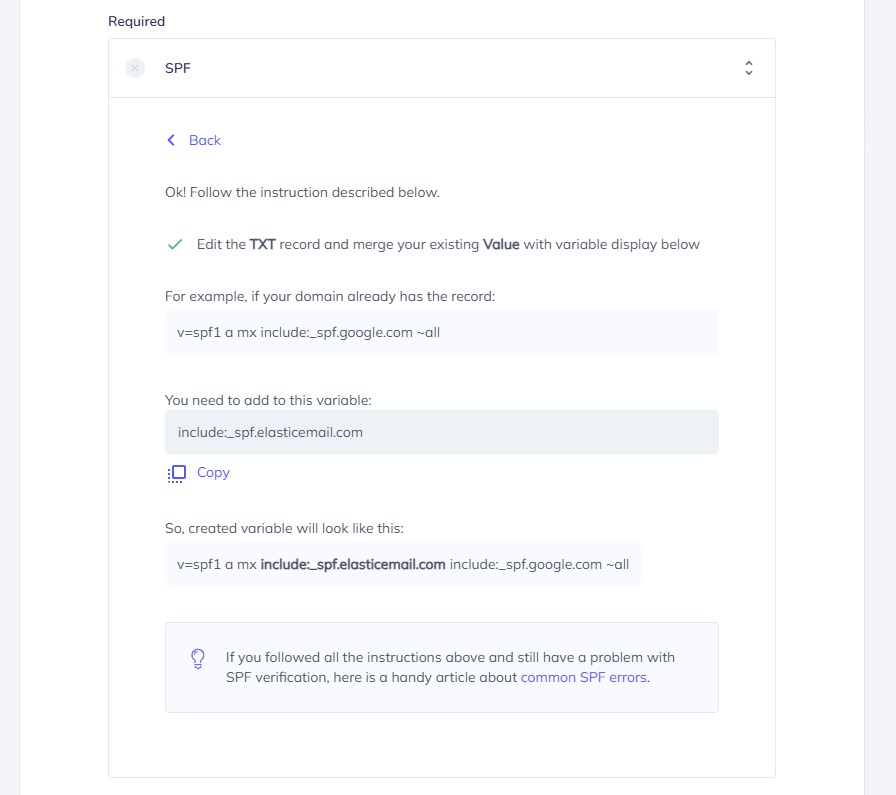
Merge Elastic Email Into Your Existing SPF Record
If your domain already has an SPF record, do not create a second SPF record. Instead, edit your existing TXT record and merge the Elastic Email value into it.
Elastic Email will show you the value that needs to be added to your current SPF record:
include:_spf.elasticemail.com
For example, if your existing SPF record is:
v=spf1 a mx include:_spf.google.com ~all
After adding Elastic Email, it should look like this:
v=spf1 a mx include:_spf.elasticemail.com include:_spf.google.com ~all
Make sure everything stays in a single SPF TXT record. Do not split it into multiple SPF records, because that can cause verification and deliverability problems.
Add the Recommended DNS Records and Verify
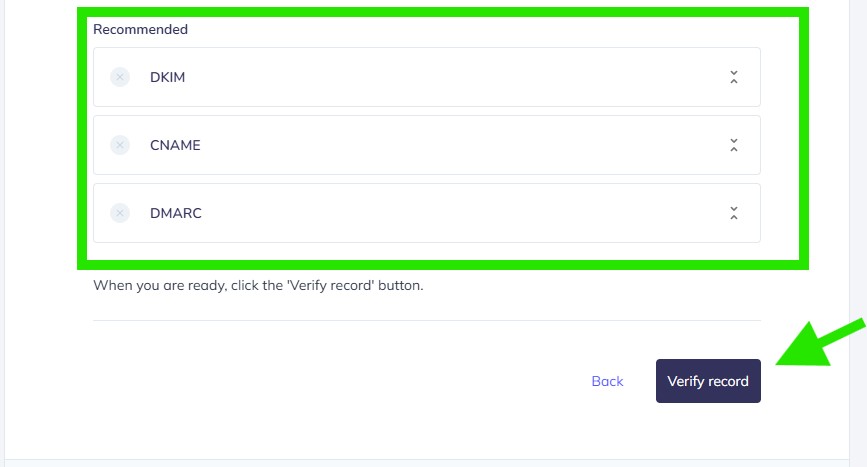
After completing the SPF step, Elastic Email will also show additional recommended records, such as DKIM, CNAME, and DMARC.
Open each section and add the required DNS records in your domain’s DNS settings exactly as provided by Elastic Email. These records help improve domain authentication, sending reputation, and email deliverability.
Once you have added all required and recommended DNS records, return to Elastic Email and click Verify record.
Continue to the Next Step
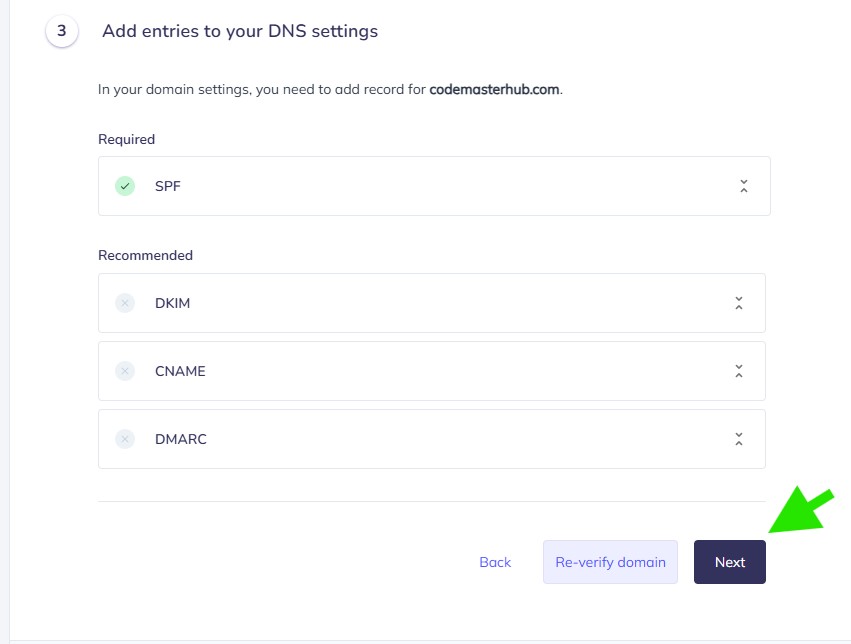
After your required SPF record is verified, Elastic Email will mark it as completed.
If you have also added the recommended records, you can click Re-verify domain to check them again. Once you are ready to continue, click Next.
Domain Verification Completed
If your domain verification is successful, Elastic Email will show a confirmation message letting you know that your domain is verified.
At this point, you can send emails from any address that uses your verified domain, such as [email protected] or [email protected].
Click Continue to finish the domain verification process and move on to the next step.
Set a Default Sender
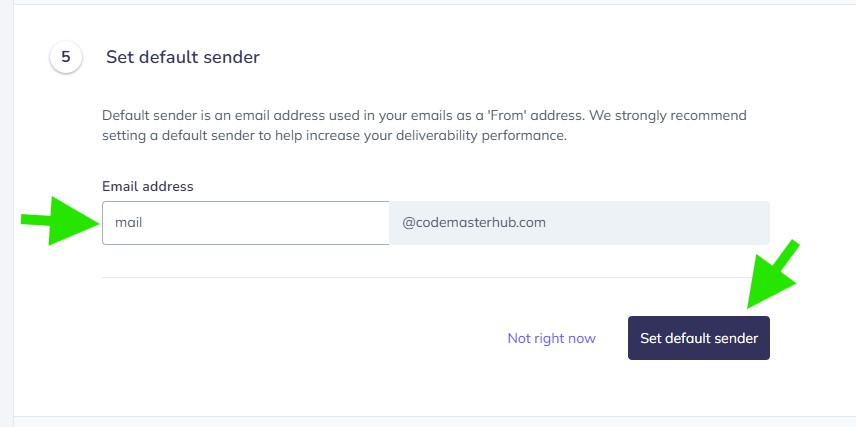
Elastic Email will now ask you to set a default sender address for your verified domain. This will be used as the default From email address for sending.
Enter the local part of the email address in the field, for example mail, which will create the full sender address [email protected].
After entering the sender name, click Set default sender. If you do not want to do this right now, click Not right now.
Finish the Domain Setup
Elastic Email will show a success message confirming that your domain is verified and that the default sender has been set.
Once you see this confirmation, click Finish to complete the domain setup process.
Create API Key
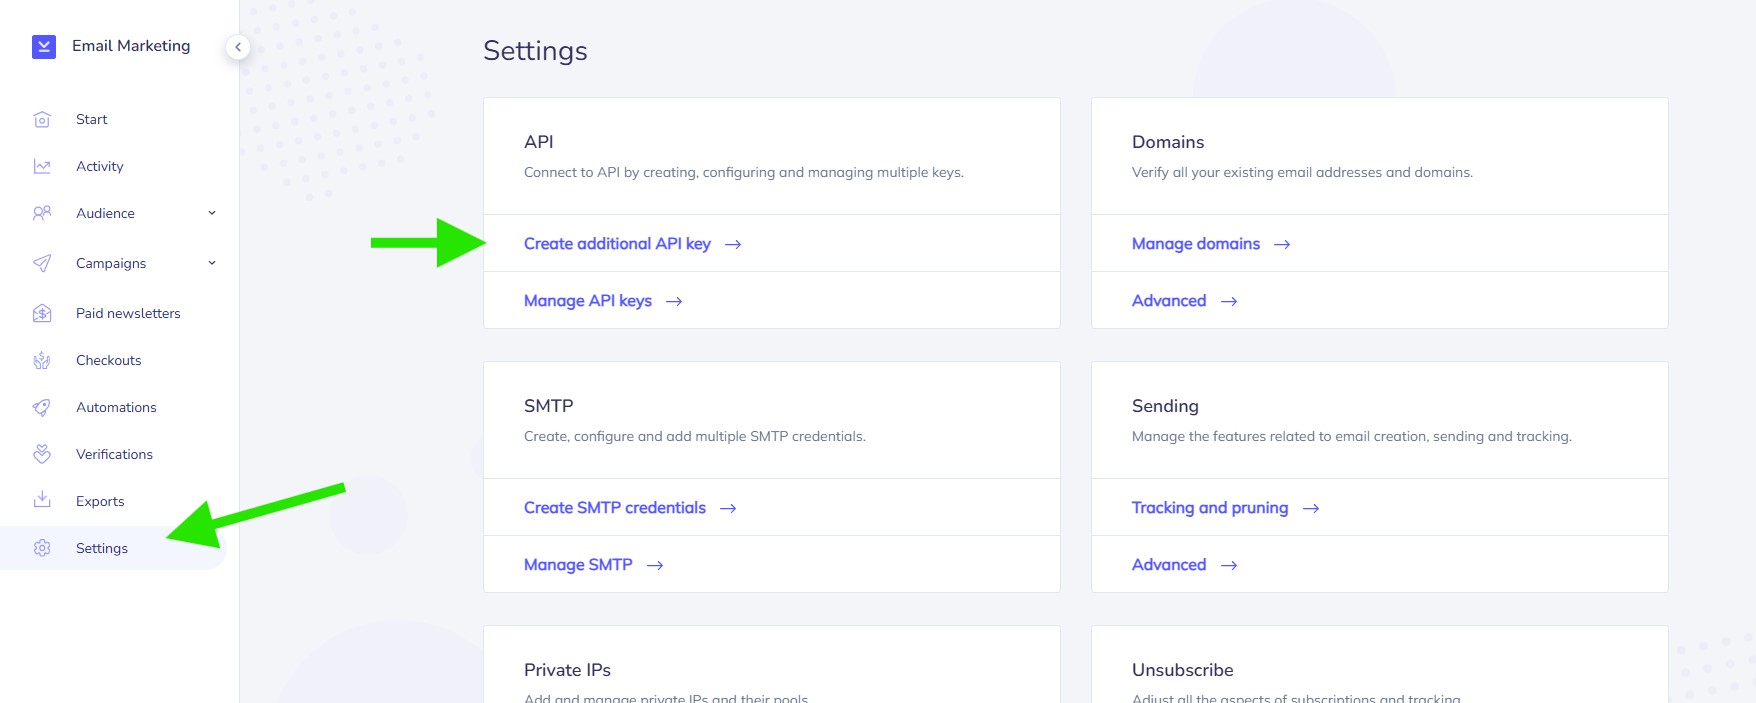
To create an API key in Elastic Email, go to Settings in the left sidebar. In the API section, click Create additional API key.
This will open the API key creation screen, where you can generate a new key for use with Elastic Email and Master SMTP.
Create a New API Key
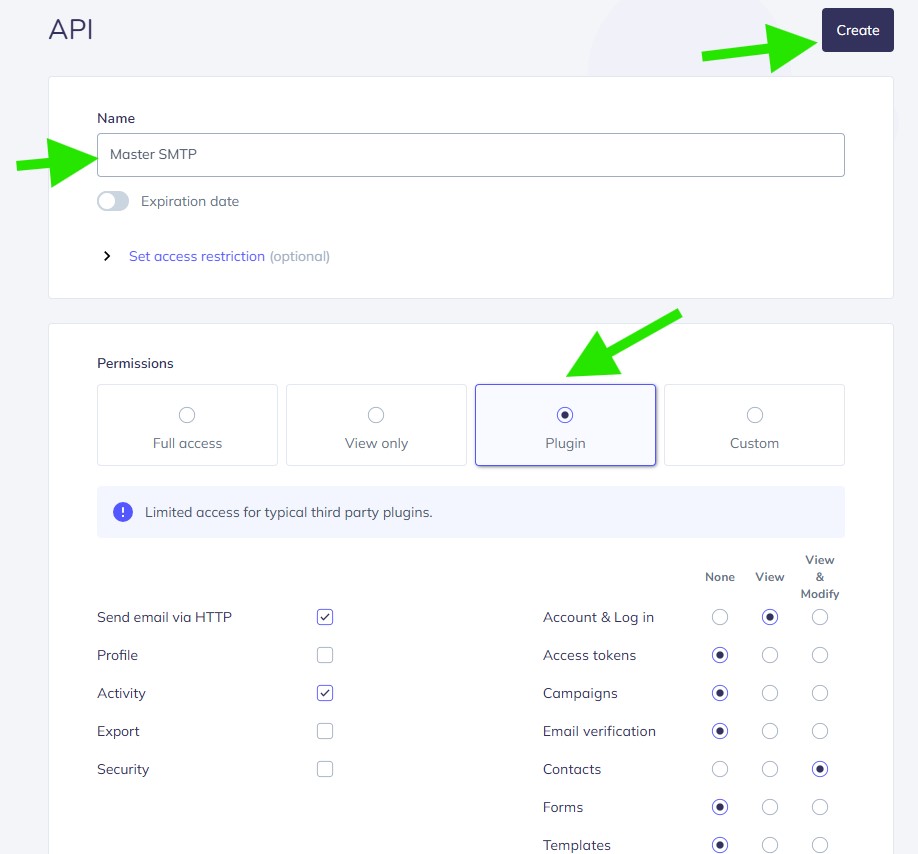
On the API key creation page, enter a name for the key, such as Master SMTP.
In the Permissions section, select Plugin. This option is intended for typical third-party plugin integrations and is suitable for Master SMTP.
You can also set an expiration date or access restriction if needed, but these options are optional.
When everything is ready, click Create to generate the API key.
Copy the API Key
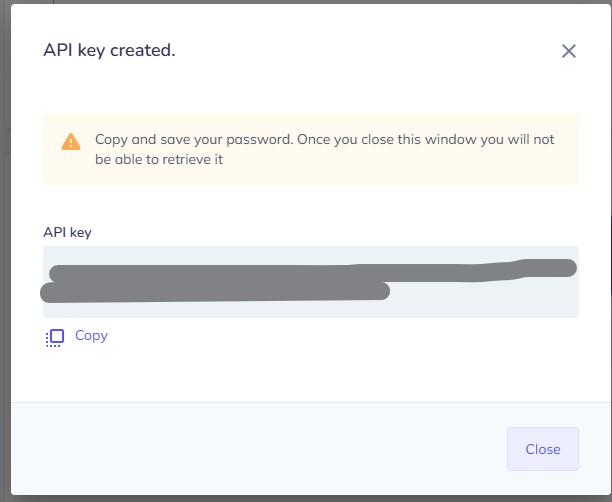
Elastic Email will now show your newly created API key.
Copy this API key and save it in a safe place. You will need it later in the Master SMTP plugin settings when configuring the Elastic Email connection.
Important: once you close this window, Elastic Email will not show this API key again.
After copying the key, click Close.
Elastic Email Setup in Master SMTP Plugin
In your WordPress dashboard, go to Master SMTP > Connections, then click Create New Connection.

Configure Connection
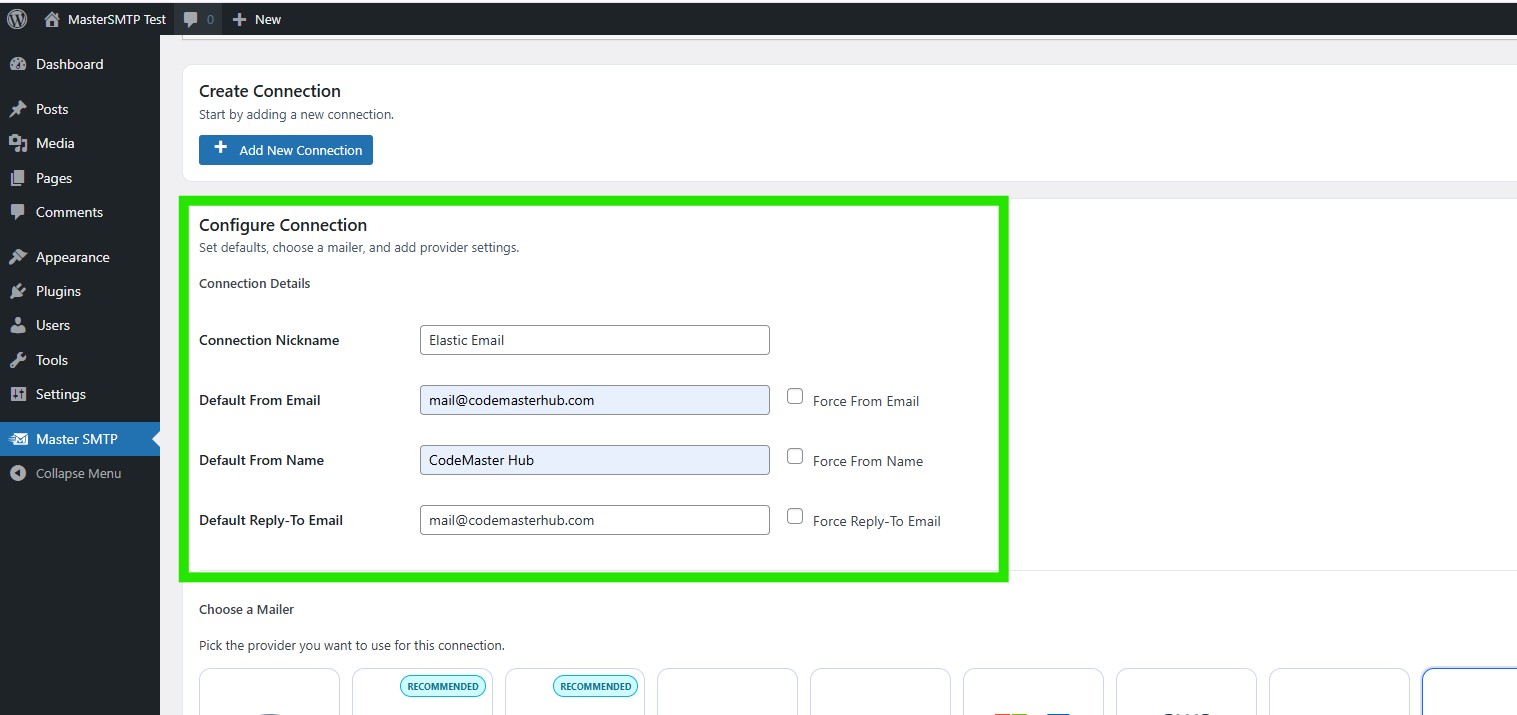
In the Configure Connection section, fill out the Connection Details fields:
Connection Details: Enter a name for this connection. This is only for you, recipients will not see it.
Default From Email: The email address used when an outgoing email does not define a From Email.
Force From Email: If enabled, this From Email will be used for all emails, even if the email has a different From Email.
Default From Name: The name used when an outgoing email does not define a From Name.
Force From Name: If enabled, this From Name will be used for all emails, even if the email has a different From Name.
Default Reply-To Email: The Reply-To address used when an outgoing email does not define a Reply-To Email.
Force Reply-To Email: If enabled, this Reply-To Email will be used for all emails, even if the email has a different Reply-To Email.
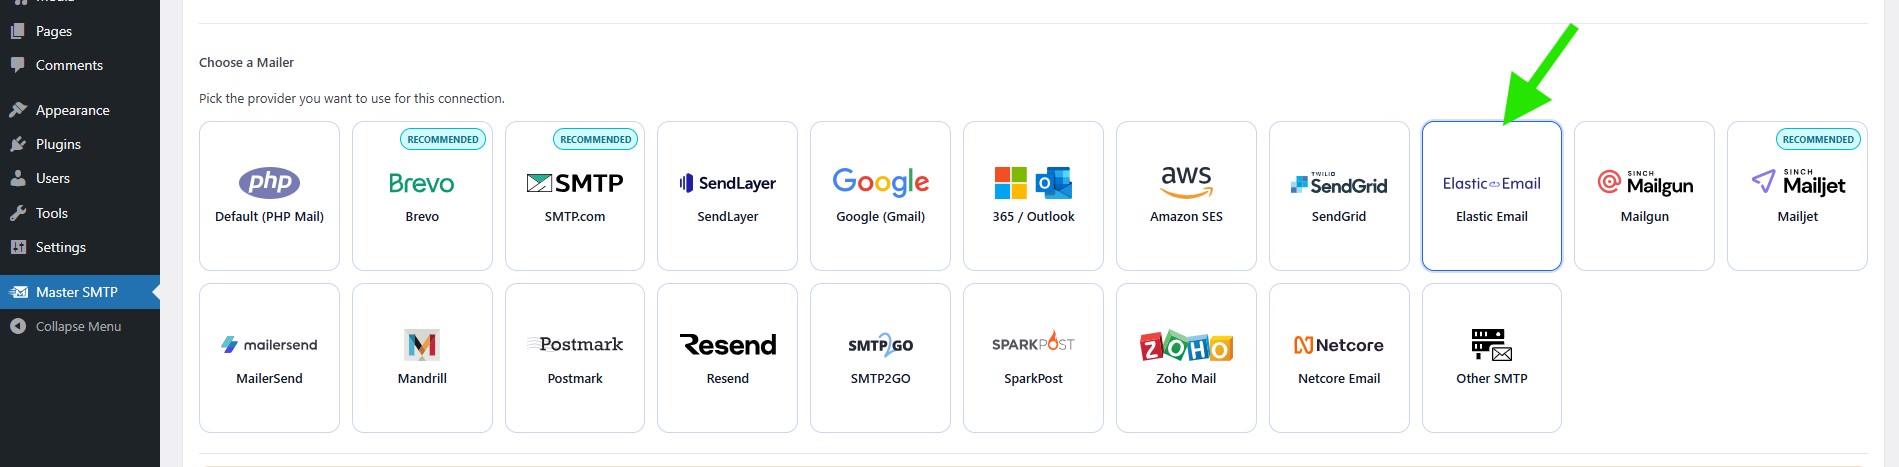
In the Choose a Mailer section, select Elastic Email from the grid mailer list.
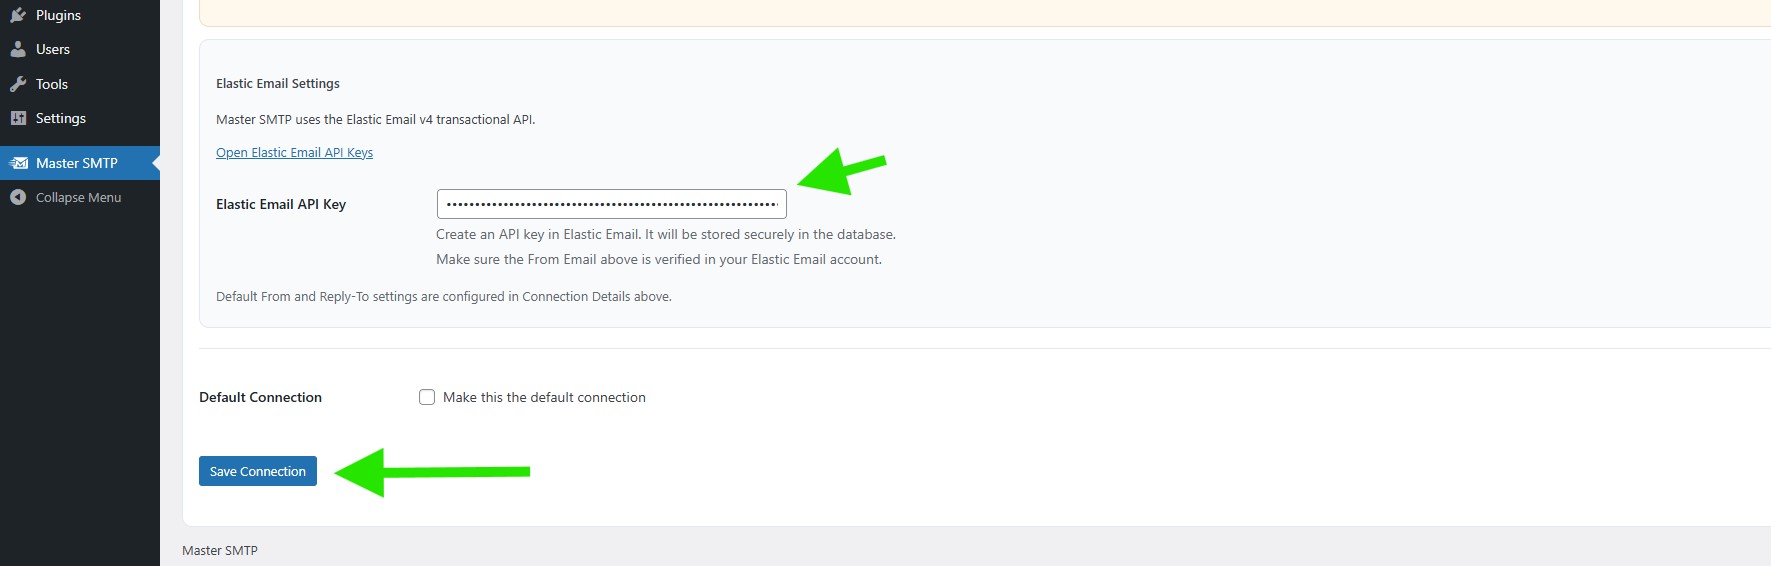
Elastic Email Settings
In the Elastic Email Settings section, paste the Elastic Email API key you created earlier into the Elastic Email API Key field.
Make sure the From Email address configured above is already verified in your Elastic Email account.
If you want to use this connection as your main mailer, enable Make this the default connection under Default Connection.
When everything is ready, click Save Connection.
The connection will be added to the Connections list, and you should see Connection saved. at the top of the window.
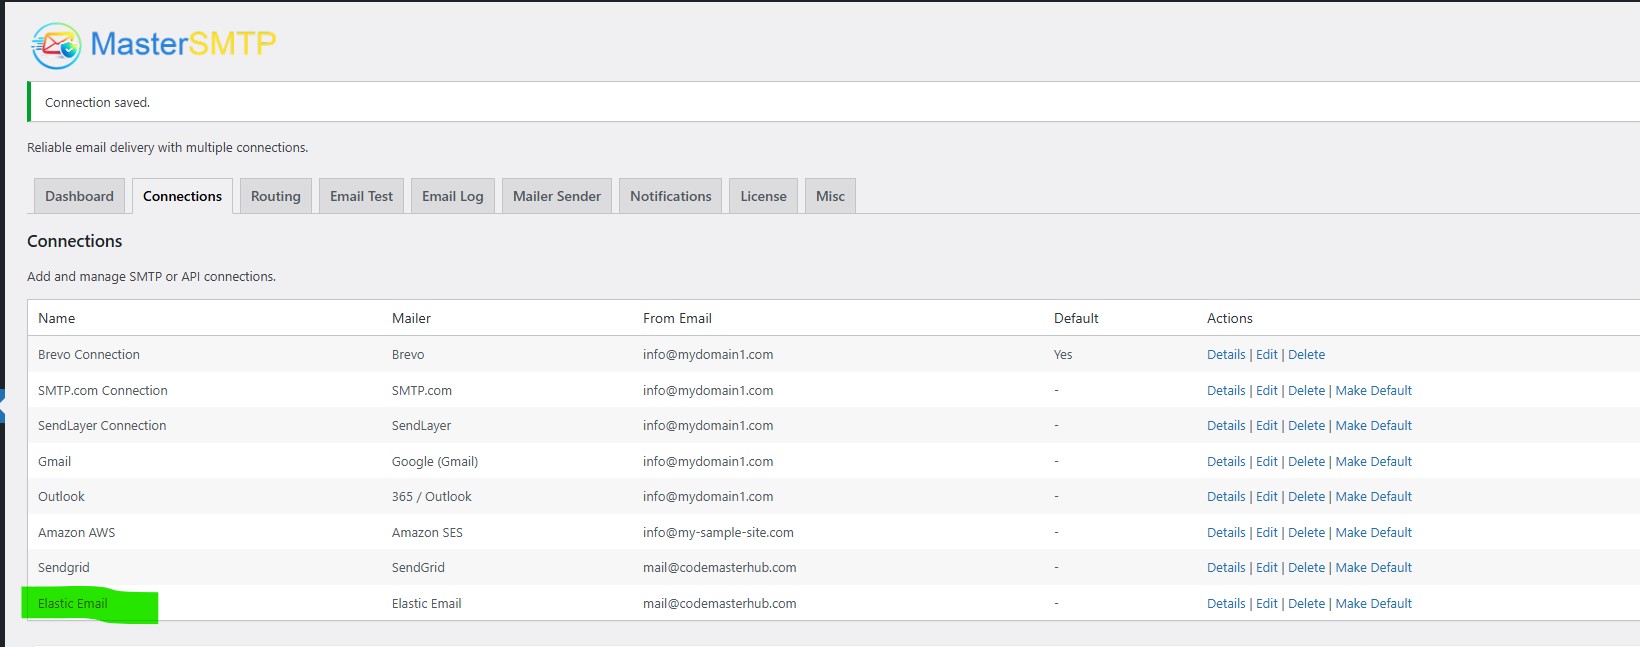
Note: The free version allows you to add only one connection. If you need multiple connections, Conditional Routing, and many other features, you should purchase the Master SMTP Pro.
Test Elastic Email Connection
After saving your Elastic Email connection, it is recommended to send a test email to make sure everything is working correctly. This helps confirm that your API Key , and connection settings have been entered properly and that your site can send emails successfully through Elastic Email SMTP.
For step-by-step instructions, see the test connection guide here: