Table of Contents
What Is Brevo?
Brevo (formerly Sendinblue) is a full marketing and communications platform that also offers powerful transactional email delivery for websites and apps. For WordPress, “transactional” usually means important automated emails like password resets, order confirmations, contact form notifications, membership emails, and admin alerts.
Instead of relying on your hosting server’s built-in mail function (which is often limited and can cause poor deliverability), Brevo sends your messages through its own email infrastructure using SMTP or an API. This typically results in better inbox placement, clearer sending reputation, and more reliable delivery. Brevo also includes tools like sender verification, basic reporting, and deliverability features that make it a solid choice when you want WordPress emails to arrive consistently and look professional.
Create and Verify Your Brevo Account
Step 1: Open the Brevo Transactional Email page
Go to:
https://www.brevo.com/products/transactional-email/
Step 2: Sign up
Click the Sign up free button.
Choose one of these signup methods:
- Enter your email and password Or:
- Use Sign up with Google
- Use Sign up with Apple
Step 3: Enter your account information
In the next steps, fill in the required information as requested:
- Company name*
- Website*
- Address*
- Zipcode*
- City*
- Country*
Then click Continue.
Step 4: Tell Brevo about your organization
In the Tell us about your organization section, fill out the fields:
- How many people are on your team?
- How many contacts do you need to have?
Then click Continue.
Step 5: Verify your mobile number
Enter your mobile number, then click Send verification code.
You will receive a code via SMS.
Enter the code in the verification field, then click Verify.
Step 6: Confirm your plan
After verification, your free plan (up to 300 emails per day) is ready.
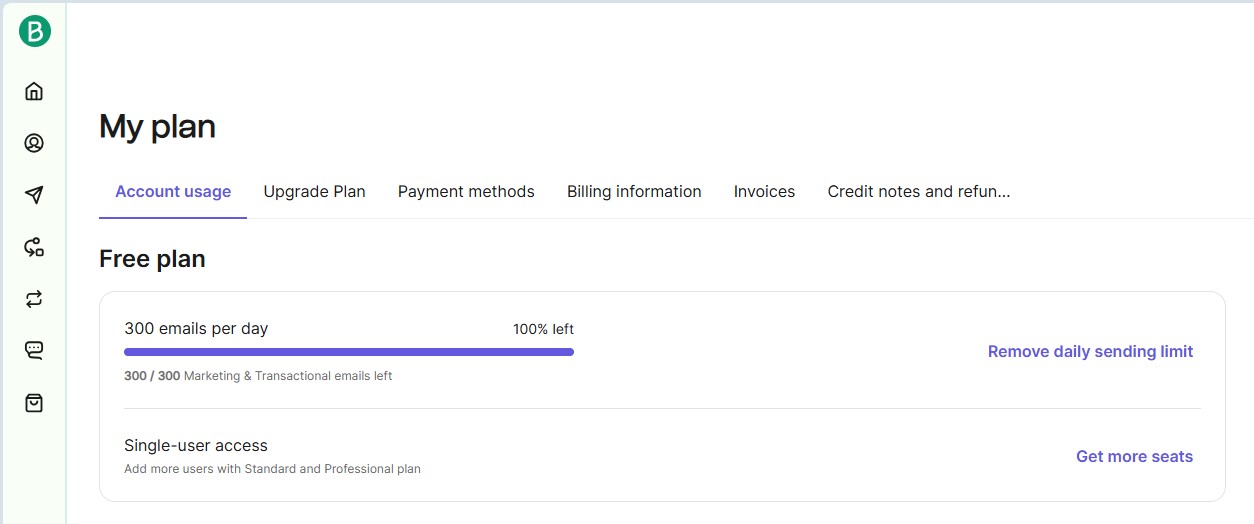
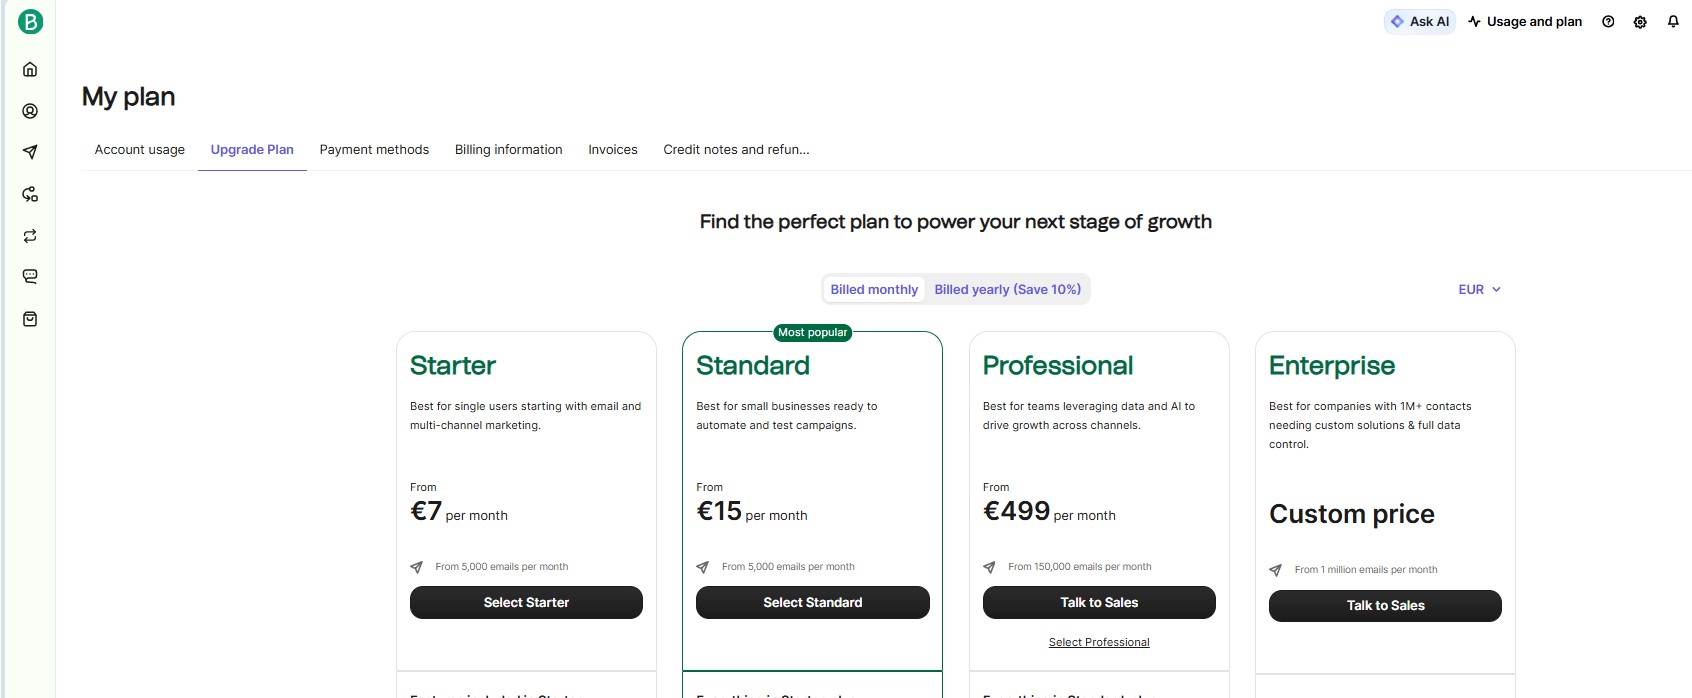
If you need a higher daily sending limit, click Upgrade Plan and choose a paid plan.
Authorizing Your Domain
To ensure your emails deliver successfully, you must authorize your domain in Brevo. This must be the same domain used in your From Email.
For example, if your From Email is [email protected], the domain you must verify in Brevo is example.com.
Setting Up a Domain in Brevo (Sendinblue)
To start the domain verification process, sign in to your Brevo account.
Step 1: Open the domain settings
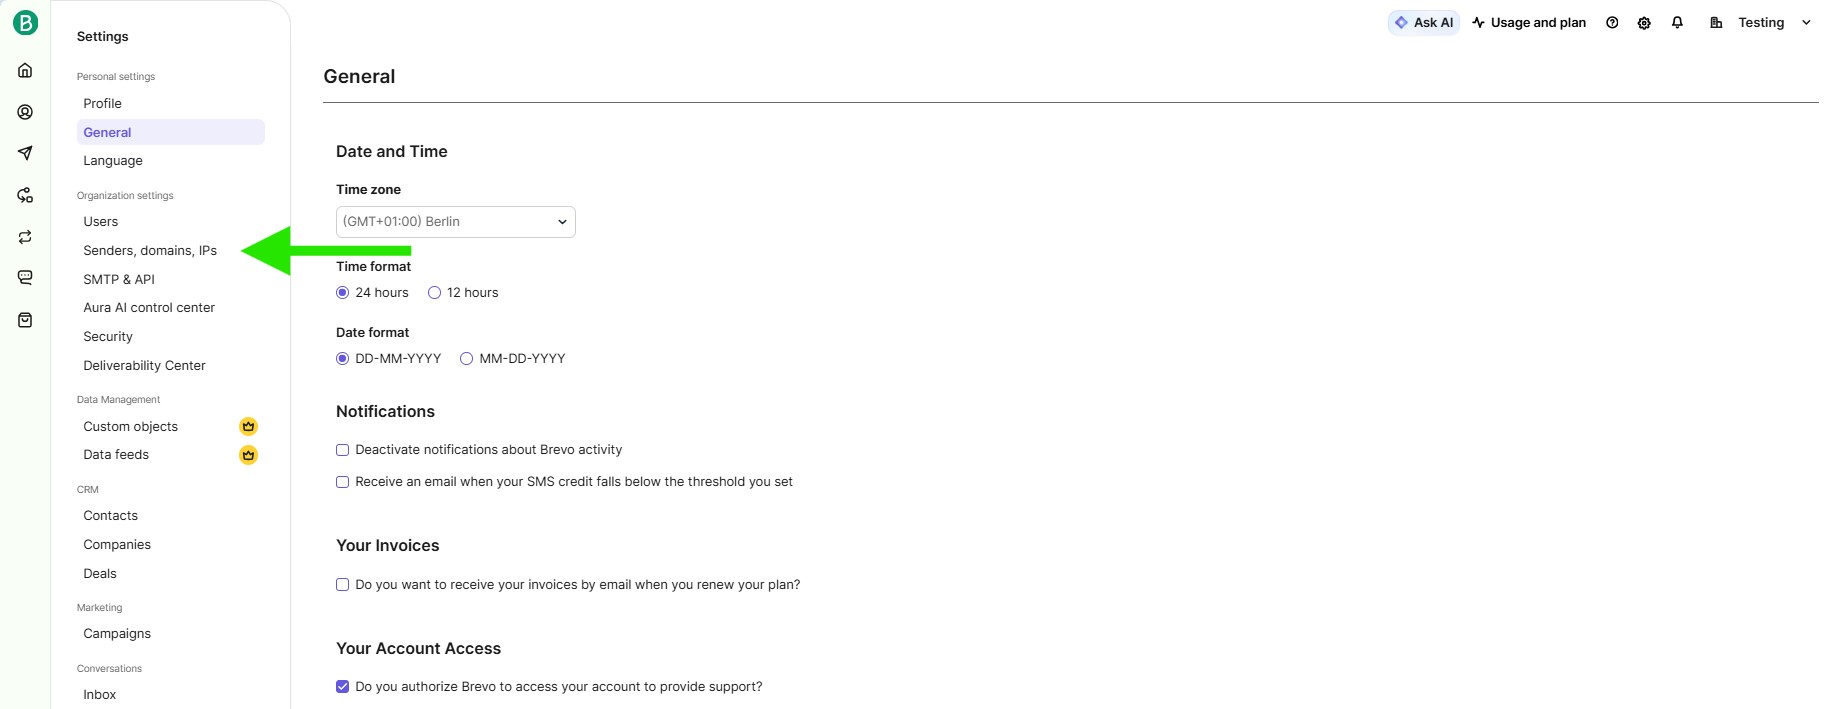
After logging in, click your company name >> My profile in the top-right corner of the dashboard.

From the sidebar menu, select:
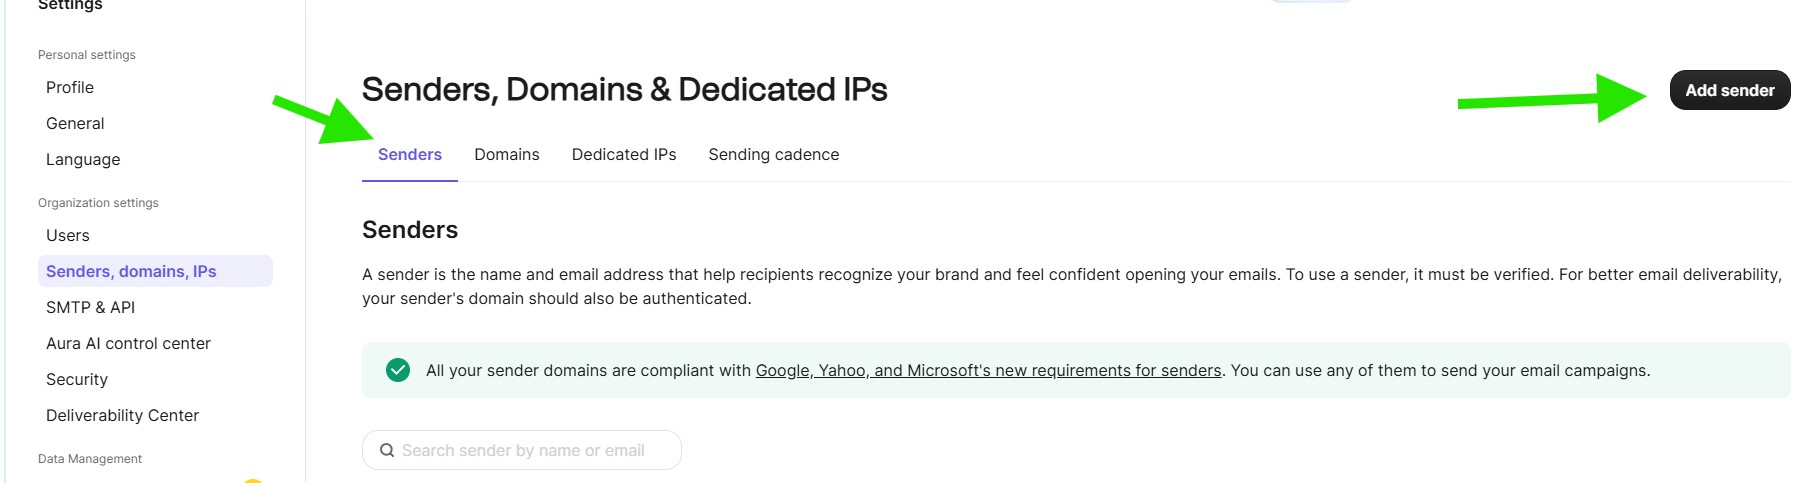
Senders, Domains & Dedicated IPs
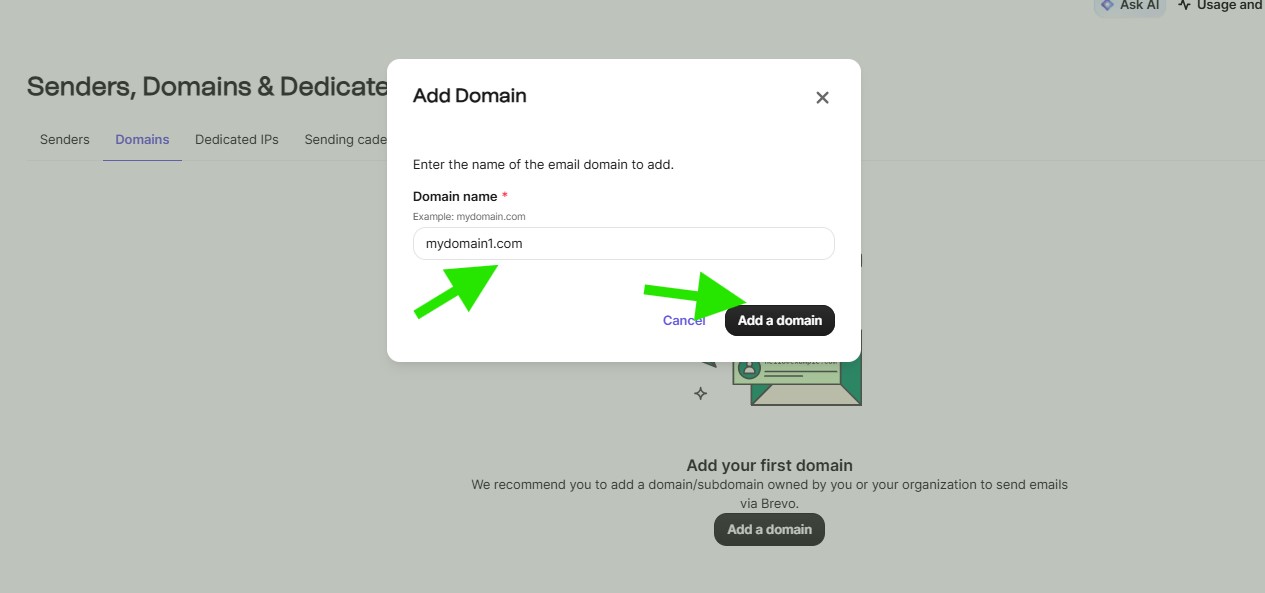
From the next page, click the Domains tab, then click the Add a domain button.
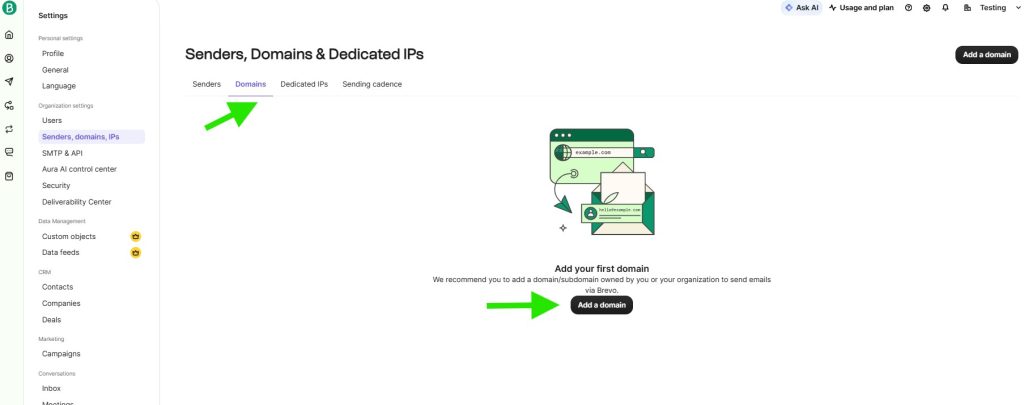
In the Add a domain popup, enter your domain name without http, https, or www, then click Add Domain.
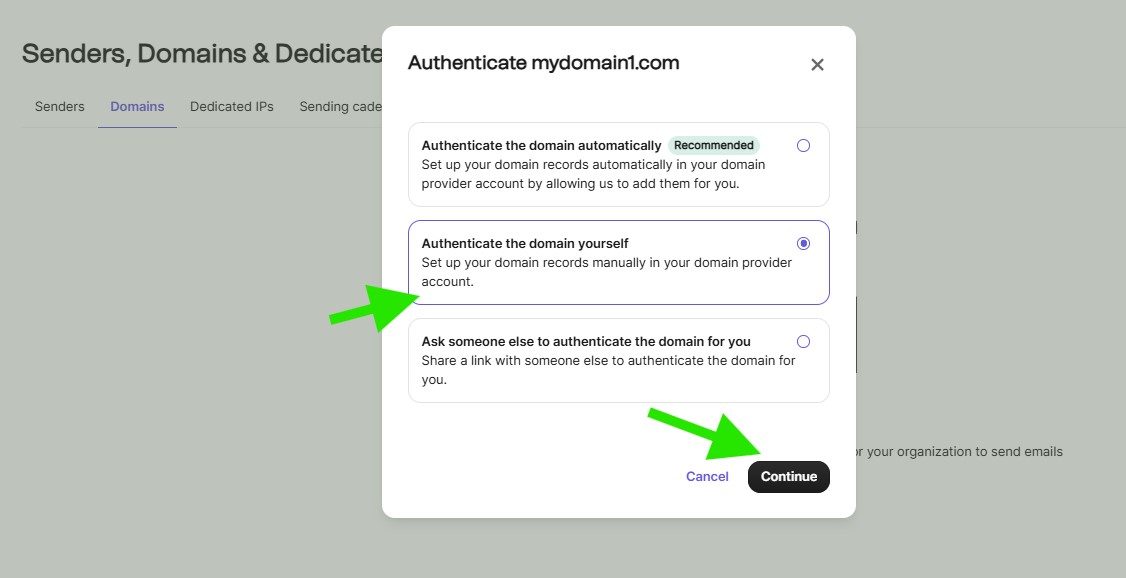
In the Authenticate your domain popup, choose Authenticate the domain yourself, then click Continue.
Adding DNS Records
To authorize your domain, you must add specific DNS records for it. This helps protect your domain, improves email security, and is critical for reliable email delivery.
To proceed, open a new browser tab or window. Then log in to the service where you manage your domain’s DNS (this is often your domain registrar or hosting provider).
Locate the DNS management area, such as:
DNS Settings, DNS Records, DNS Management, or Zone Editor.
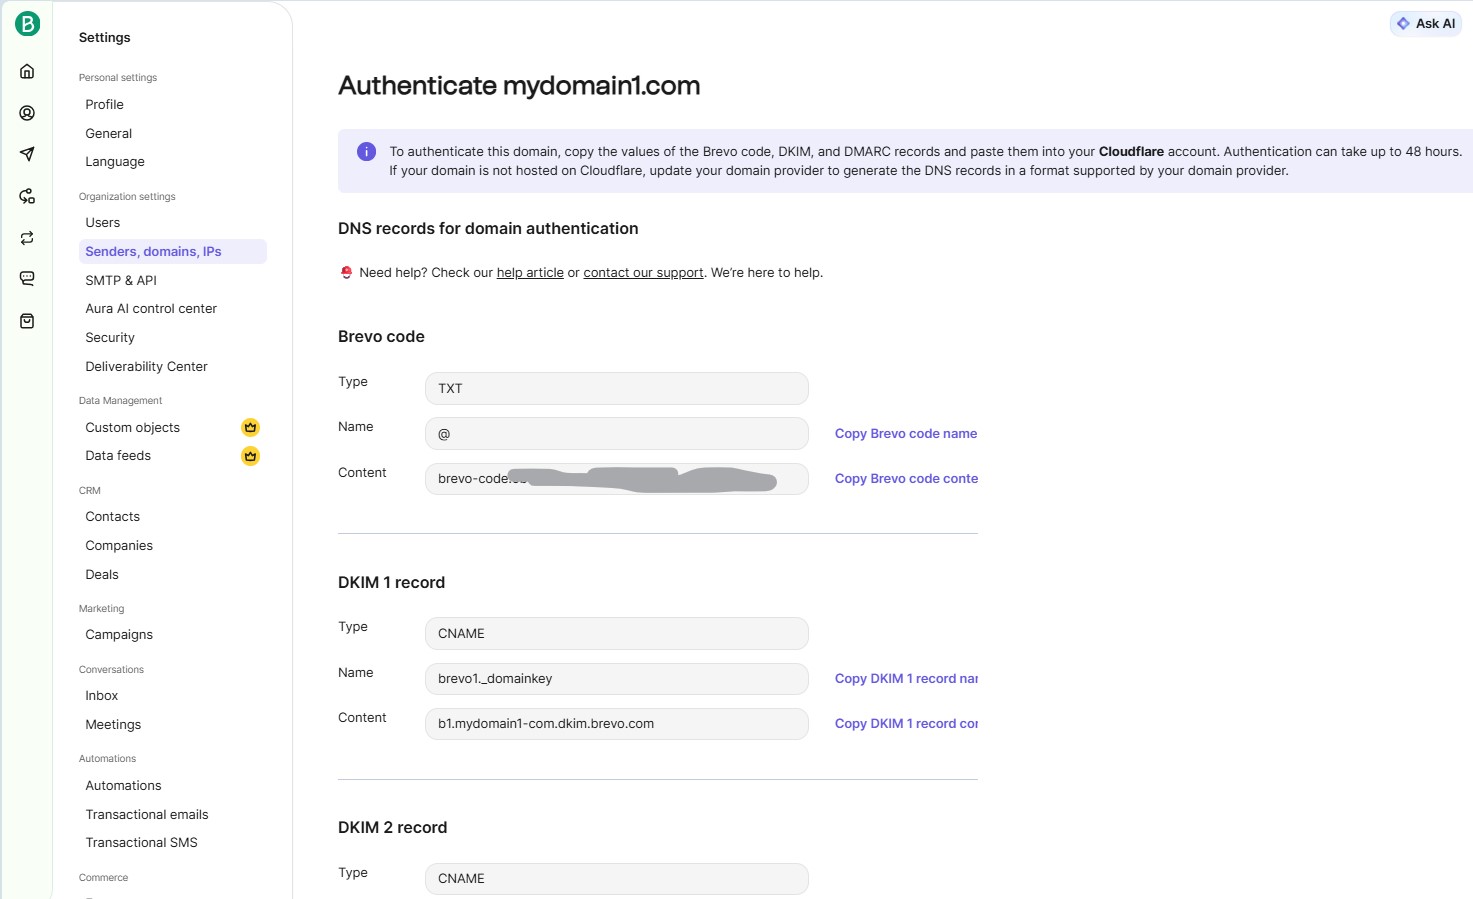
After you add the DNS records, return to Brevo and click Authenticate this email domain.
Note: DNS changes can take up to 24 hours to fully apply. Usually it works within about 2 hours. With fast DNS providers like Cloudflare, it can take as little as 2 minutes.
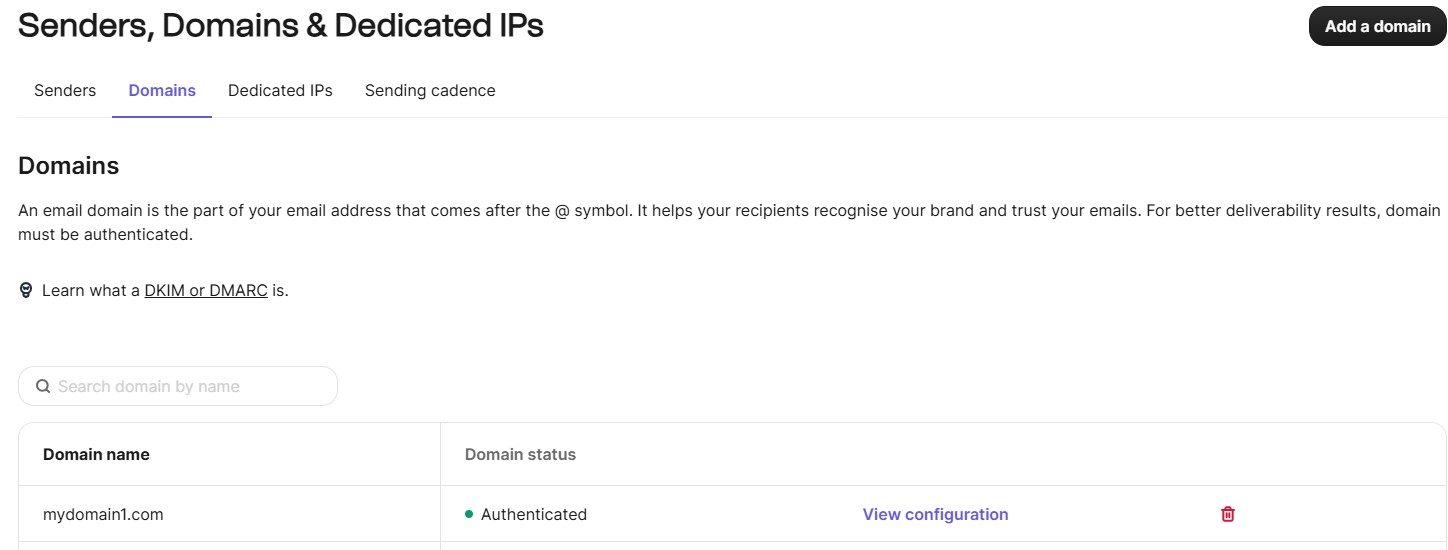
After the records apply, go back to the Domains list. Under Domain status, you should see Authenticated.
If it does not show Authenticated, the DNS records are not applied yet, or they were entered incorrectly.
Add a Sender
In the Senders, Domains & Dedicated IPs page, click the Senders tab, then click the Add Senders button.
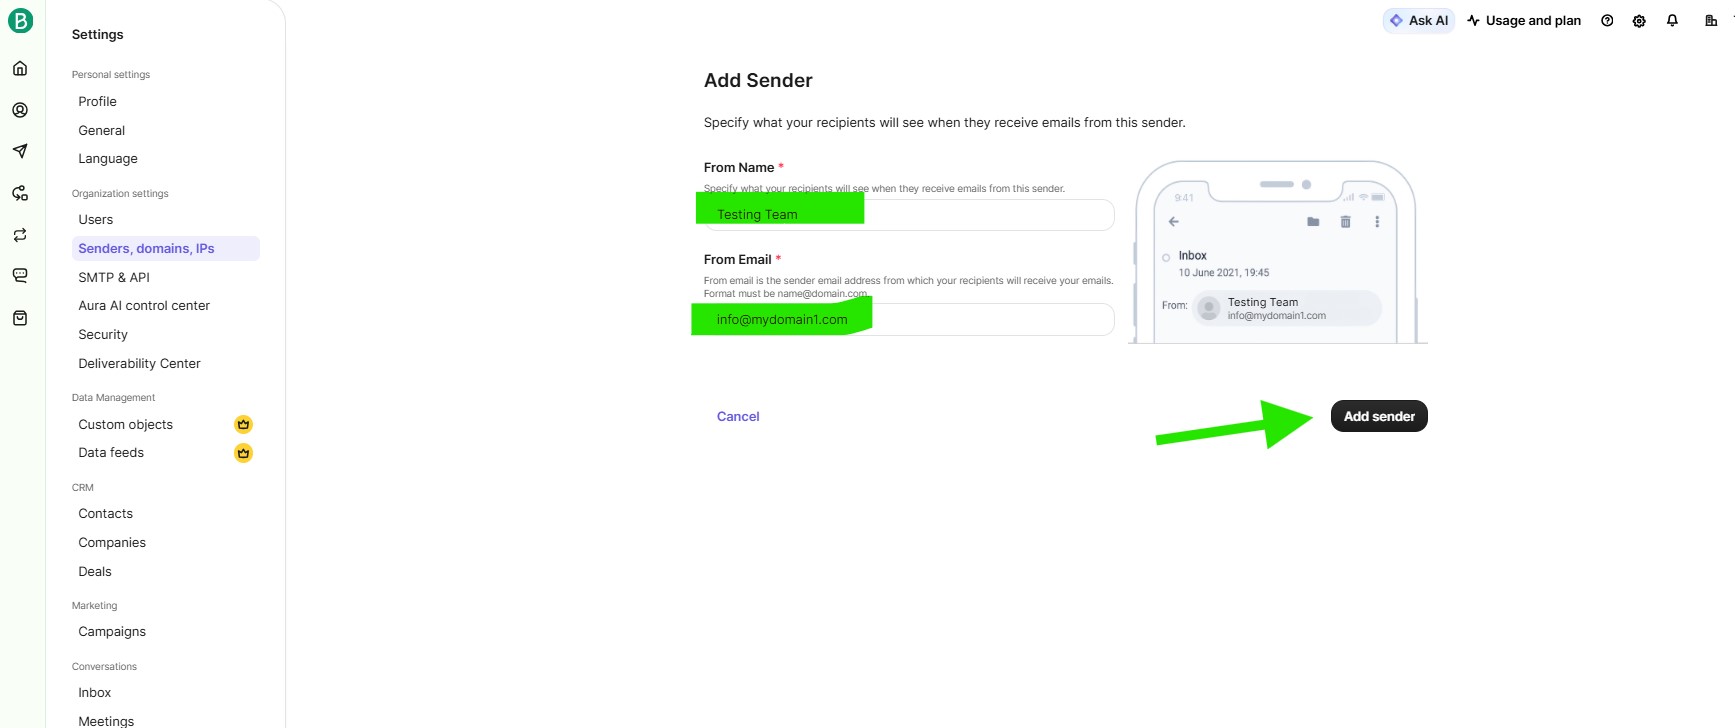
On the Add a Sender page, enter your From Name and From Email, then click the Add Sender button.
Note: The sender email must use an authenticated domain.
Example: If you authenticated example.com, your sender email can be [email protected].
After adding the sender, you should see Verified and DMARC is configured for that email in the Senders list.

Setting Up Brevo on Master SMTP
In your WordPress dashboard, go to:
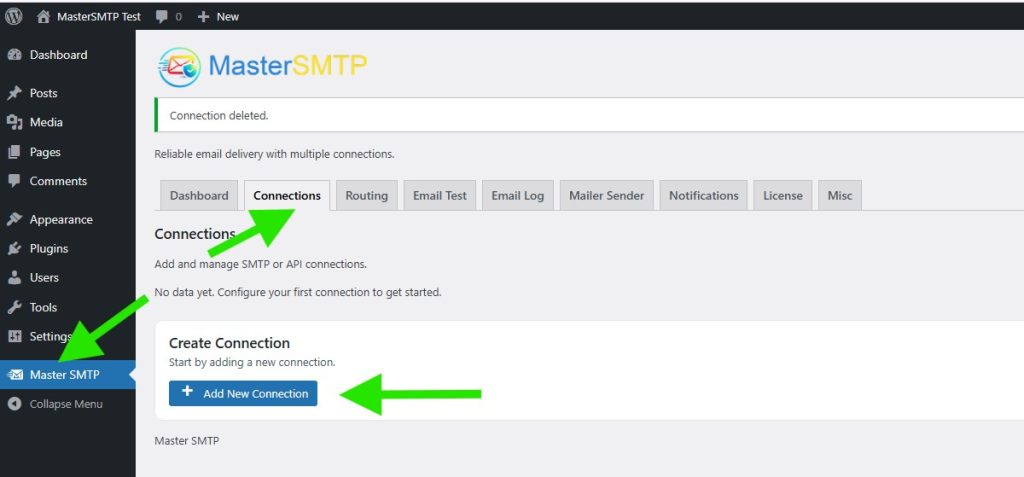
Master SMTP > Connections
In the Create Connection section, click Add New Connection.
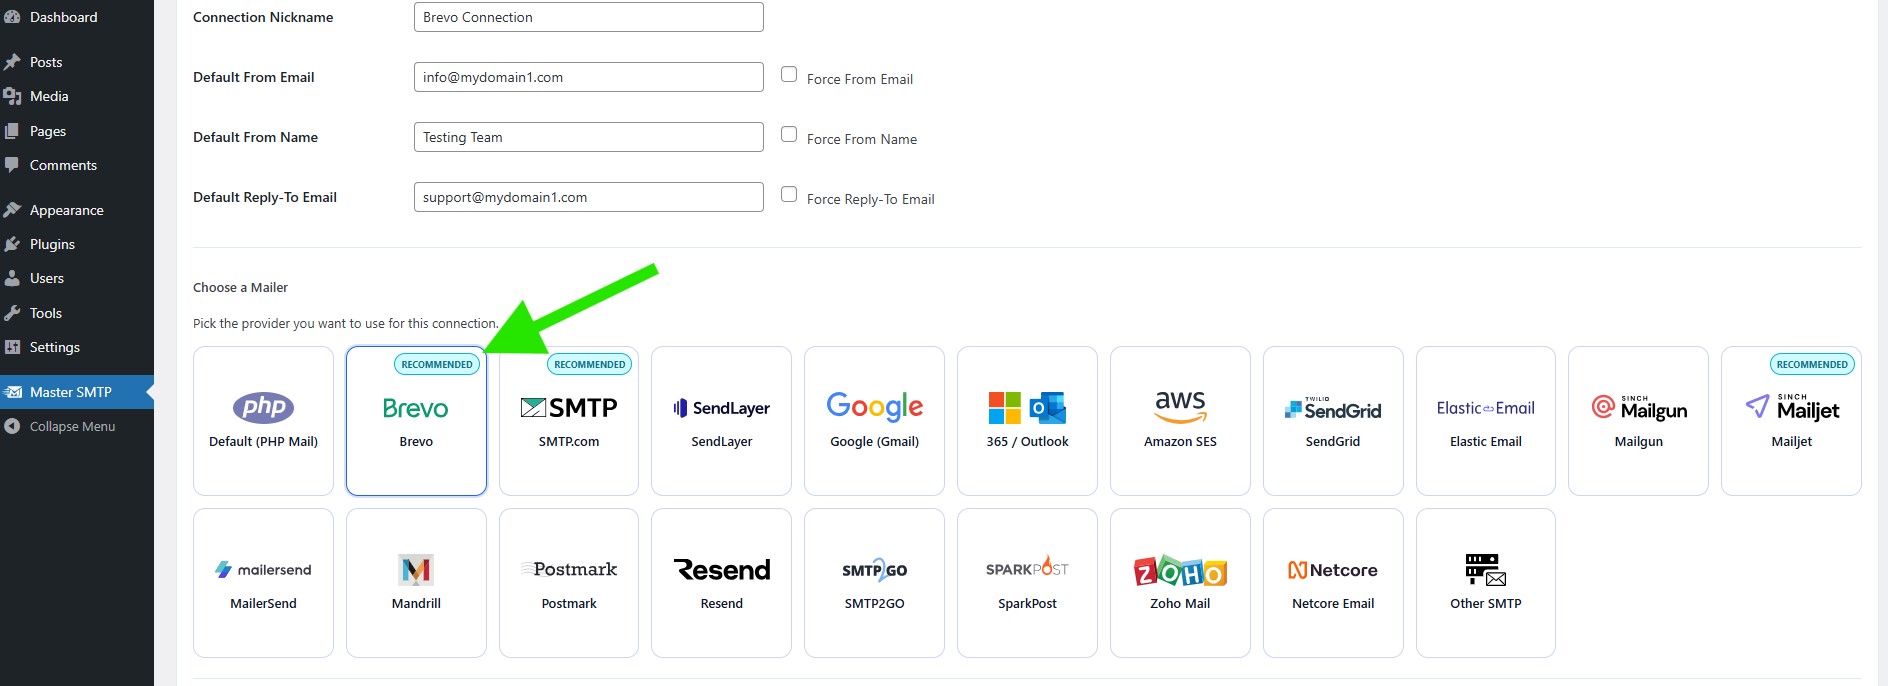
Configure Connection
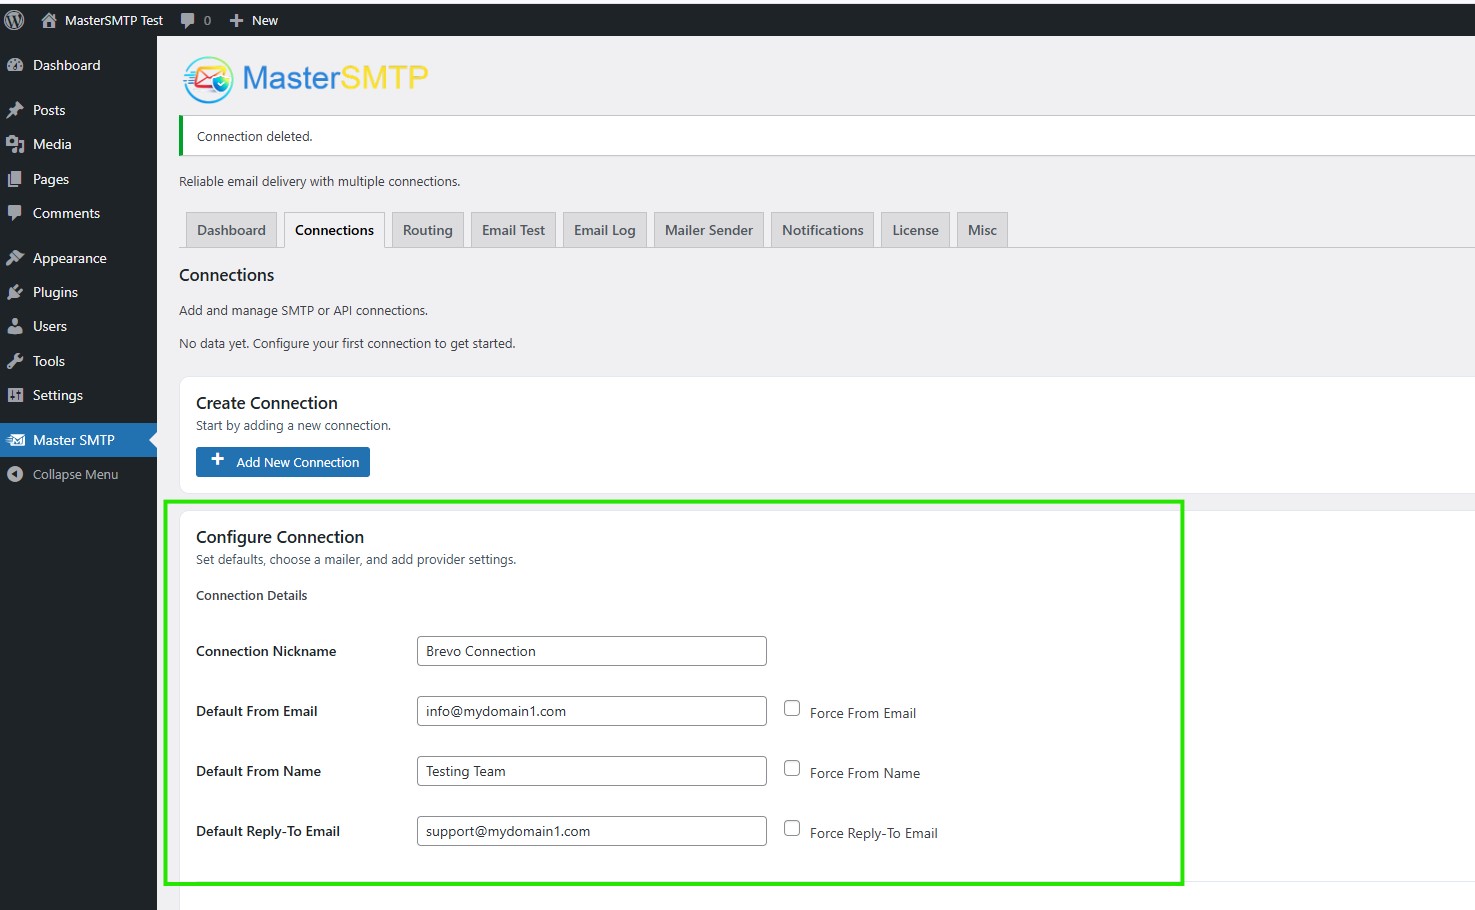
In the Configure Connection section, fill out the Connection Details fields:
Connection Details: Enter a name for this connection. This is only for you, recipients will not see it.
Default From Email: The email address used when an outgoing email does not define a From Email.
Force From Email: If enabled, this From Email will be used for all emails, even if the email has a different From Email.
Default From Name: The name used when an outgoing email does not define a From Name.
Force From Name: If enabled, this From Name will be used for all emails, even if the email has a different From Name.
Default Reply-To Email: The Reply-To address used when an outgoing email does not define a Reply-To Email.
Force Reply-To Email: If enabled, this Reply-To Email will be used for all emails, even if the email has a different Reply-To Email.
Choose a Mailer
In the Choose a Mailer section, click Brevo in the mailers grid list.
Create an API Key in Brevo
Open a new browser tab, then go to:
https://app.brevo.com/settings/keys/api
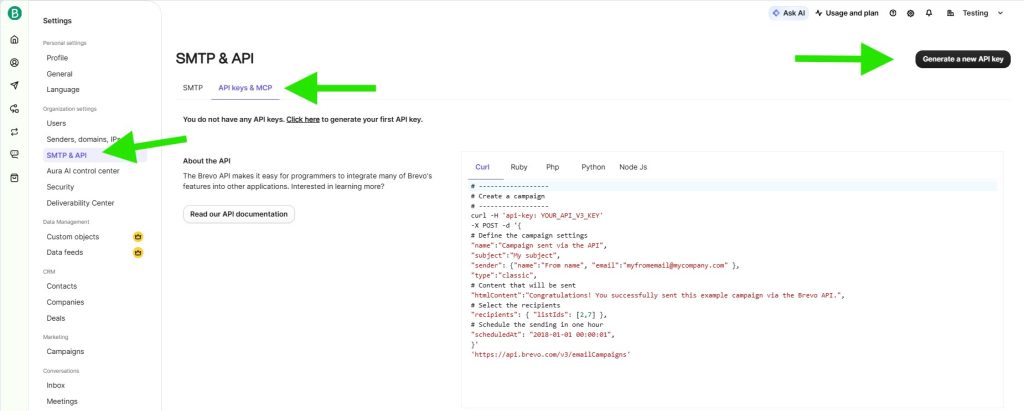
You can also access this page from the Brevo sidebar menu, below Senders, domains, IPs.
On the Keys page, make sure you are in the API keys & MCP tab, then click Generate a new API key.
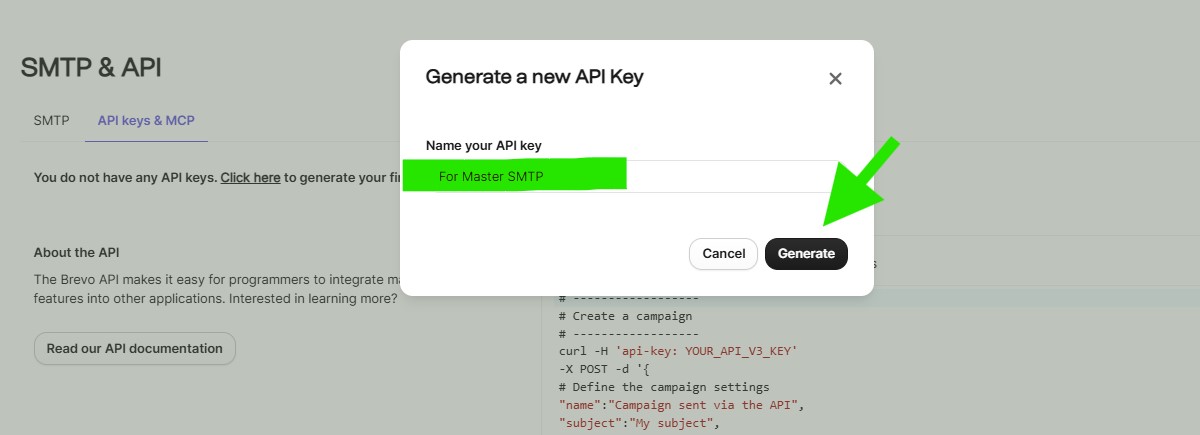
In the Name your API key field, enter a name for the key, then click Generate.
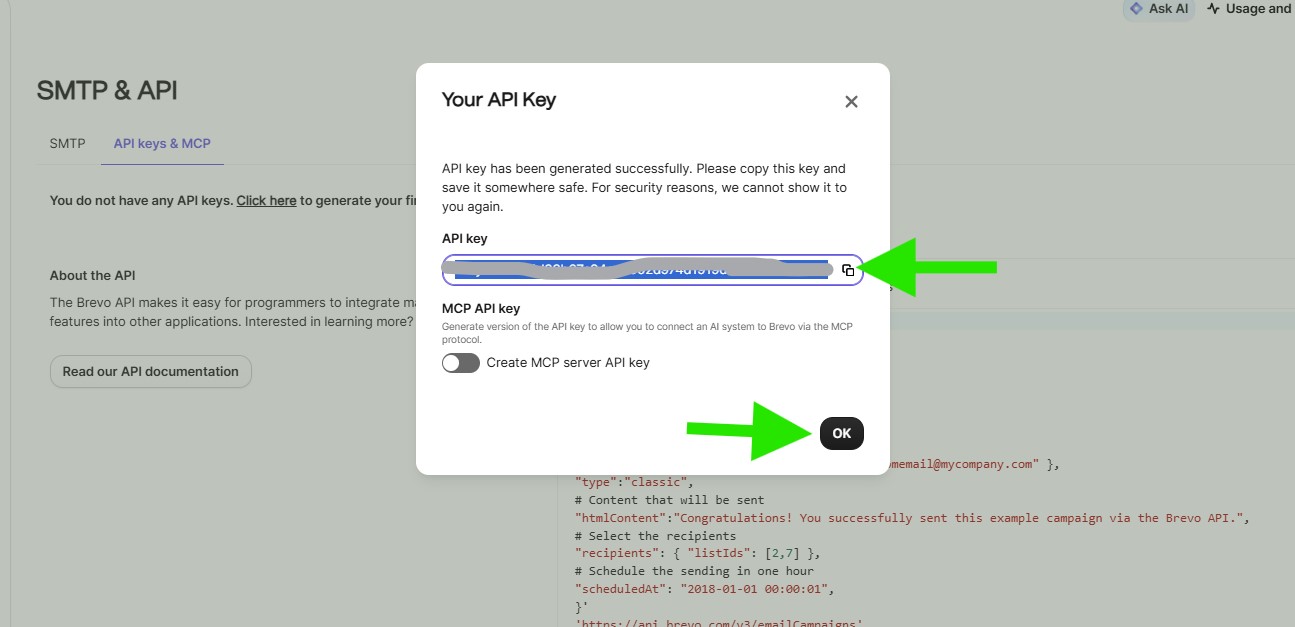
After the API key is generated, in Your API Key, click the copy icon to copy it, then click OK.
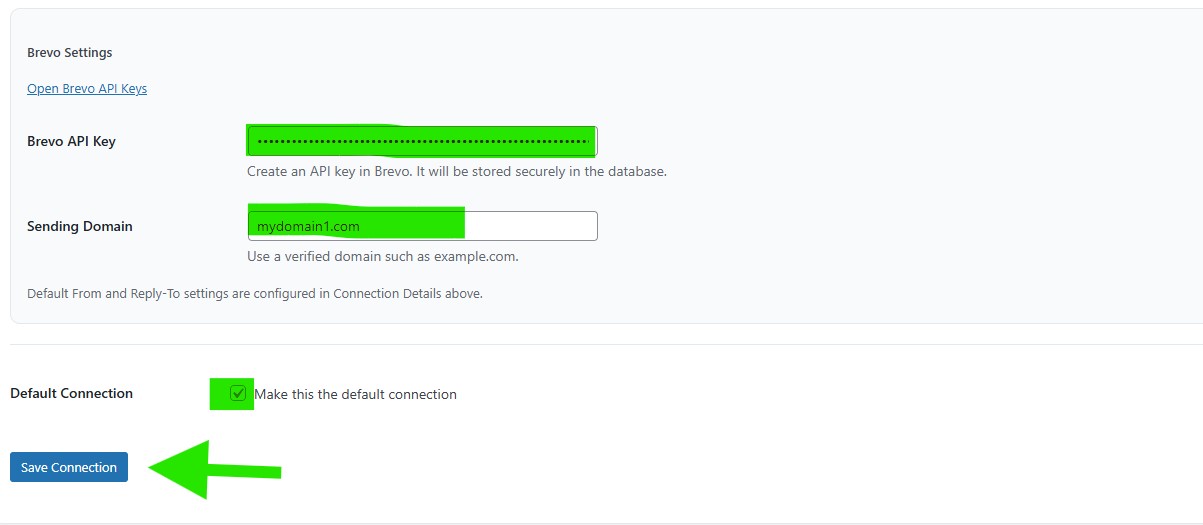
Go back to the Brevo connection settings in your WordPress dashboard, then paste the API key you copied.
In Sending Domain, enter the same domain you authenticated in Brevo.
Default Connection: Enable this if you want this connection to be the default sender for outgoing emails.
Then click Save Connection.
The connection will be added to the Connections list, and you should see Connection saved. at the top of the window.
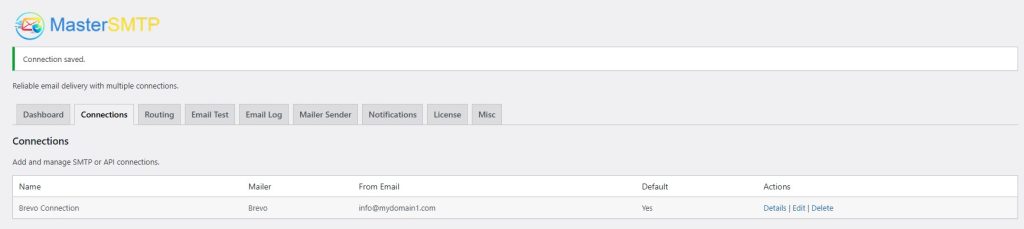
Note: The free version allows you to add only one connection. If you need multiple connections, Conditional Routing, and many other features, you should purchase the Master SMTP Pro.
Test Brevo Connection
After saving your Brevo connection, it is recommended to send a test email to make sure everything is working correctly. This helps confirm that your API Key, Sender Name, and connection settings have been entered properly and that your site can send emails successfully through Brevo SMTP.
For step-by-step instructions, see the test connection guide here: