Table of Contents
What is Amazon AWS SES
Amazon AWS SES, short for Amazon Simple Email Service, is a cloud-based email sending service from Amazon Web Services that helps websites, apps, and businesses send transactional and marketing emails at scale. It is designed to provide reliable delivery, flexible sending options, and tools for managing sender identity, authentication, reputation, and performance. With Amazon SES, you can send messages such as verification emails, password resets, order updates, contact form notifications, and other important website emails through Amazon’s infrastructure instead of relying on standard web hosting mail.
Amazon AWS SMTP refers to using Amazon SES through the SMTP protocol, which allows email clients, plugins, and applications to connect to SES just like a traditional SMTP mail server. Instead of using the Amazon SES API directly, you generate SMTP credentials in your AWS account and use them in your mailer settings to send email through Amazon’s servers. This makes Amazon AWS SMTP a practical option for WordPress plugins such as Master SMTP, because it allows you to connect Amazon SES easily while improving deliverability, reliability, and sending control.
Configuring an Amazon AWS Account
Before you begin, you will need to create a free Amazon Web Services (AWS) account. Although the account itself is free and this mailer setup does not require any paid AWS services, Amazon will still ask you to add a valid credit card during the registration process.
After your AWS account is created, Amazon will try to detect your region automatically based on the address you entered. If the system cannot determine your region with confidence, you will be asked to select the closest available region manually before continuing.
Creating an IAM User
After creating your Amazon Web Services account, the next step is to create an IAM user. This user will later provide the access keys required for your Amazon AWS SMTP setup.
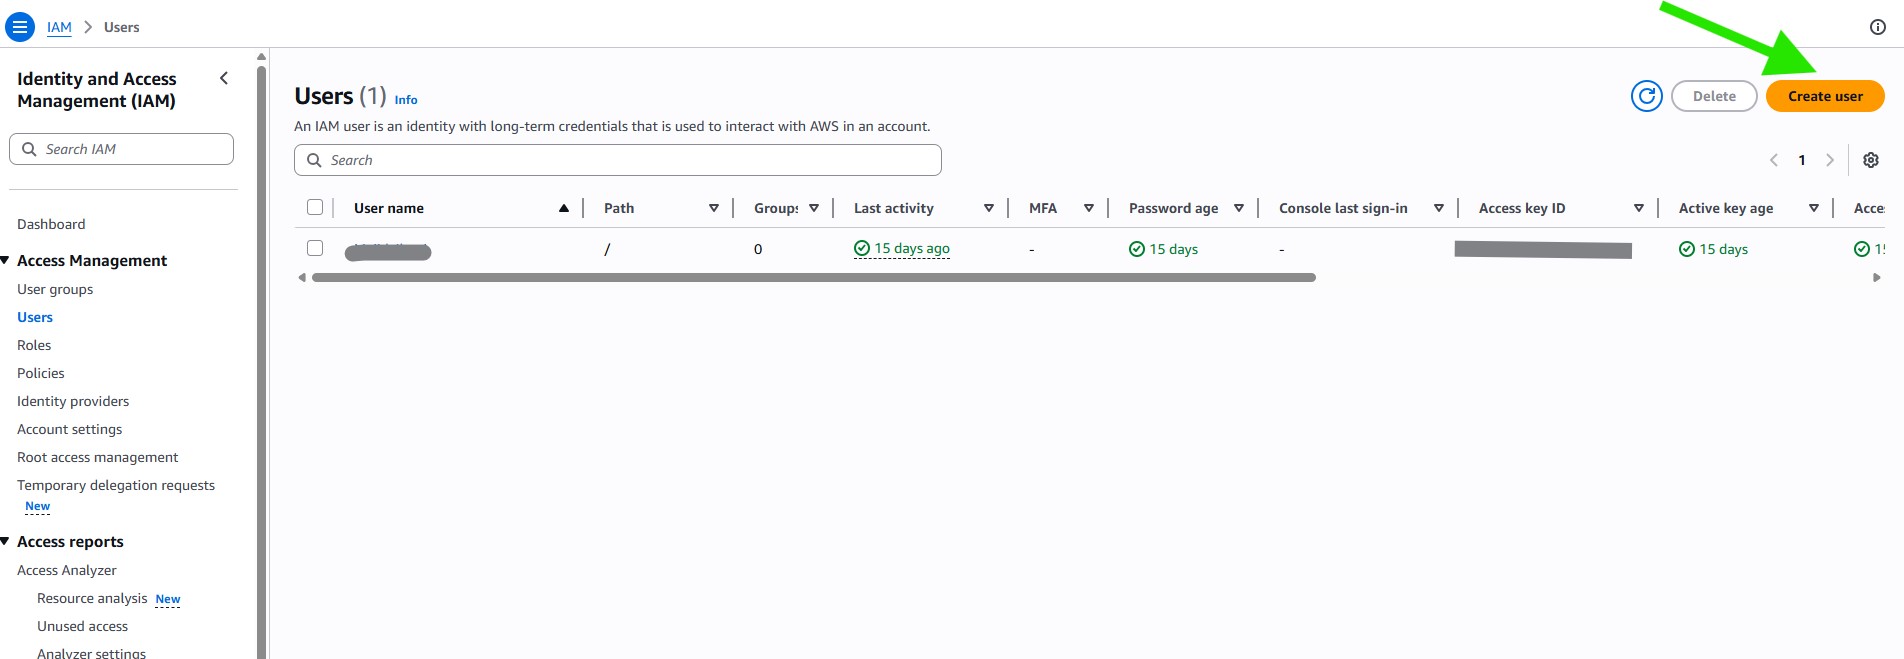
To get started, open the AWS IAM Users page:
https://console.aws.amazon.com/iam/home#users
On this page, click the Create user button to continue.
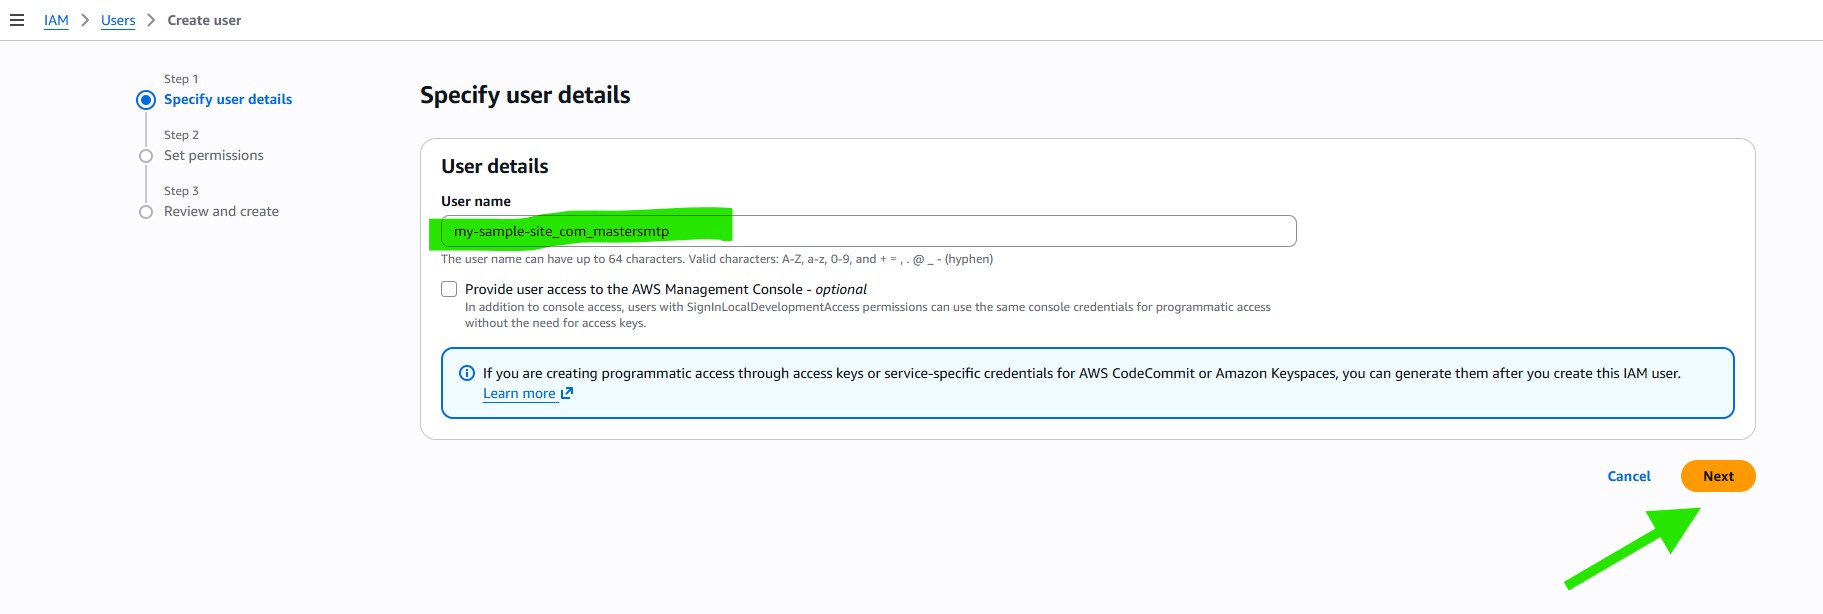
On the Specify user details page, enter a User name.
Recommended format: yourdomain_mastersmtp
After entering the user name, click Next.
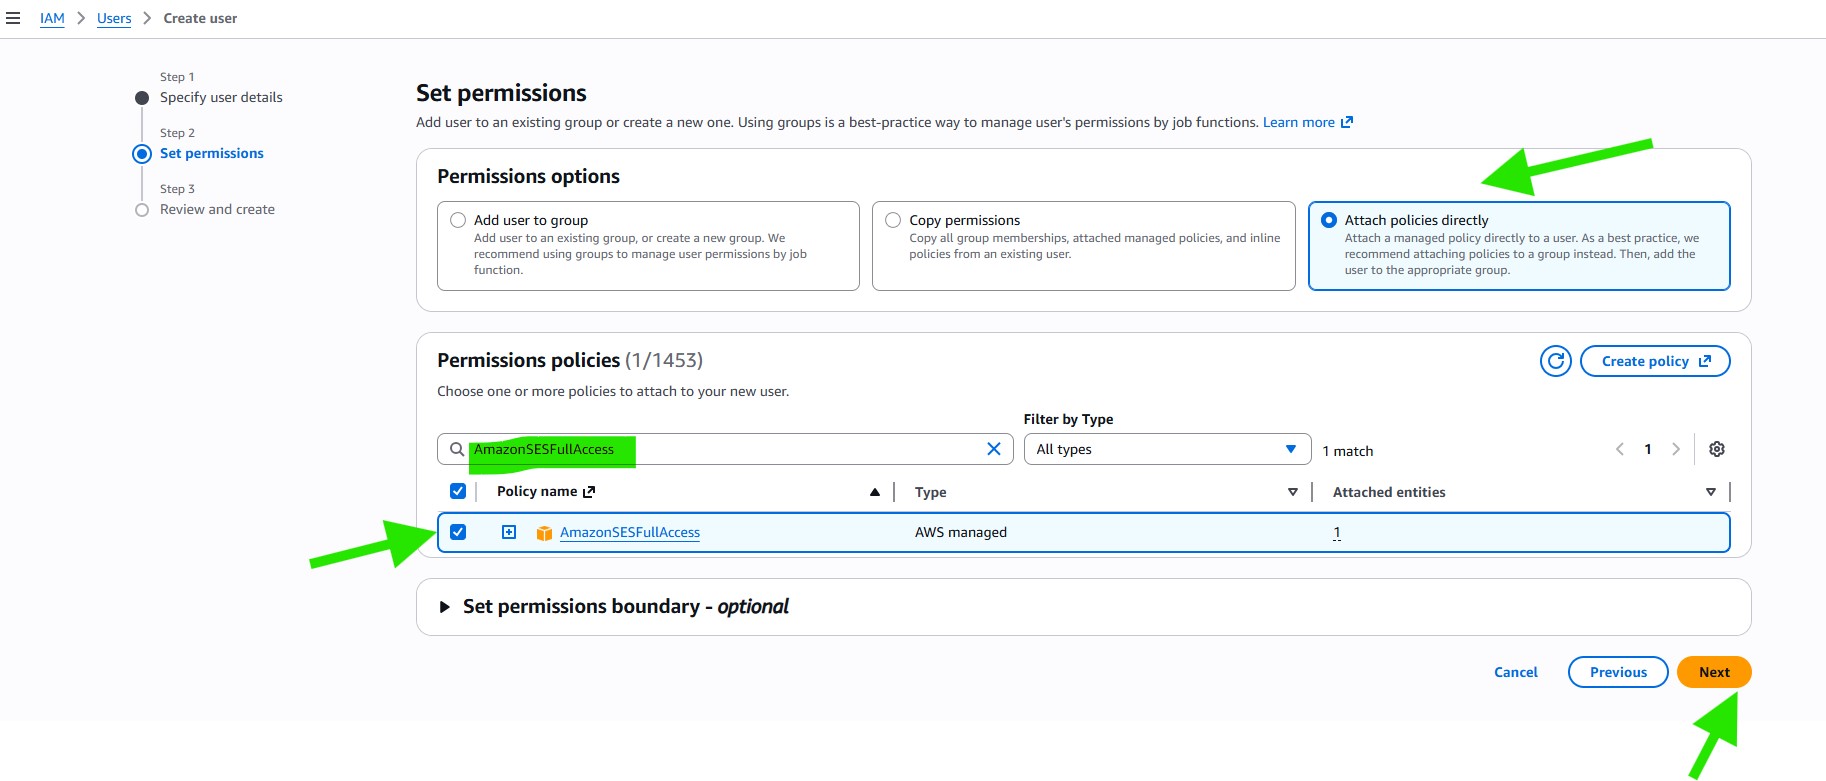
On the Set permissions page, select Attach policies directly.
In the search bar, type AmazonSESFullAccess. You should see one result with the same name. Select the checkbox next to this option to grant the user permission to access Amazon SES.
When you are ready, click Next to proceed.
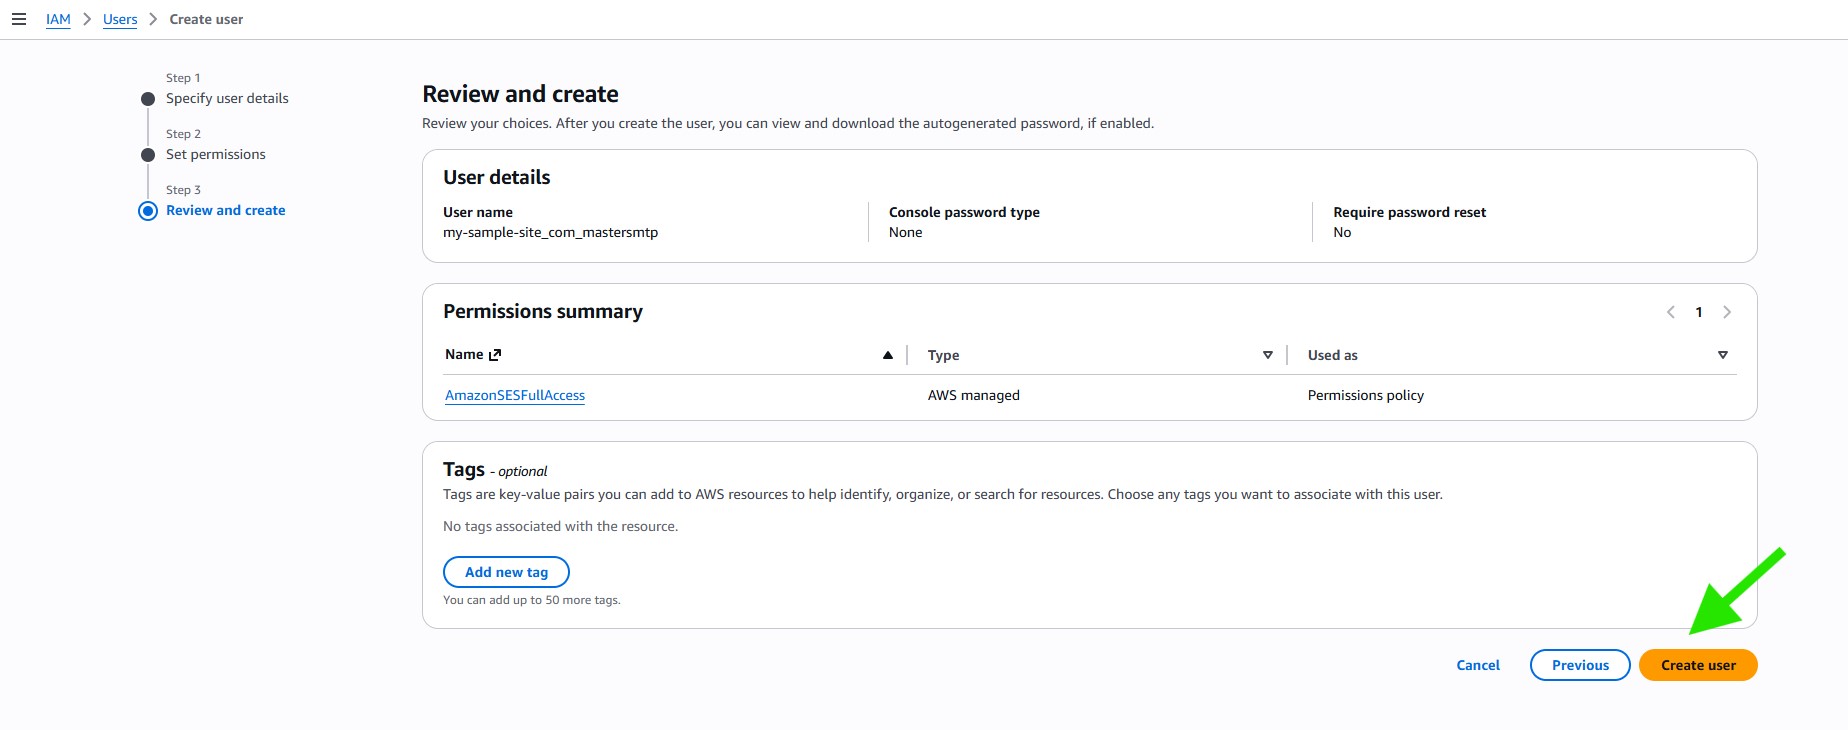
On the next page, you will see a summary of all the details you selected for this user. Review the information to make sure everything is correct, then click Create user.
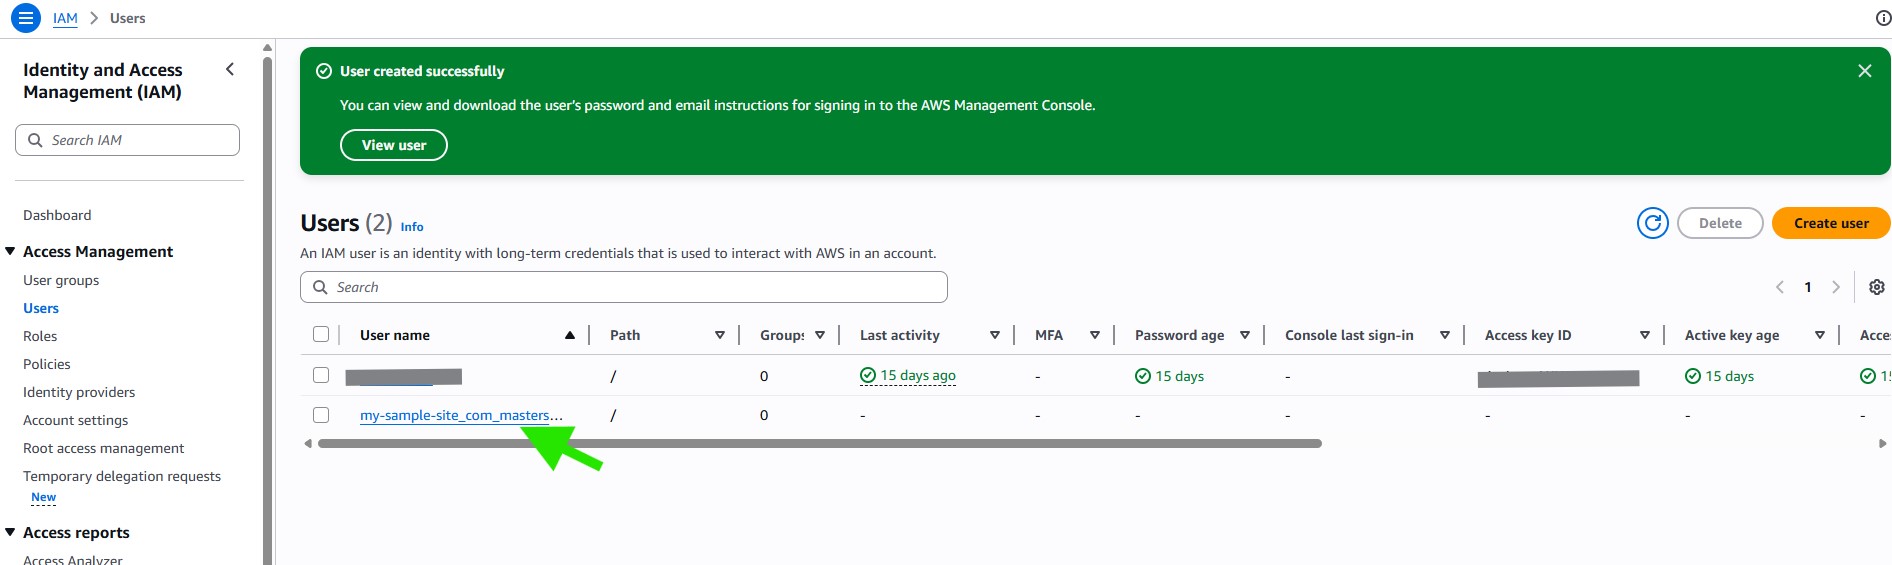
You will be redirected to the Users list, where you will see a User created successfully message.
On the Users page, click the User name of the user you created to continue.
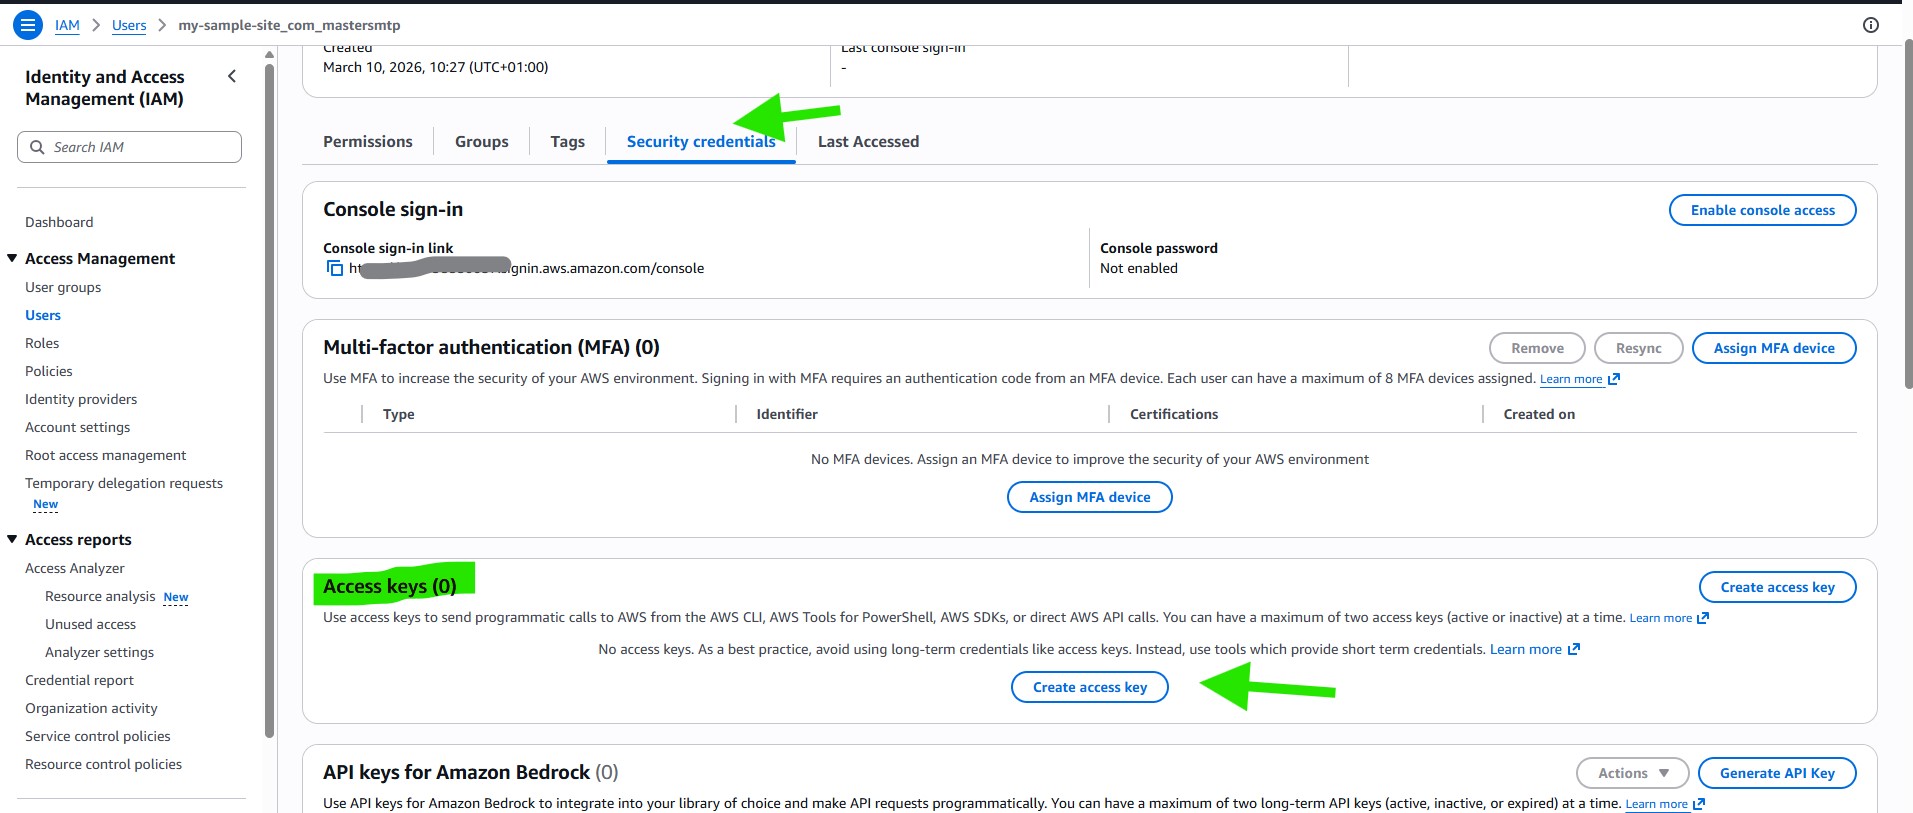
From the tabs displayed on this page, click Security credentials.
Then scroll down to the Access keys section and click Create access key.
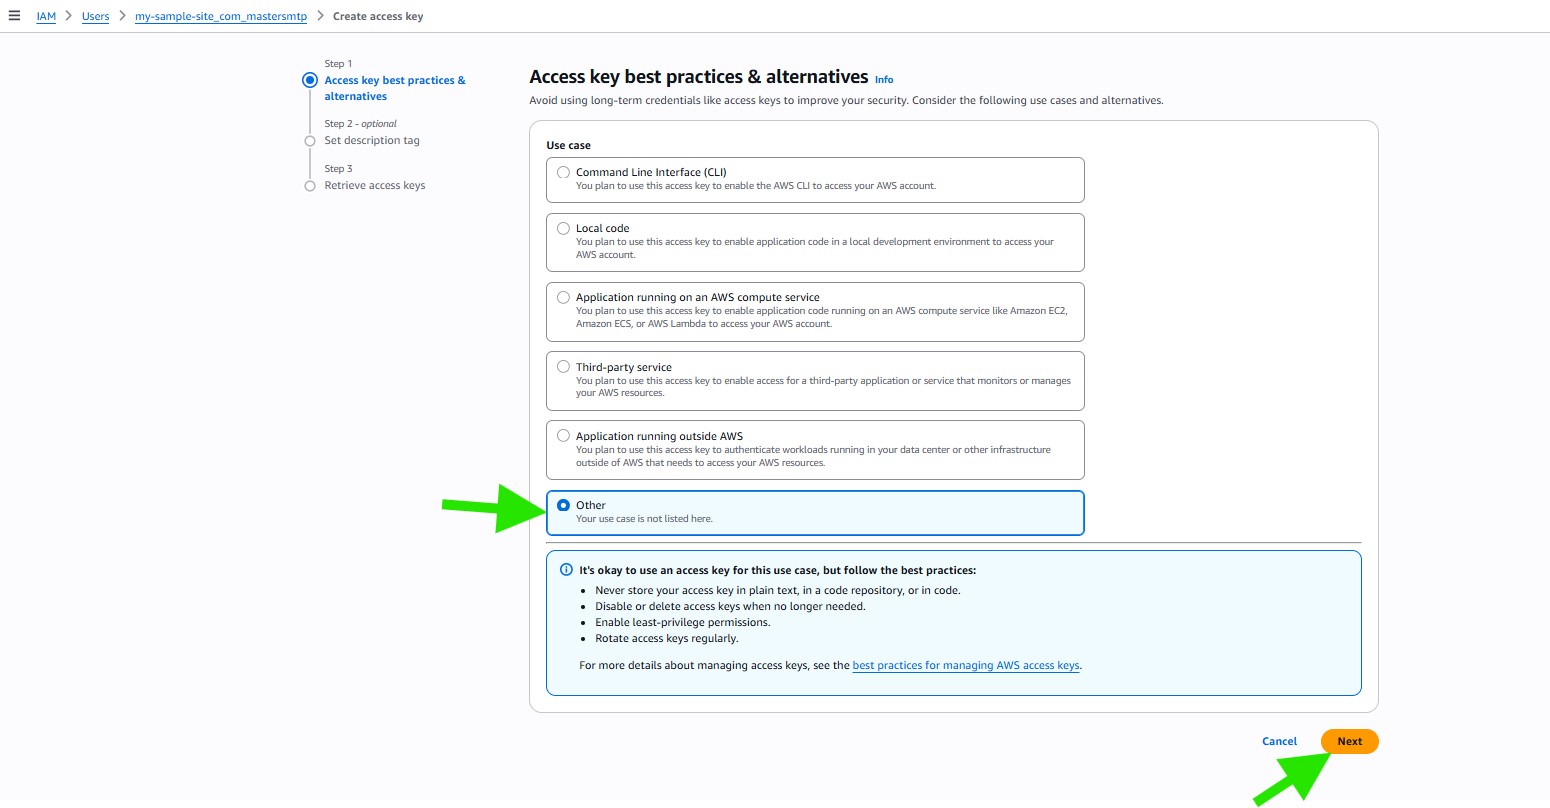
For the Access key best practices & alternatives section, select Other.
Then click Next.
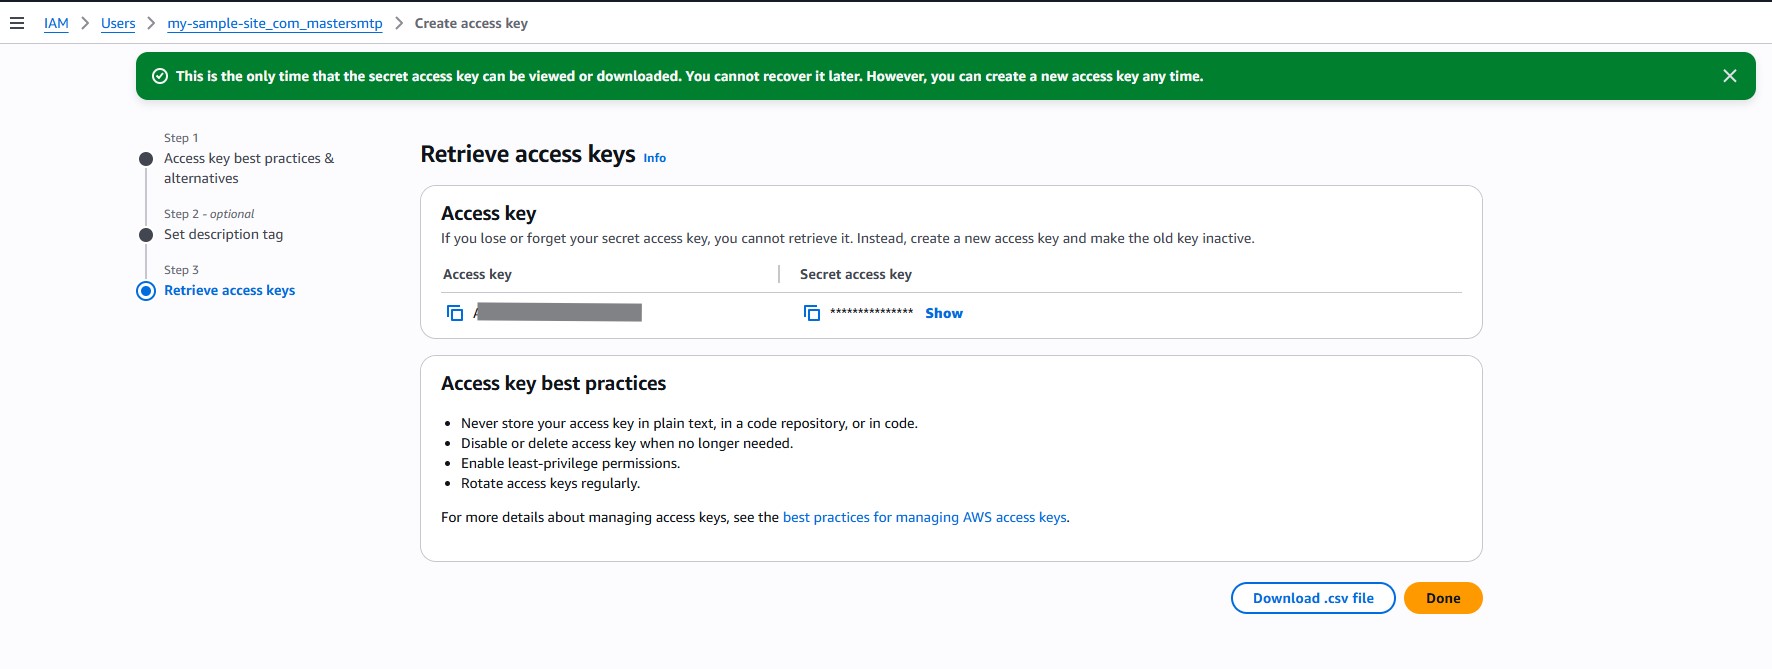
On the next page, you can leave the description tag empty and click Create access key to proceed.
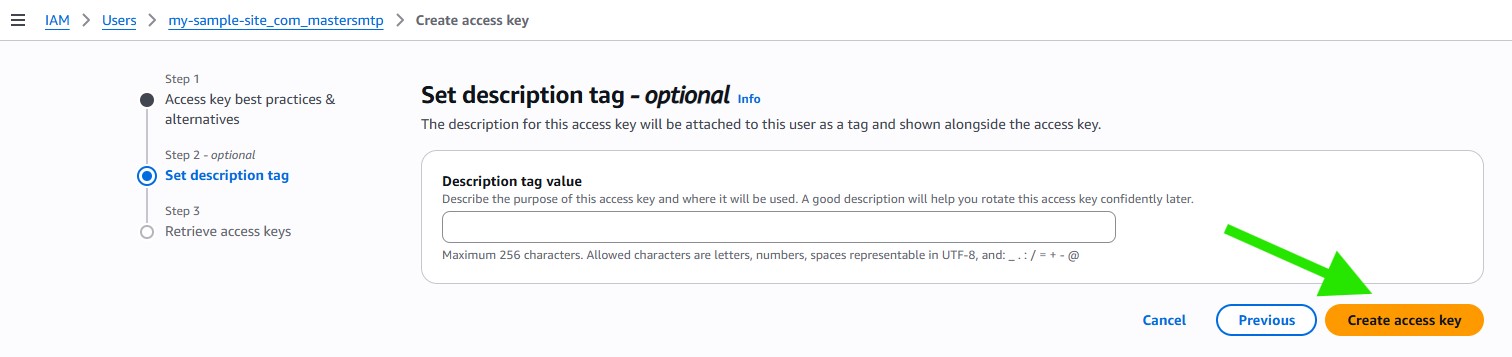
AWS will now display a success message along with the Access key ID and Secret access key for your user. Be sure to securely save a copy of these keys before leaving this page.
Switching AWS to Production Mode
All Amazon SES accounts are placed in Sandbox Mode by default. This is limiting because your account will have a low monthly sending quota and can send emails only to email addresses that have been verified in Amazon SES.
To send emails more freely and increase your sending quota, you will need to move your Amazon SES account from Sandbox Mode to Production Mode.
Keep the Access Keys tab open, then open the Amazon Service Quotas dashboard in a new tab:
Selecting Your Region
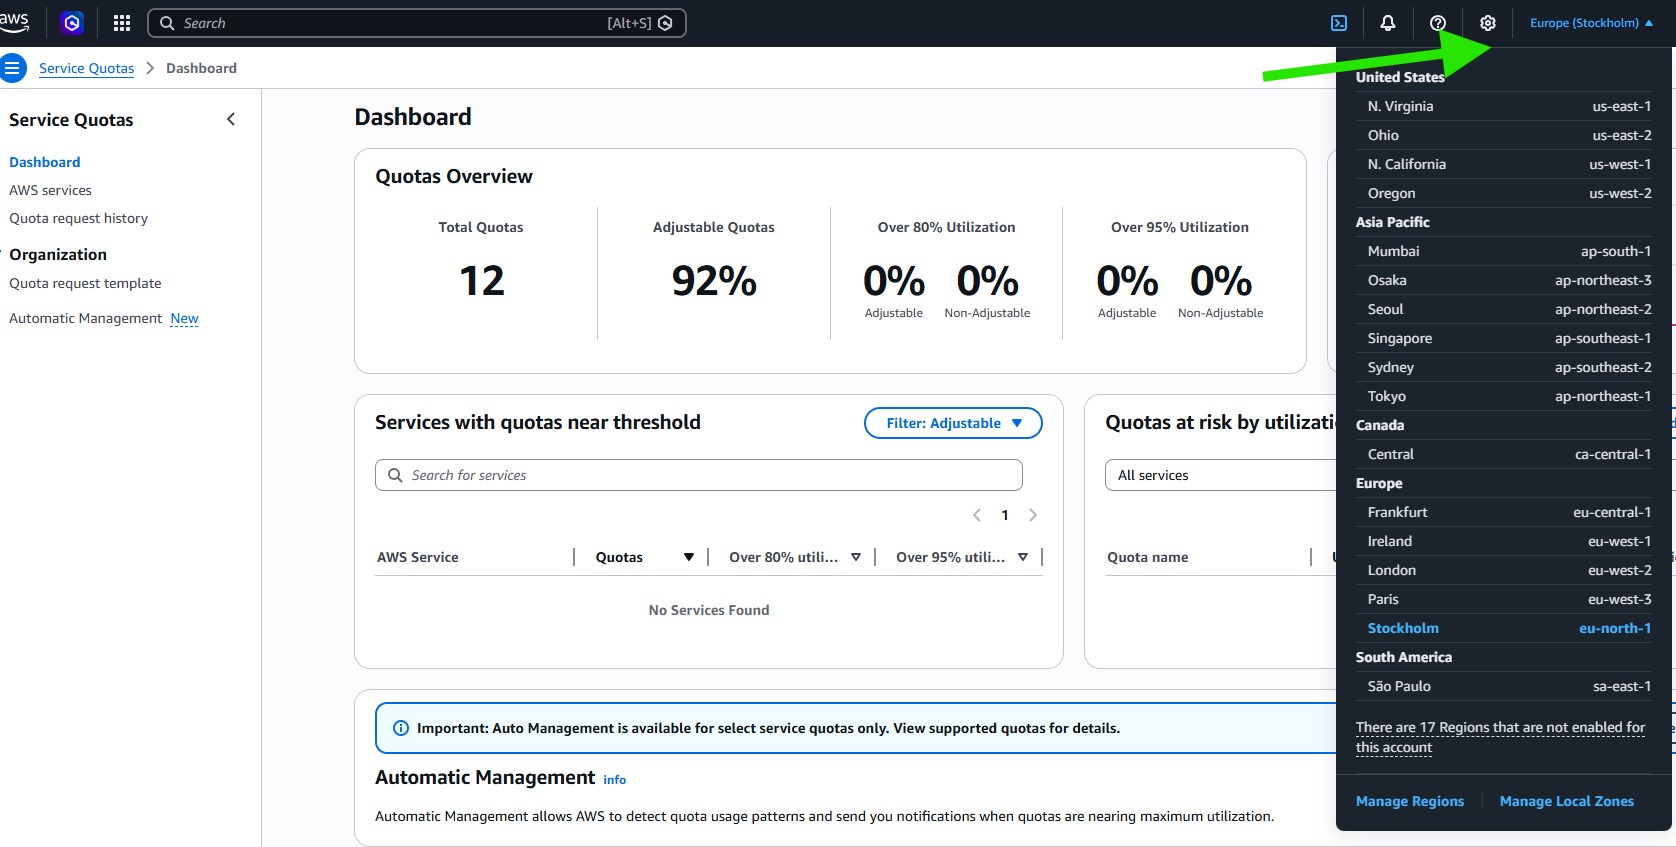
After opening the dashboard, click the Select a Region dropdown and choose your region from the list. Be sure to select the same region you used when setting up your Amazon AWS account.
Requesting a Quota Increase
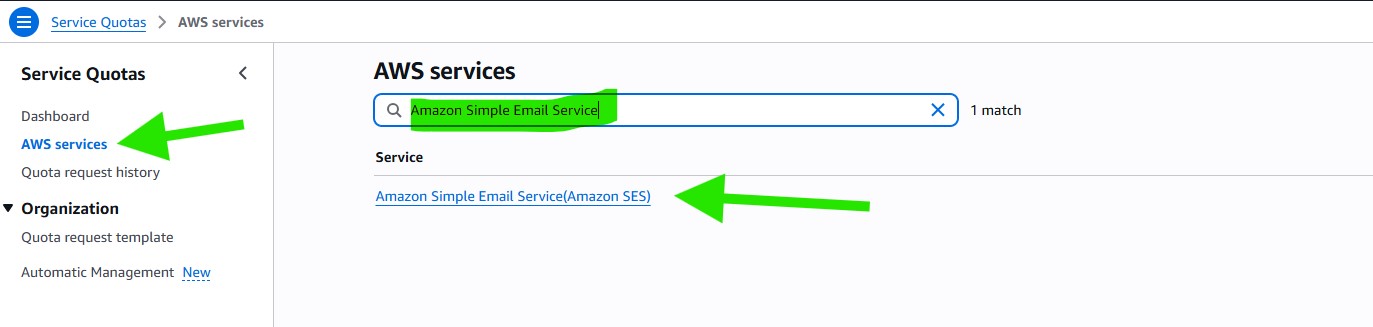
To request an increase to your monthly email sending limit, click AWS services in the sidebar menu.
Then type Amazon Simple Email Service into the search bar.
You should see a single result named Amazon Simple Email Service (Amazon SES). Click this option to continue.
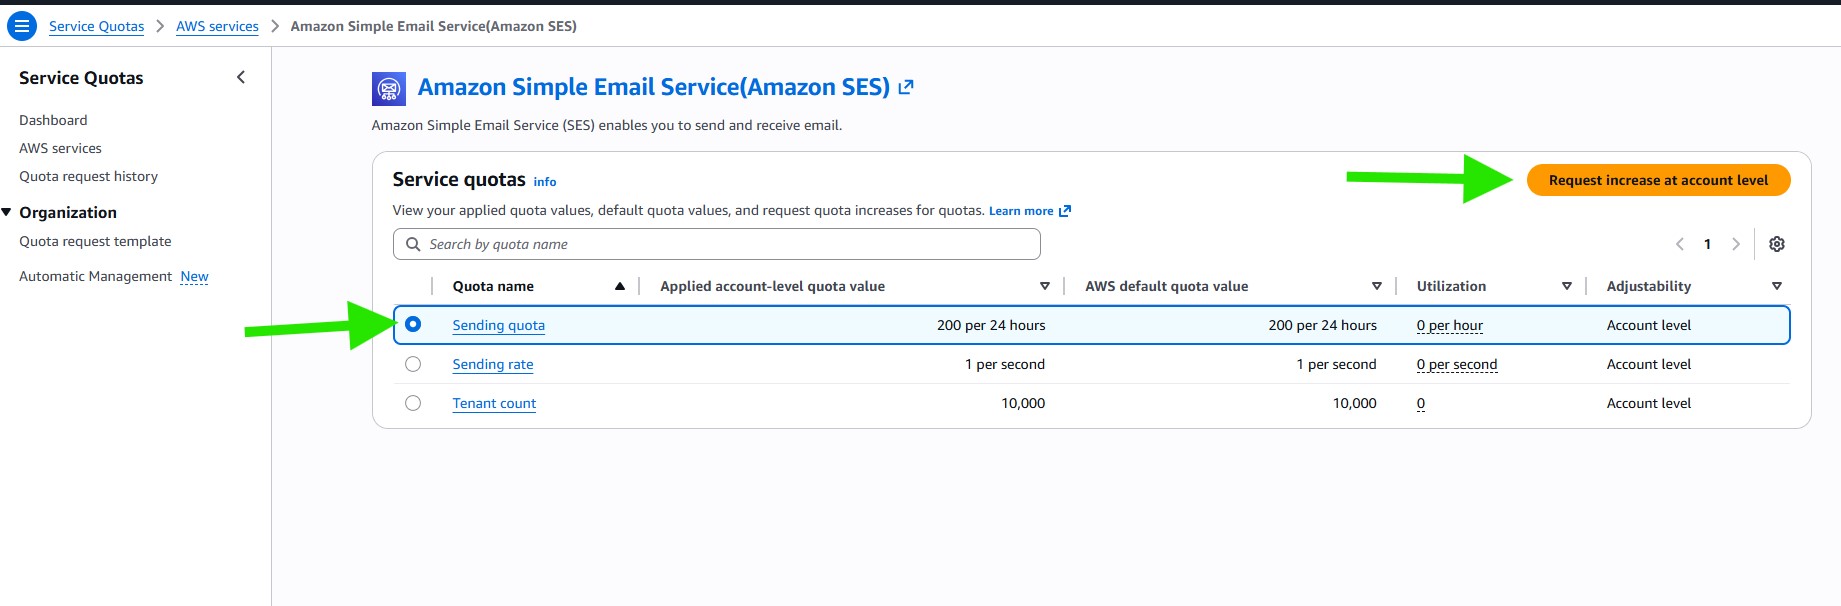
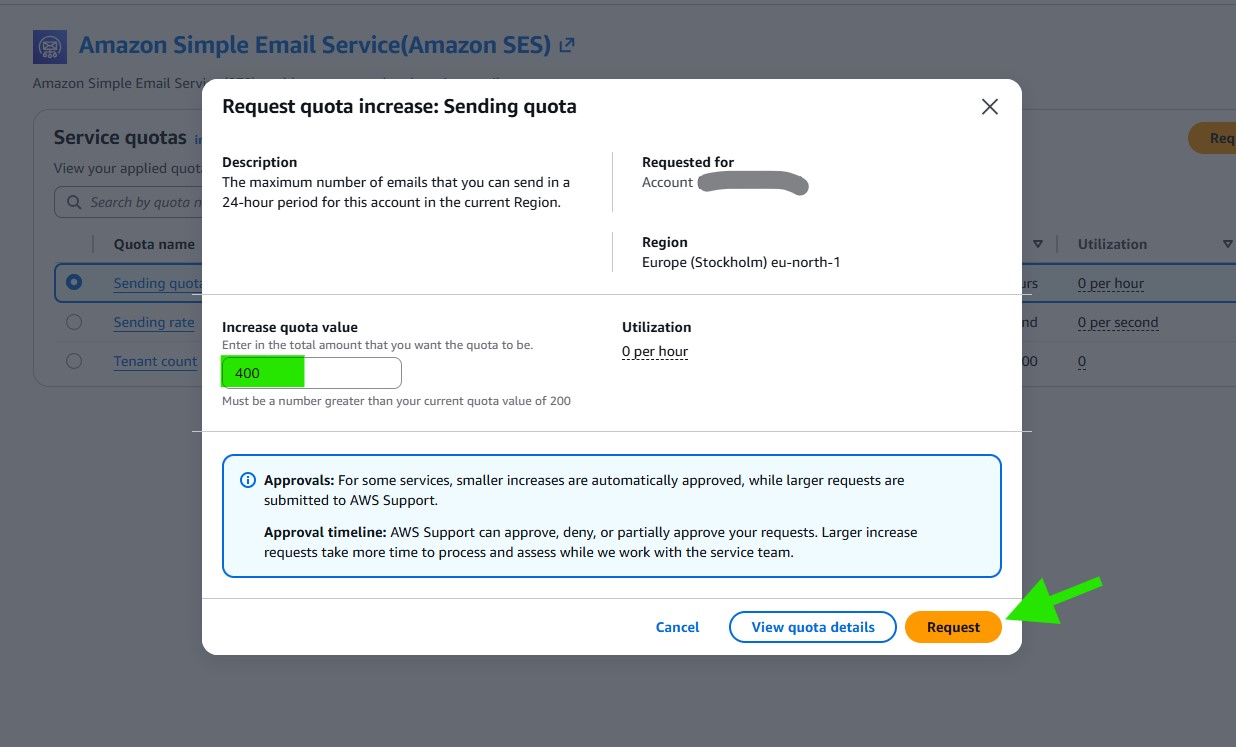
On the next page, select the option next to Sending quota to begin the request for a quota increase.
Then click Request quota increase.
A Case classification form will then appear for you to review and complete. This is an important step because Amazon uses this form to help prevent spam and to confirm that your website will be sending emails for legitimate purposes.
In the Change quota value field, enter your desired daily sending quota. For example, you can request a daily sending quota of 400 emails.
Click Request
Immediately after submitting the request, you should receive two emails from Amazon Web Services. Both emails simply confirm that a new support case has been created.
AWS usually reviews these requests within one business day. While you wait for the result, you can continue with the next setup steps.
Amazon SES Setup in Master SMTP Plugin
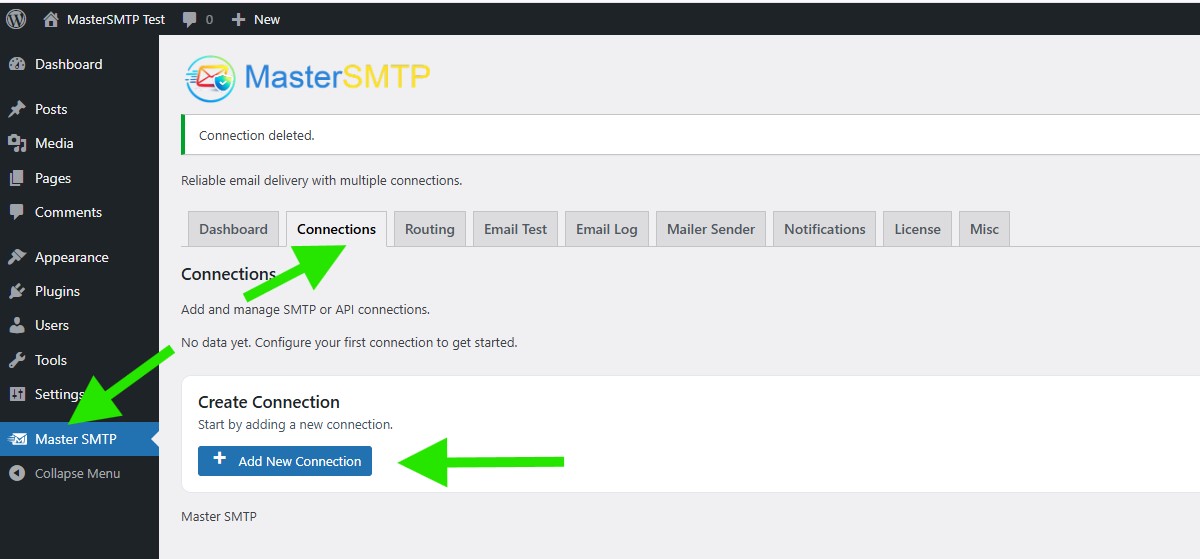
In your WordPress dashboard, go to Master SMTP > Connections, then click Create New Connection.
Configure Connection
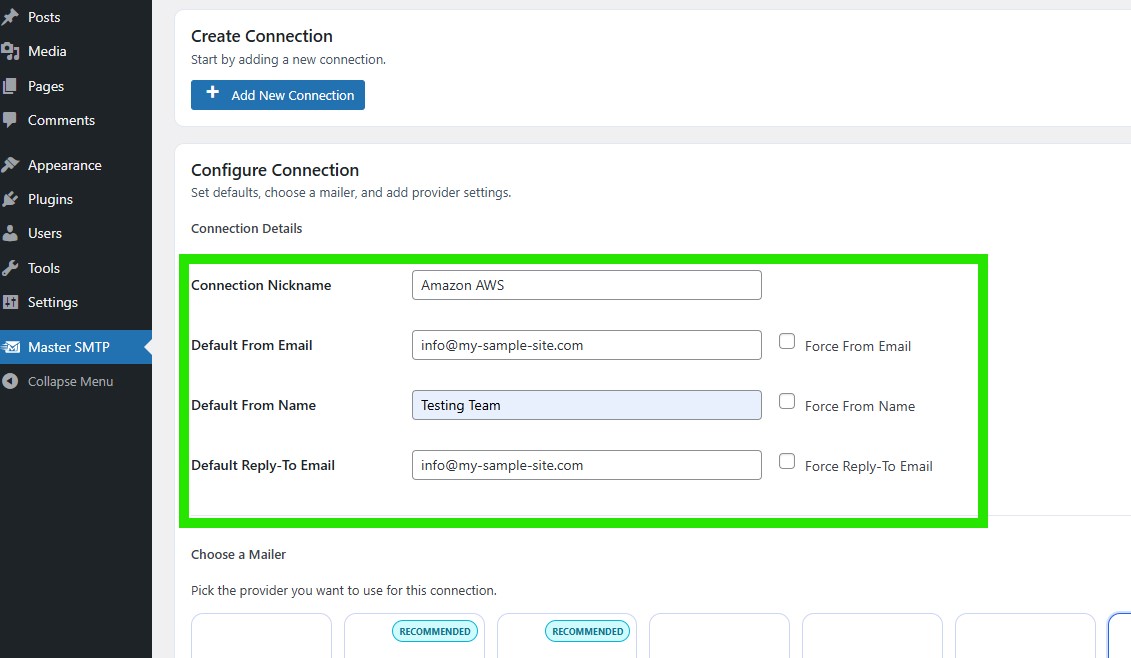
In the Configure Connection section, fill out the Connection Details fields:
Connection Details: Enter a name for this connection. This is only for you, recipients will not see it.
Default From Email: The email address used when an outgoing email does not define a From Email.
Force From Email: If enabled, this From Email will be used for all emails, even if the email has a different From Email.
Default From Name: The name used when an outgoing email does not define a From Name.
Force From Name: If enabled, this From Name will be used for all emails, even if the email has a different From Name.
Default Reply-To Email: The Reply-To address used when an outgoing email does not define a Reply-To Email.
Force Reply-To Email: If enabled, this Reply-To Email will be used for all emails, even if the email has a different Reply-To Email.
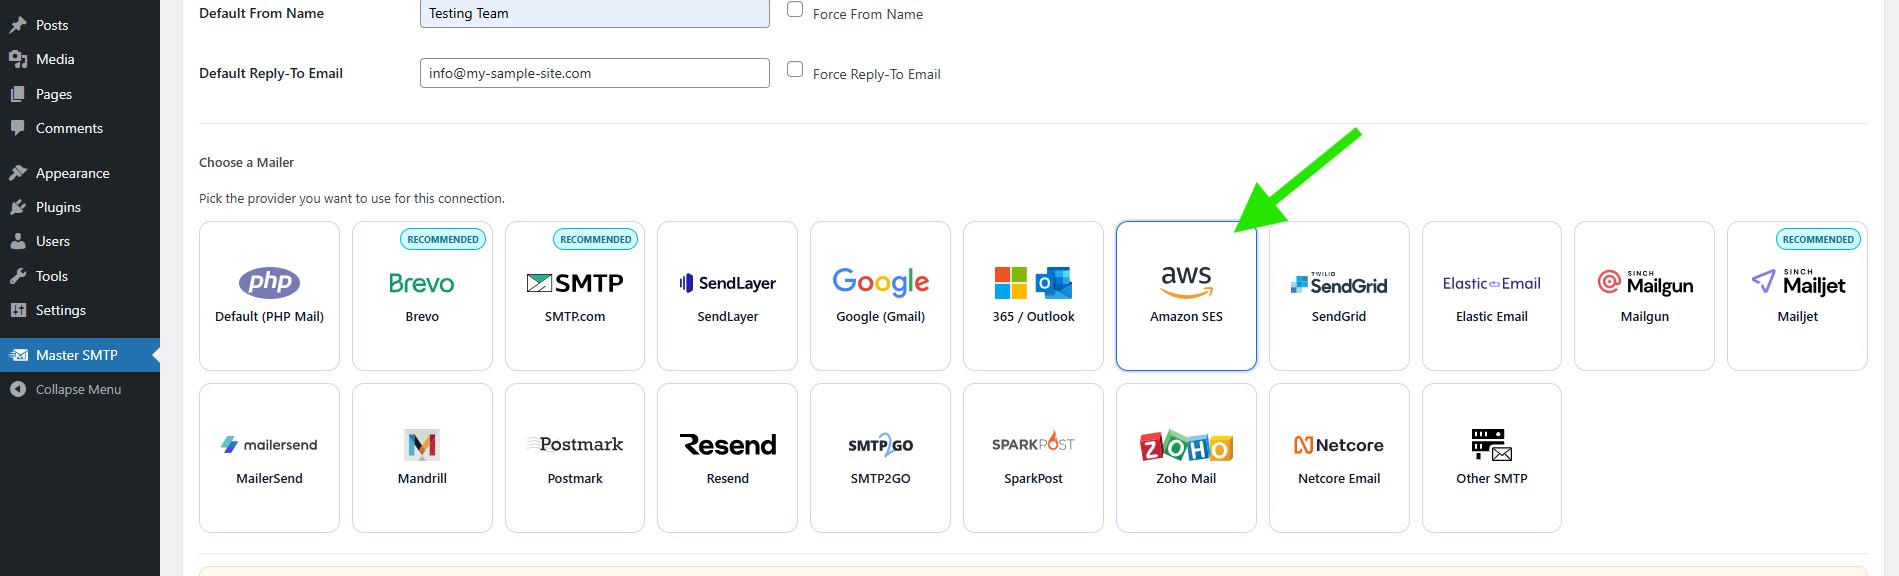
In the Choose a Mailer section, select Amazon SES (AWS) from the grid mailer list.
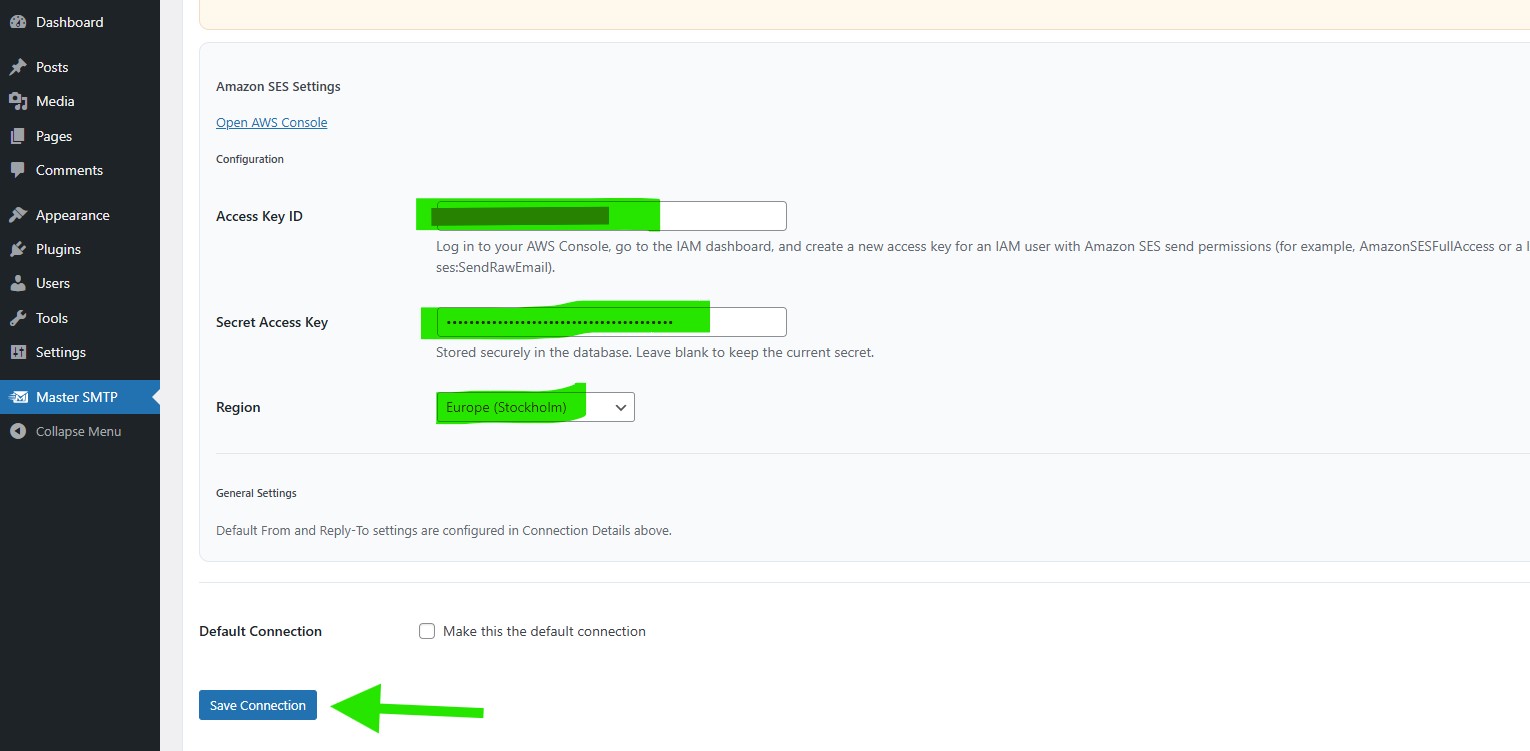
Amazon SES Settings
Copy the Access Key ID and Secret Access Key from the Amazon AWS Access keys tab, then paste them into the corresponding fields in the Amazon SES Settings section.
Region: Enter the exact AWS region you selected earlier in your Amazon AWS account.
Default Connection: Enable this option if you want this connection to be the default sender for your WordPress website.
Then click Save Connection.
The connection will be added to the Connections list, and you should see Connection saved. at the top of the window.
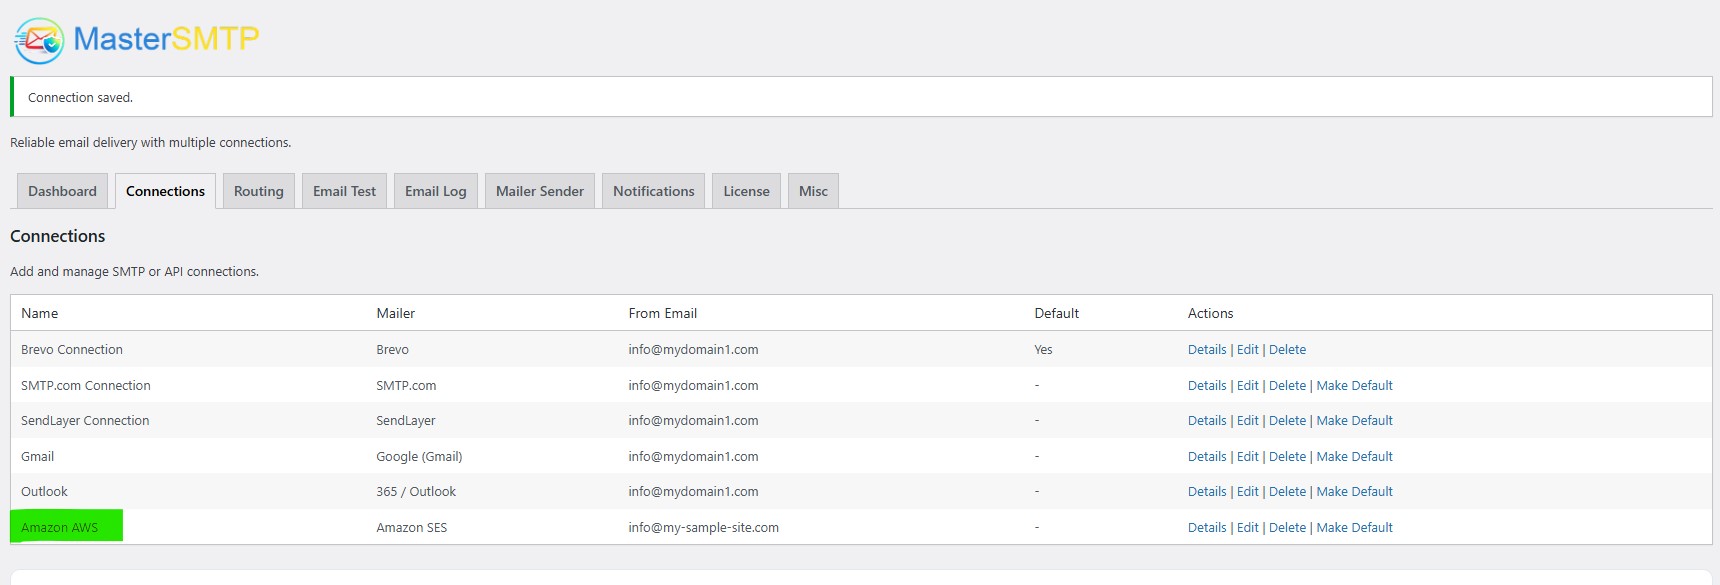
Note: The free version allows you to add only one connection. If you need multiple connections, Conditional Routing, and many other features, you should purchase the Master SMTP Pro.
Test Amazon SES Connection
After saving your Amazon SES connection, it is recommended to send a test email to make sure everything is working correctly. This helps confirm that your Access Key ID , Secret Access Key , and connection settings have been entered properly and that your site can send emails successfully through Amazon SES SMTP.
For step-by-step instructions, see the test connection guide here: