Table of Contents
How Conditional Routing Works
Conditional Routing in DeliveryKit SMTP lets you send emails through different saved connections based on custom rule groups. You can create routing rules using conditions such as To, From, Subject, Message, and more, then choose how those conditions should match using options like contains, does not contain, starts with, and others. Each routing rule can use AND or OR logic to control when it applies. If an email does not match any routing rule, DeliveryKit SMTP will send it using your main sending connection.How to Create Conditional Routing
Once you have added multiple connections, you can create a new routing rule group, choose which saved connection should be used for that route, and then add one or more conditions such as To, From, Subject, or Message. You can also combine conditions using AND or OR logic to control exactly when that route should apply.
Add Conditional Routing
In your WordPress dashboard, go to DeliveryKit SMTP, then click the Routing tab.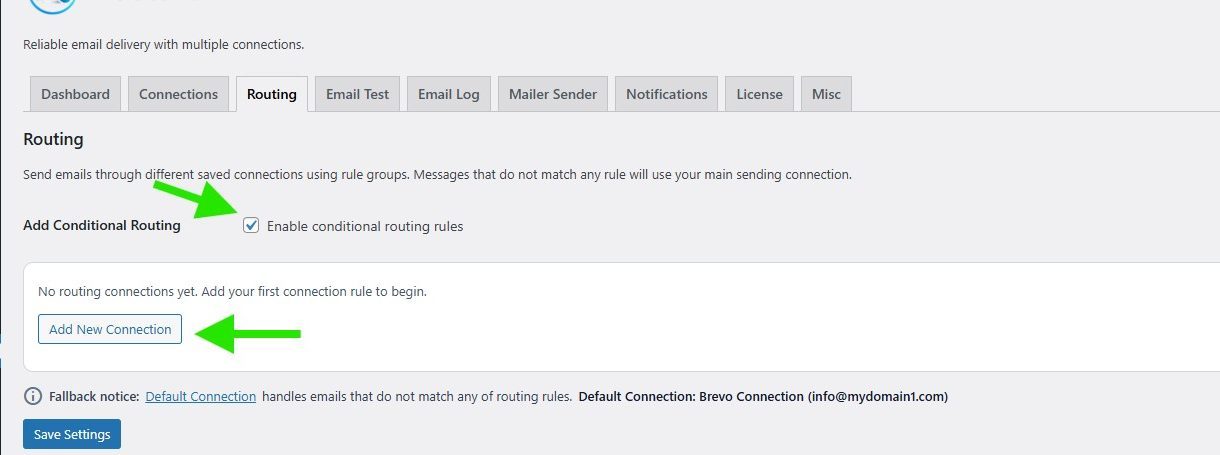
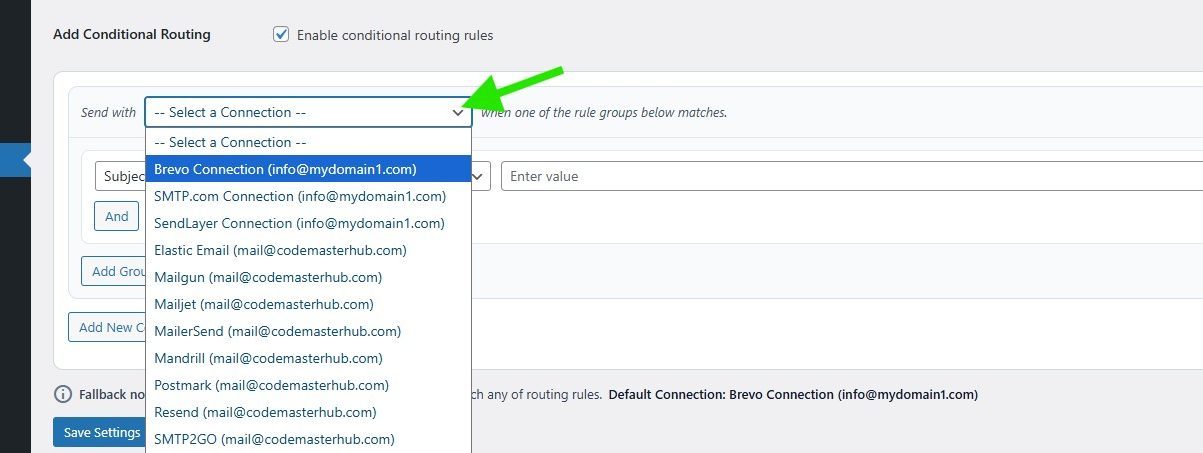
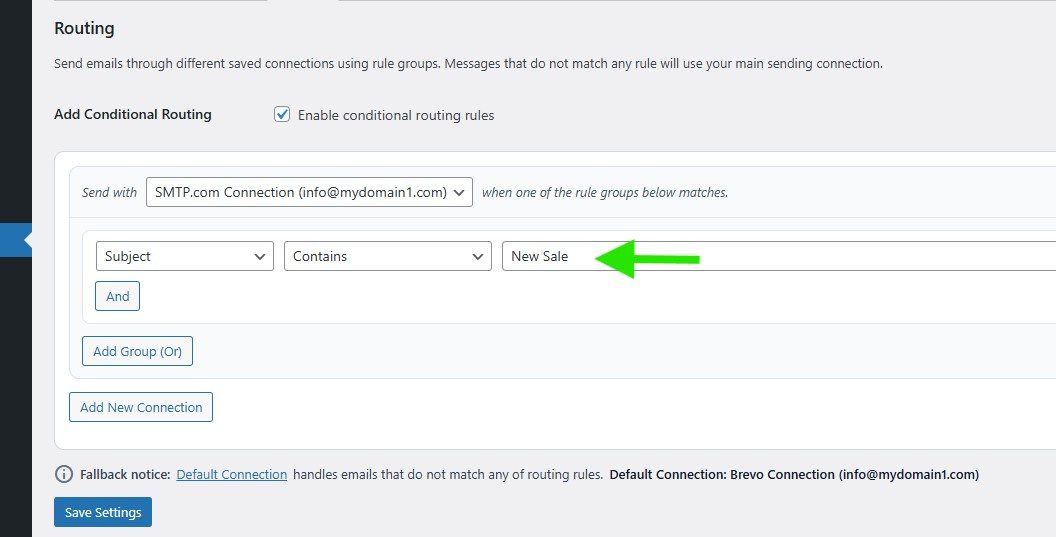
In the Send with dropdown, select the saved connection you want this routing rule to use.
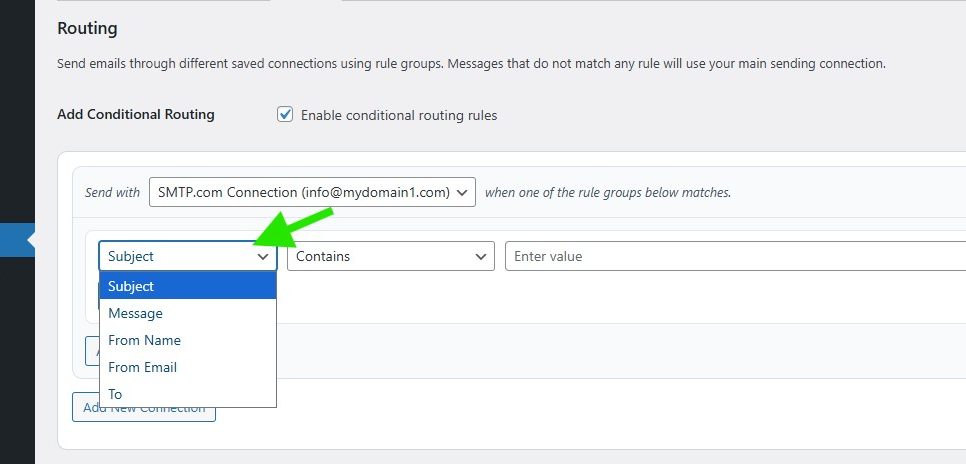
In this example, we will use Subject.
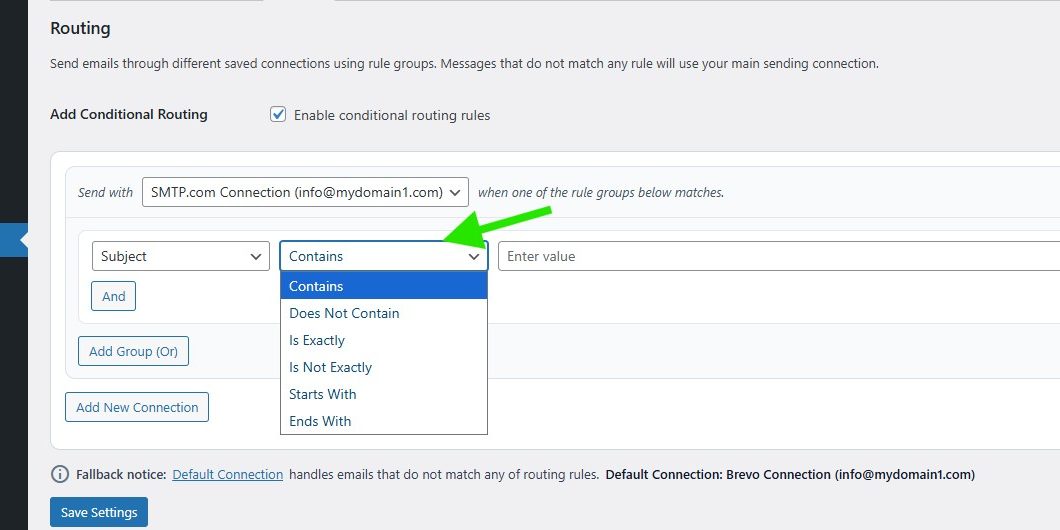
In the second condition dropdown, select how the selected field should be matched.
In this example, we will use Contains.
In the value field, enter the text you want to match.
In this example, we use New Sale.
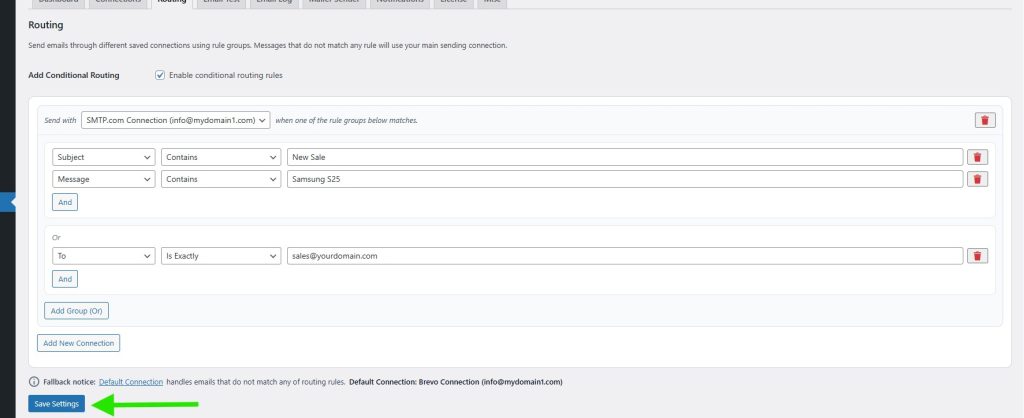
Click And to add another condition when you want multiple conditions to match in the same routing rule. For example, you can create a rule where Subject contains New Sale and Message contains Samsung S25.
Once you have finished configuring the routing rule and its conditions, click Save Settings to save your Conditional Routing.
Delete a Conditional Routing
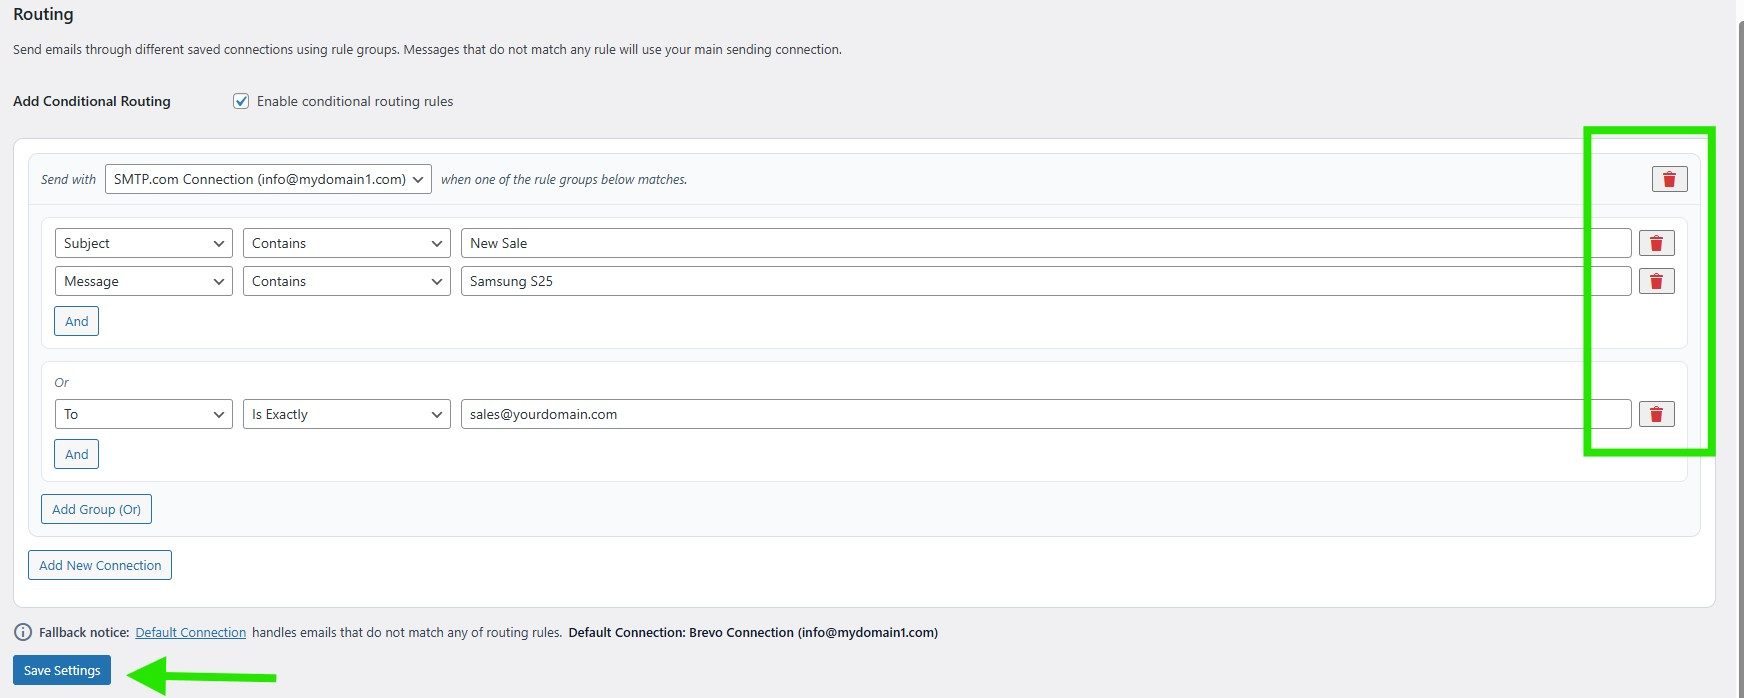
To delete a single condition, click the trash icon next to that condition row. To delete an entire routing connection and all of its rule groups, click the trash icon at the top right of that routing block. After deleting any condition or routing rule, click Save Settings to save the changes.
Note: If you create only one Conditional Routing group, every email that matches that group’s conditions will be sent through its selected connection, while all other emails will be sent through your default connection. If you create multiple Conditional Routing groups, any message that does not match any of those groups will still be sent through your default connection.
Test Conditional Routings
The fastest way to test your Conditional Routing setup is to use the Mailer Sender tool in DeliveryKit SMTP. Go to DeliveryKit SMTP, then click the Mailer Sender tab. In the Connection dropdown, select Auto (Conditional Routing). This will send the email using your routing rules, and if no rule matches, your default connection will be used.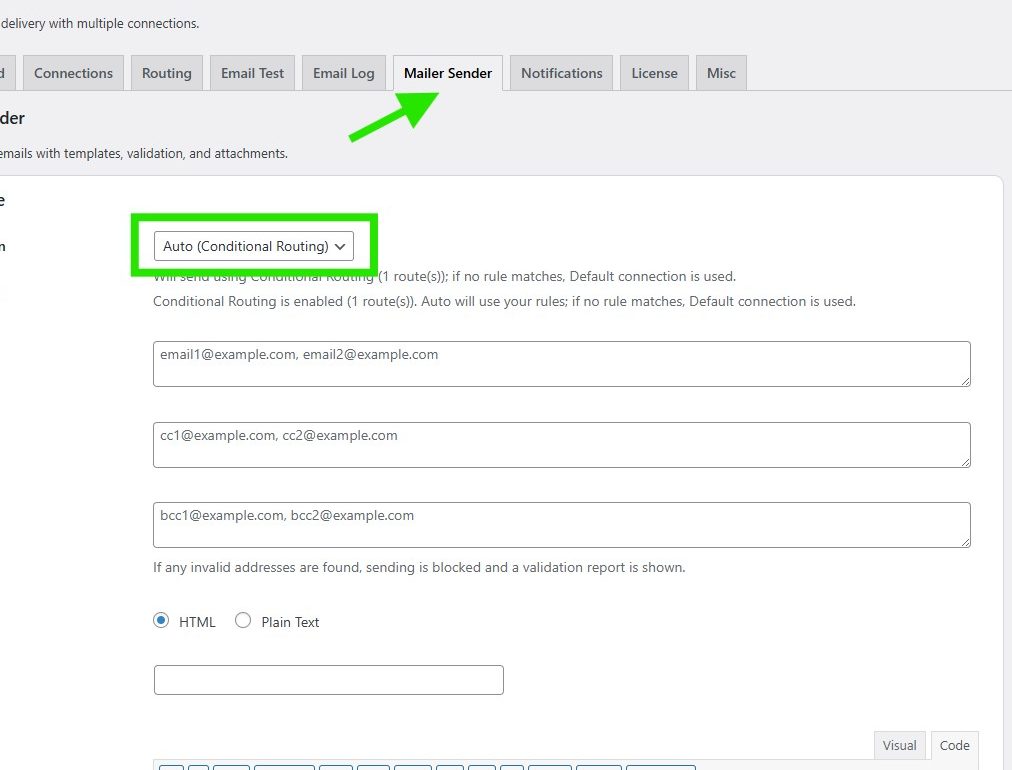
In the Compose fields, enter values that match or do not match your routing conditions, then send a test email to check whether your Conditional Routing works as expected.