Table of Contents
What Is Other SMTP in DeliveryKit SMTP?
Set Up Custom SMTP Settings Using cPanel Email
Check Your Email Deliverability Status
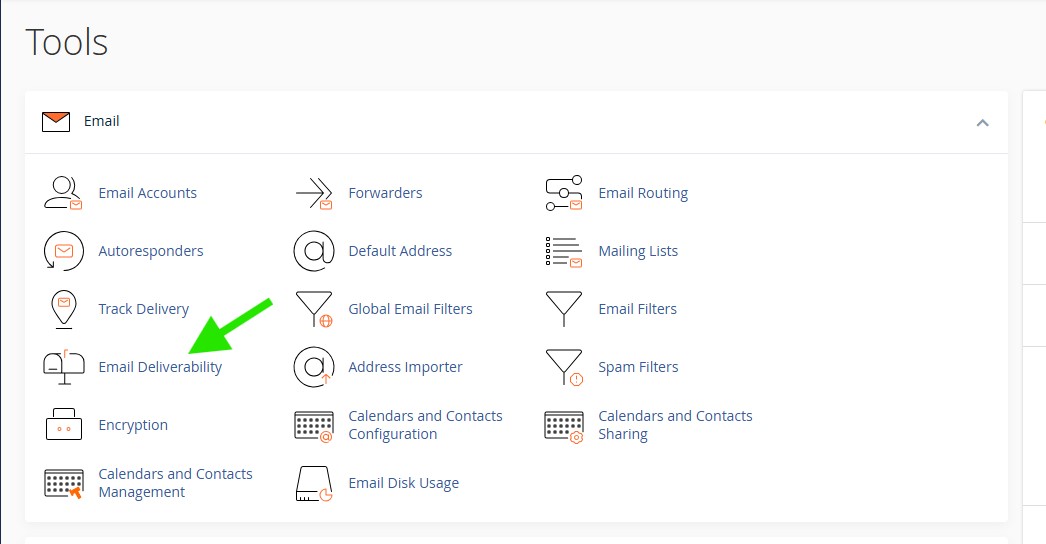
In cPanel, go to the Email section and click Email Deliverability.
Make sure the domain you want to use shows Valid in the Email Deliverability Status column before continuing.
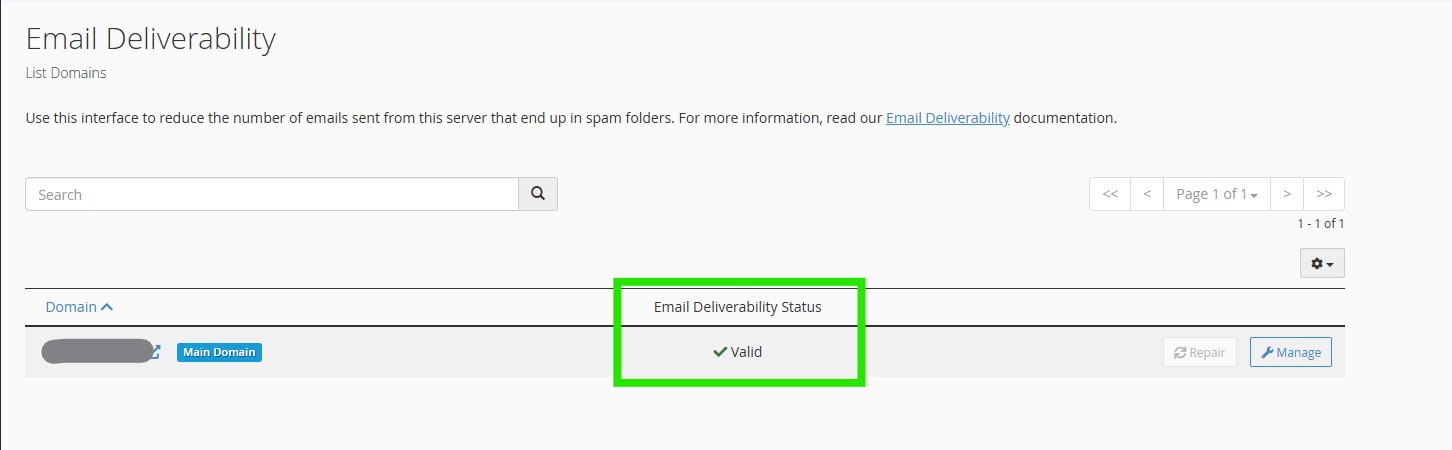
If you see a warning such as Problems Exist (DMARC, DKIM, and SPF), click Manage to review and fix the missing or invalid email records before continuing.

If cPanel shows any email deliverability problems, review the listed issues and apply the recommended fixes. If you are not sure how to fix them, contact your hosting provider and ask them to correct the email deliverability records for your domain.
Set Up Mail Client in cPanel
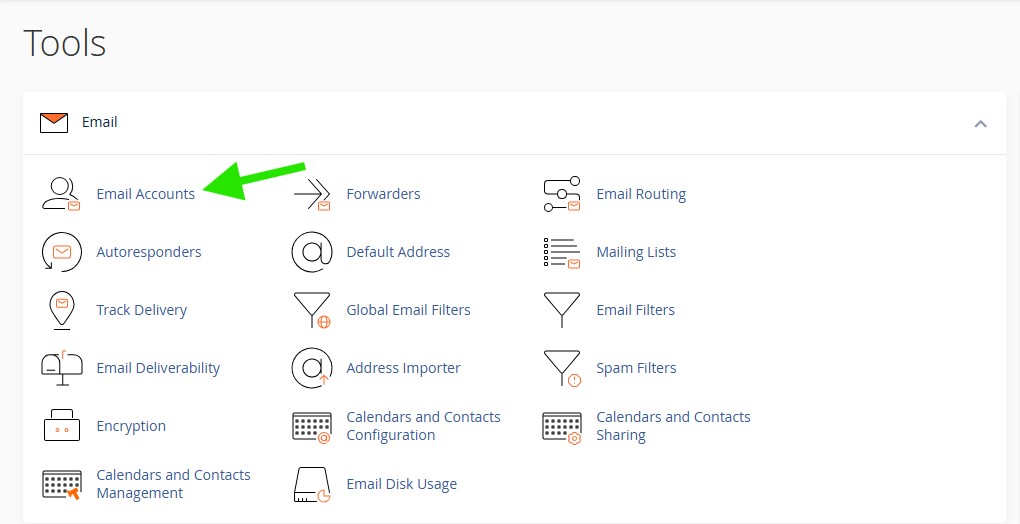
In cPanel, go to the Email section and click Email Accounts.
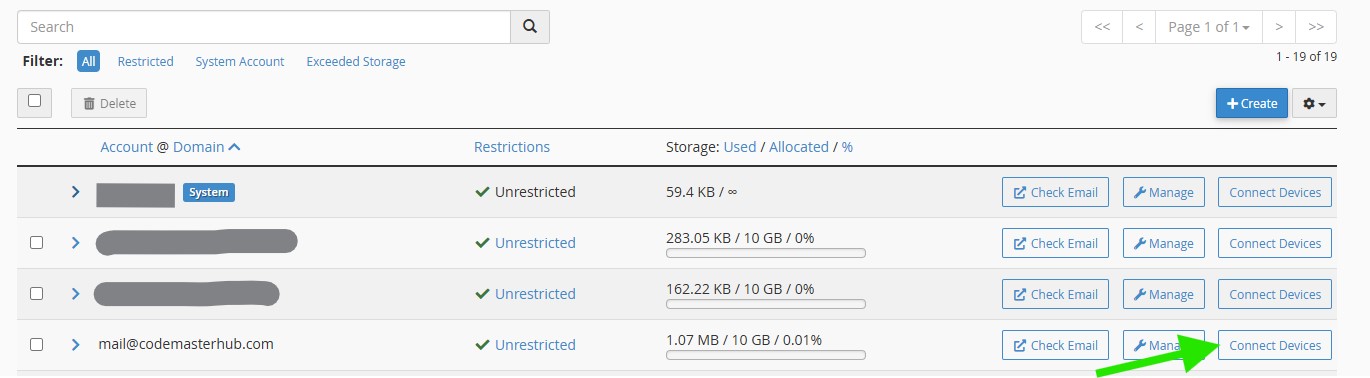
Find the email account you want to use for SMTP, then click Connect Devices.
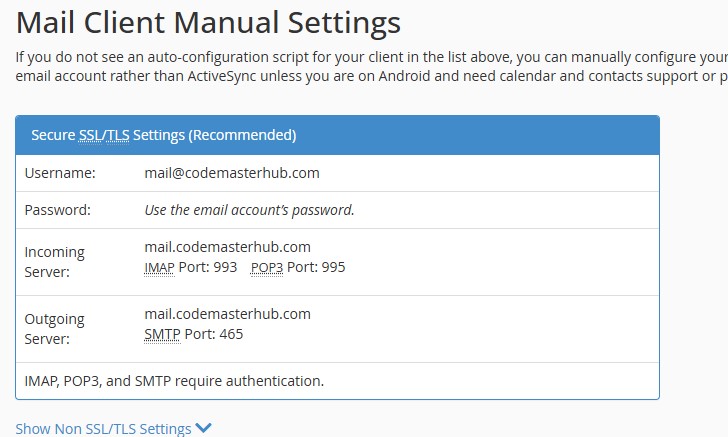
On the Mail Client setup page, look for the Mail Client Manual Settings section. In most cases, use the Secure SSL/TLS Settings values and keep the SMTP details ready for the next step.
Set Up Other SMTP in DeliveryKit SMTP
Configure Connection
In the Configure Connection section, fill out the Connection Details fields:
Connection Details: Enter a name for this connection. This is only for you, recipients will not see it.
Default From Email: The email address used when an outgoing email does not define a From Email.
Force From Email: If enabled, this From Email will be used for all emails, even if the email has a different From Email.
Default From Name: The name used when an outgoing email does not define a From Name.
Force From Name: If enabled, this From Name will be used for all emails, even if the email has a different From Name.
Default Reply-To Email: The Reply-To address used when an outgoing email does not define a Reply-To Email.
Force Reply-To Email: If enabled, this Reply-To Email will be used for all emails, even if the email has a different Reply-To Email.
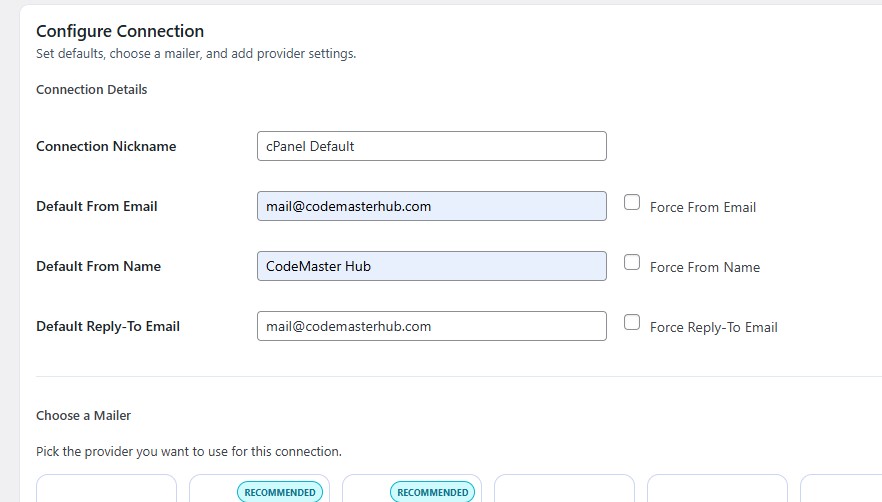
In the Choose a Mailer section, select Other SMTP from the grid mailer list.

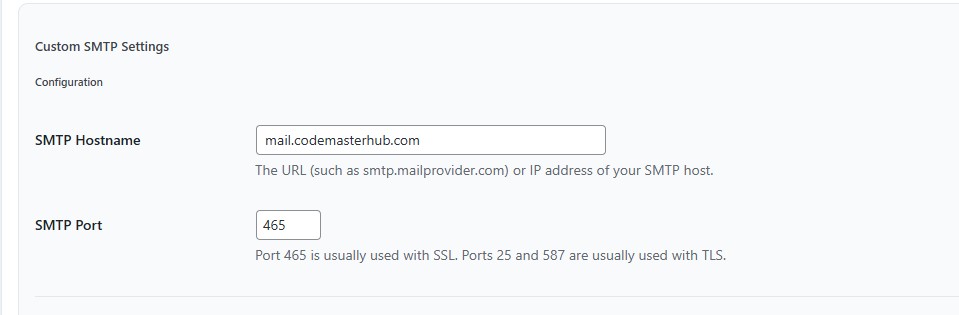
Configuration
In the Custom SMTP Settings section, start with the Configuration fields.
Enter your SMTP Hostname exactly as shown in your email account setup. In this example, it is mail.yourdomain.com.
Then enter the SMTP Port. For cPanel email accounts using secure SSL/TLS settings, this is commonly 465.
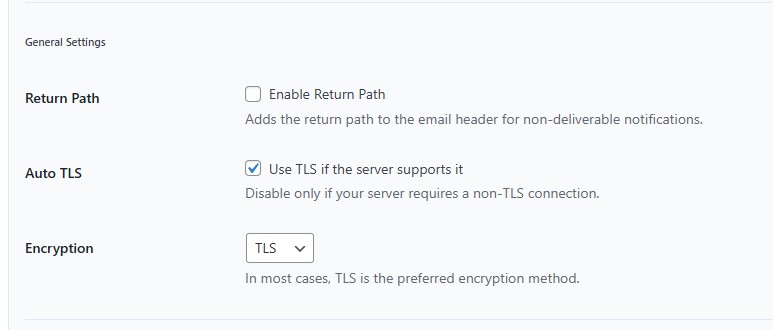
General Settings
Next, configure the General Settings options.
Return Path: Enable this if you want non-delivery notifications to be sent back to the sender address. You can leave it disabled unless you specifically want bounce notices handled this way.
Auto TLS: Keep this enabled if your mail server supports TLS. This is recommended in most cases.
Encryption: Select the encryption method that matches your email provider settings. For most modern SMTP servers, TLS is recommended. If your cPanel mail settings specifically use SSL on port 465, choose SSL instead.
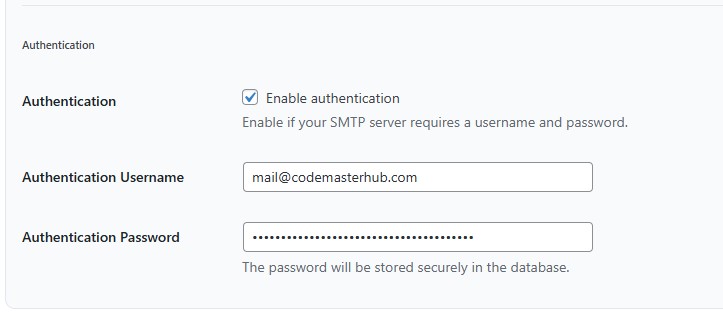
Authentication
In the Authentication section, enable authentication if your SMTP server requires a username and password. This is the standard setup for most cPanel email accounts.
For Authentication Username, enter the full email address of the mailbox you want to use.
For Authentication Password, enter the password for that email account.
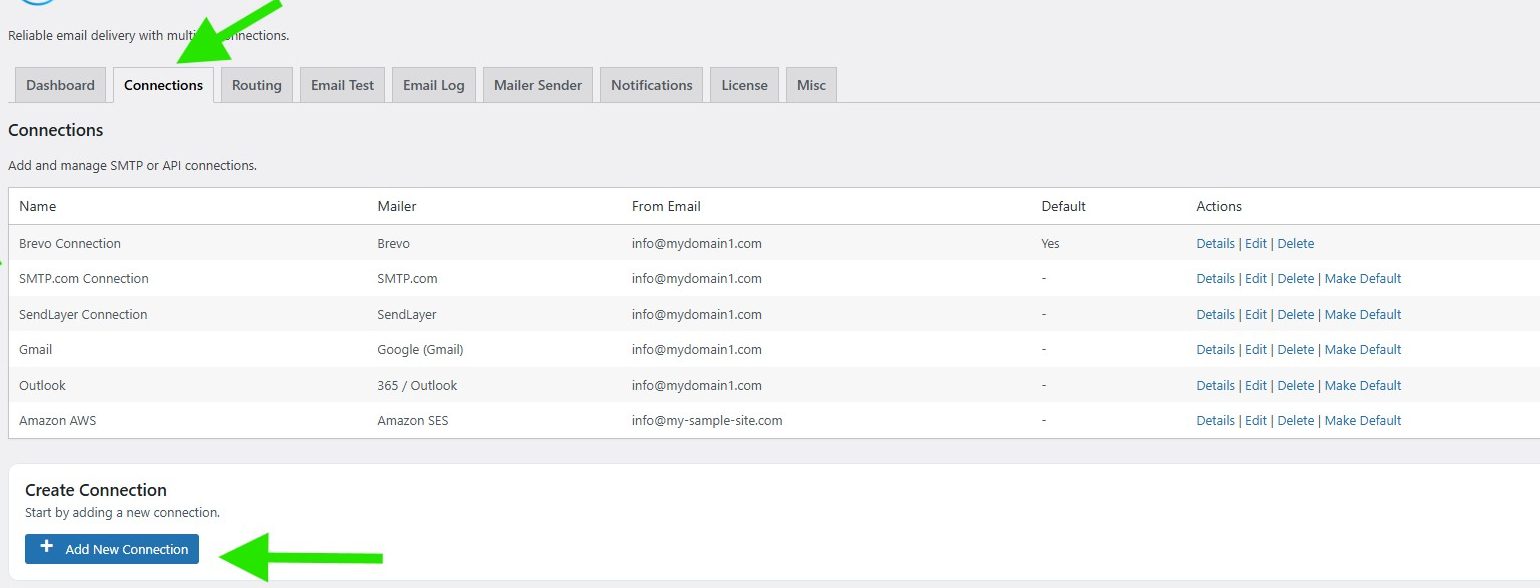
Save Connection
If you want this to be your main sending connection, enable Make this the default connection. Then click Save Connection.
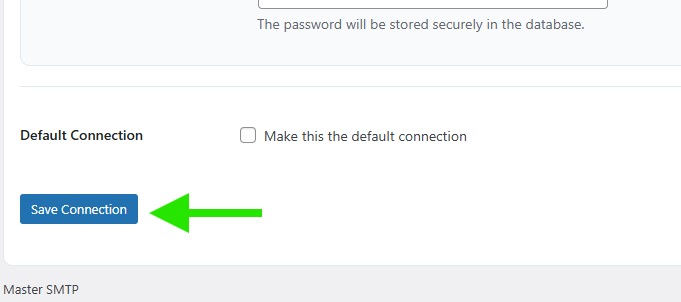
The connection will be added to the Connections list, and you should see Connection saved. at the top of the window.